EasyManua.ls Logo

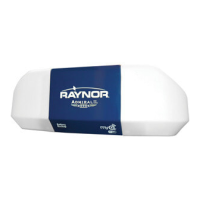
Raynor 8550WRGD Admiral II - User Manual

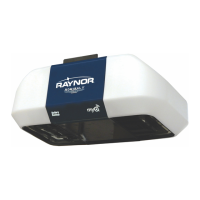
Raynor 8550WRGD Admiral II
44 pages
Print Icon
To Next Page IconTo Next Page
Loading...
CONTENTS
Preparation . . . . . . . . . . . . . . . .2-5
Assembly . . . . . . . . . . . . . . . . .6-7
Installation . . . . . . . . . . . . . . . 8-15
Install the Door Control. . . . . . 16-17
Install the Protector System
®
. . 18-21
Power. . . . . . . . . . . . . . . . . . 22-23
Adjustments . . . . . . . . . . . . . 24-26
Battery Backup. . . . . . . . . . . . 27-28
Operation . . . . . . . . . . . . . . . 29-35
Maintenance . . . . . . . . . . . . . . . 36
Troubleshooting. . . . . . . . . . . 37-38
Accessories. . . . . . . . . . . . . . . . 39
Warranty. . . . . . . . . . . . . . . . . . 40
Notes . . . . . . . . . . . . . . . . . . . . 41
Repair Parts . . . . . . . . . . . . . 42-43
WiFi
®
Garage
Door Opener
Raynor Garage Doors
1101 E. River Road
Dixon, Illinois 61021
Please read this manual and the enclosed safety materials carefully!
Fasten the manual near the garage door after installation.
metsyS rotcetorP eht sselnu ESOLC TON LLIW rood ehT
®
is connected and properly
aligned.
Periodic checks of the garage door opener are required to ensure safe operation.
QyM htiw elbitapmoc YLNO si renepo rood egarag sihT
®
and Security+ 2.0™
accessories.
rood egarag eht gnillatsni era uoy fi erutaef esolC-ot-remiT eht elbane TON OD
opener on a one-piece door. The Timer-to-Close is to be used ONLY with
sectional doors.
www.raynor.com
Model DGRW0558
DC Belt Drive with
Battery Backup
FOR RESIDENTIAL USE ONLY
SERIAL NUMBER:
Please write the MyQ Serial number in the box above. See page 2.
Register online at: http://blog.raynor.com/warranty-registration

Question and Answer IconNeed help?

Do you have a question about the Raynor 8550WRGD Admiral II and is the answer not in the manual?

Summary

Preparation

MyQ Serial Number

Record essential serial and purchase information for future reference.

Safety Symbol and Signal Word Review

Understand safety symbols and signal words for hazard awareness.

Unattended Operation

Information on unattended close features and their use with sectional doors.

Test the Wi-Fi Signal Strength

Guide to checking Wi-Fi signal strength for opener connectivity.

Check the Door

Instructions to check garage door balance and condition before installation.

Tools Needed

Lists the necessary tools for installing the garage door opener.

Carton Inventory

Lists all components included in the opener's package.

Assembly

Attach the Rail to the Garage Door Opener

Steps to connect the rail assembly to the main opener unit.

Tighten the Belt

Procedure for properly tensioning the drive belt.

Installation

IMPORTANT INSTALLATION INSTRUCTIONS

Critical safety warnings and guidelines for a safe installation.

Determine the Header Bracket Location

Steps to find the correct position for the header bracket.

Install the Header Bracket

Instructions for mounting the header bracket to the wall or ceiling.

Attach the Rail to the Header Bracket

Connects the opener rail to the installed header bracket.

Position the Garage Door Opener

Placing the opener unit onto the ladder and aligning it with the rail.

Hang the Garage Door Opener

Securing the opener unit to structural supports in the garage.

Install the Light Bulbs

Guidance on installing appropriate light bulbs into the opener.

Attach the Emergency Release Rope and Handle

How to attach the manual release rope and handle to the trolley.

Install the Door Bracket

Mounting the bracket to the garage door for arm attachment.

Connect the Door Arm to the Trolley

Attaching the straight and curved door arms to the opener's trolley.

Install the Door Control

Install the Door Control

Step-by-step guide to mounting and wiring the wall-mounted door control.

Wire the Door Control to the Garage Door Opener

Connecting the door control wiring to the opener unit.

Attach the Warning Labels

Instructions for placing safety and test labels on the door and wall.

Install the Protector System

Introduction

Overview of the safety reversing sensor system and its importance.

Safety Reversing Sensors Information

Key details on sensor connection, alignment, and function.

Door Track Sensor Installation

Instructions for mounting sensors to the garage door track.

Wall Sensor Installation

Instructions for mounting sensors to the garage wall.

Floor Sensor Installation

Instructions for mounting sensors to the garage floor.

Wire the Safety Reversing Sensors

Connecting the safety sensor wires to the garage door opener.

Power

Connect Power

Options for connecting the opener to a power source (typical and permanent wiring).

Ensure Safety Reversing Sensors Alignment

Verifying sensor alignment and LED status for proper operation.

Ensure Door Control Wiring

Checking the door control wiring for correct installation.

Adjustments

Introduction to Adjustments

Overview of electronic controls for setting door travel and force.

Program the Travel Limits

Steps to set the open and close limits for the garage door.

Test Safety Reversal System

Procedures to verify the safety reversal system functions correctly.

Test Protector System

Verifying the proper operation of the safety reversing sensors.

Battery Backup

Install the Battery

Steps for installing the backup battery into the opener unit.

Test the Battery

Procedure to check if the battery backup is functioning correctly.

Charge the Battery

Information on how the battery charges and its expected lifespan.

Battery Status LED Indicators

Explanation of the LED indicators for battery status.

Operation

Operation Safety Instructions

Crucial safety guidelines for operating the garage door opener.

Opener Features Overview

Description of features like Alert2Close, Timer-to-Close, MyQ, etc.

MyQ Connectivity Setup

Guide to connecting opener to Wi-Fi and setting up a MyQ account.

Using the Door Control

How to use the wall-mounted door control for various functions.

Remote Control Programming

Instructions for programming and using remote controls.

Erasing Memory and Settings

Procedures for erasing paired devices and Wi-Fi settings.

Manual Door Operation

Steps for manually opening the door and managing the trolley.

Maintenance

Maintenance Schedule

Recommended maintenance tasks for monthly, yearly, and every 2-3 years.

Remote Control Battery Replacement

Instructions for replacing the battery in the remote control.

Troubleshooting

Diagnostic Chart

Table correlating diagnostic codes (flashes) with symptoms and solutions.

Wi-Fi LEARN Mode Issues

Troubleshooting steps for issues with Wi-Fi setup.

Wi-Fi Network Connection Issues

Steps to resolve Wi-Fi connectivity problems.

Opener Beeping Causes

Explains common causes for the opener beeping.

Door Not Closing with Blinking Lights

Troubleshooting for the door not closing and lights blinking.

Remote Control Not Activating Door

Steps to fix issues with remote control activation.

Opener Light Stays On

Resolving issues with the opener light staying on.

Unauthorized Remote Access

Steps to prevent unauthorized remote access.

Homelink Programming Issues

Troubleshooting Homelink programming issues.

Accessories

Warranty

Notes

Repair Parts

Rail Assembly Parts

Lists part numbers for rail assembly components.

Installation Parts

Lists part numbers for various installation components.

Garage Door Opener Parts

Lists part numbers for opener components.

Raynor 8550WRGD Admiral II Specifications

General IconGeneral
BrandRaynor
Model8550WRGD Admiral II
CategoryGarage Door Opener
LanguageEnglish

Related product manuals