11
Configure Date and Time
10
Configure Date and Time
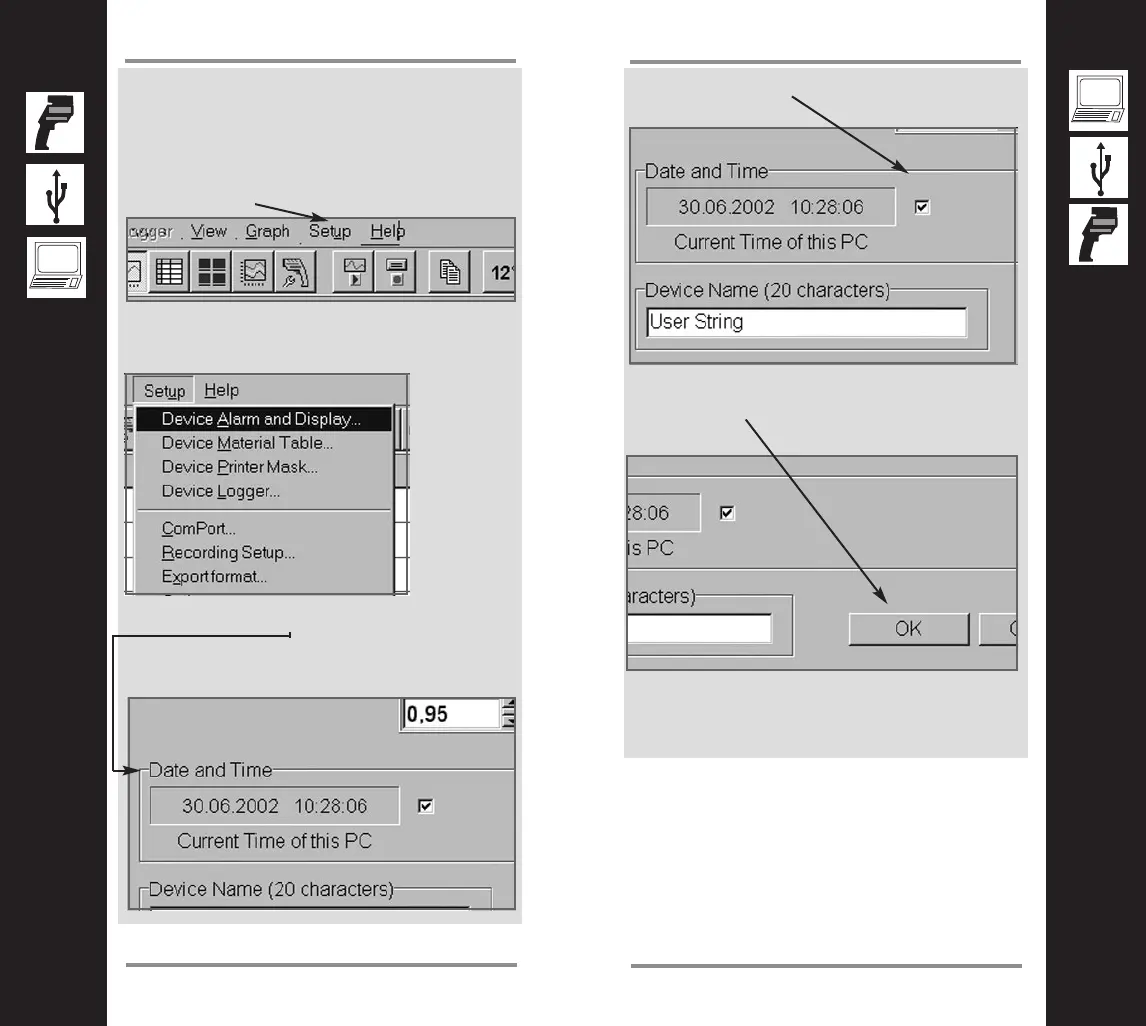
Set Date and Time of the unit
To get the right date and time stamp in your
picture, proceed with the following steps:
1. Choose “Setup” in the software’s menu bar.
2. Go to “Device Alarm and Display”
3. Look for “Date and Time” and verify that the
correct values are shown (these values
depend on your computer system settings)
4. Enable the checkbox to the right of the val-
ues.
5. Click on “OK”.
6. Disconnect the unit from the PC.