HEADLINE
Need Help? Visit our website for replacement parts, product support, a list of authorized service centers in the US and customer service contact information
at www.razor.com. Please have the product I.D. code (located on the white label of your product) available for better assistance. Additional Customer
Service contact information is listed at the back of this manual.
8
REPAIR AND MAINTENANCE
8
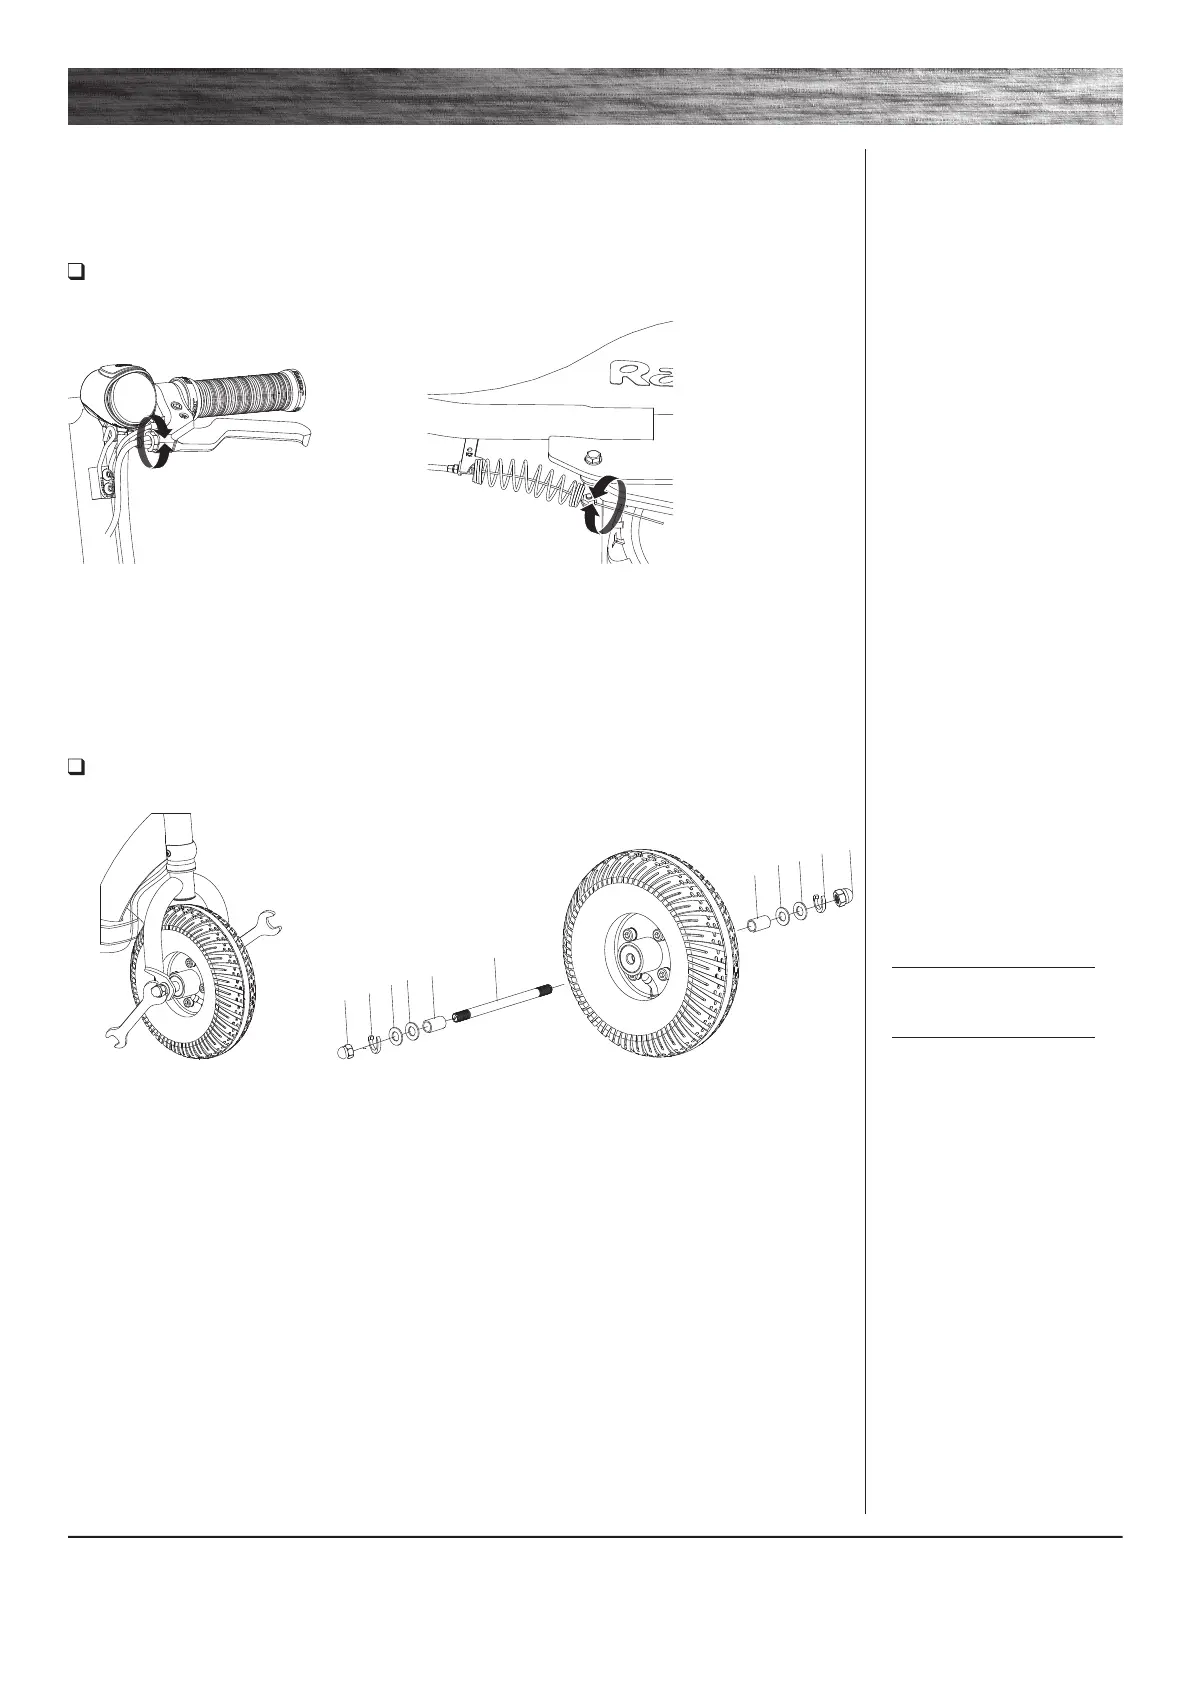
2 If the brake is too tight or too
loose, use a 10 mm wrench to loosen
the nut for additional adjustment on
the brake cable. Securely tighten the
nut when finished.
1 To adjust the brake cable tension,
thread the brake lever adjuster in or
out 1/4 to 1/2 turn until the desired
brake adjustment is attained. Most
adjustments are complete at this
step. If brake still needs further
adjustment, proceed to step 2.
Adjusting the Brake
Tool required: 10 mm Wrench (not included)
Front Tire Replacement
Tools Required: Two (2) 16 mm Wrenches (not included)
Right Side (Throttle)
1-5 Spacer
1-4 Washer
Fork
1-3 Washer
1-2 Spring Washer
1-1 16 mm Locknut
Middle
1-6 Front Axle Bolt
Left Side (Brake)
1-5 Spacer
1-4 Washer
Fork
1-3 Washer
1-2 Spring Washer
1-1 16 mm Locknut
Note: Front wheel
hardware sequence.
1 Using two (2) 16 mm wrenches,
loosen the axle bolt. Remove wheel
and install replacement wheel.
(Note the sequence of the hardware)
1-1
1-2
1-3
1-4
1-5
1-6
1-2
1-3
1-4
1-5
1-1
Turn power “OFF” before beginning repair or maintenance:
• Read the instructions
• Remove charger plug
• Turn the power switch OFF
• Secure the product under repair
• Exercise caution around
exposed parts
• Contact Razor customer service
if unsure about any repair or
maintenance
 Loading...