11
with the small bolt in the long slot on the left side of the rear fork.
3. Tightening the adjusters clockwise tightens the chain, loosening the
adjusters counter-clockwise will relax the chain tension. When loosening
the adjusters, you will have to nudge the axle forward by tapping the
wheel with your hand to relax the tension on the chain. Turn both
adjusters the exact same amount, 1/8 to 1/4 turn at a time, to maintain
the wheel alignment.
Note: This system of adjusters is common to motorcycles and BMX
bicycles. If your are not familiar with it or do not feel comfortable
performing the adjustment, consult a qualified BMX bike or motorcycle
mechanic.
Chain tension: The chain should be “just not-quite snug” in other
words, not taut or sloppy loose. BE CAREFUL NOT TO ADJUST TOO
TIGHT. The tensioning system can easily impart too much tension
and snap the chain or bend the motor output shaft. Turn the adjusters
1/8 to 1/4 turn at a time and recheck the tension each time. Rotate the
chain to verify the tension at various places (see note below).
NOTE: The chain will typically have a “loose-spot” and a “tight
spot” corresponding with a particular rotational position of the sprockets.
This is normal and common to all chain-driven vehicles due to run-out
tolerances freewheel and sprocket. The chain should be adjusted to the
ideal tension with chain in the tightest
spot.
NOTE: Proper chain alignment must be maintained.The wheel
must not be skewed. If the chain is noisy, or rough running, check the
lubrication, tension, and alignment of the sprockets, in that order.
4. Once the tension is good, tighten the axle and brake anchor bolt. Test
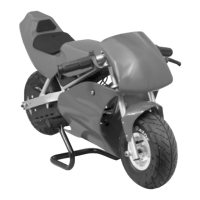
run the Pocket Rocket. Re-adjust as needed.
Fig 11a. Loosen rear axle by turning nuts counter-clockwise.