ASSEMBLY AND SETUP
Need Help? Visit our website for replacement parts, product support, a list of authorized service centers in the US and customer service contact information
at www.razor.com. Please have the product I.D. code (located on the white label of your product) available for better assistance. Additional Customer
Service contact information is listed at the back of this manual.
4
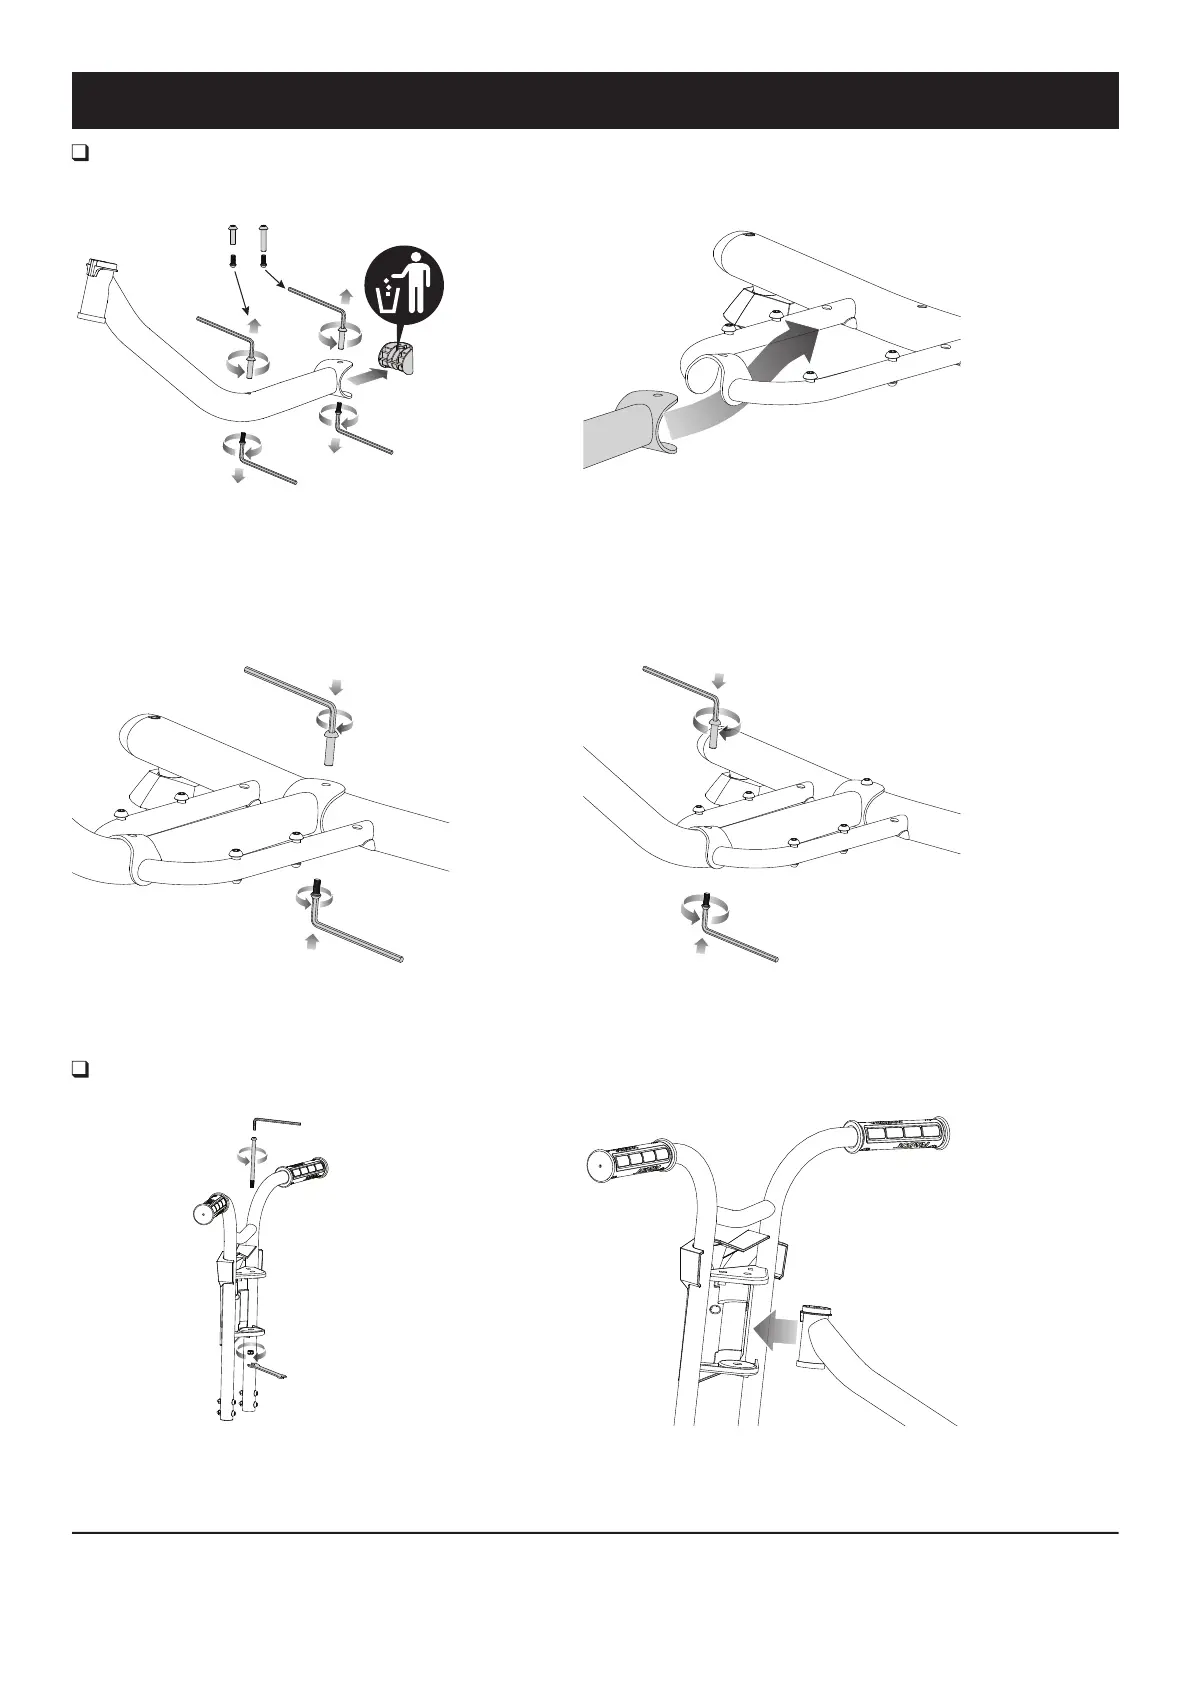
Attaching the Frame
Required Tools: Two (2) 5 mm Allen Wrenches (included)
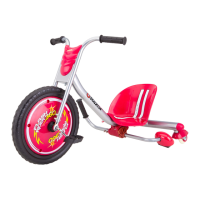
Attaching the Front Fork
Required Tools: 13 mm Wrench and 5 mm Allen Wrench (included)
1 Using two (2) 5 mm Allen wrenches, remove the
coupling bolt on the end of the frame and the coupling
bolt in the middle of the frame. Remove and discard the
plastic insert.
Note: The coupling bolt in the middle of the frame is shorter.
3 Securely tighten the (longer) coupling bolt on the
rear frame using two (2) 5 mm Allen wrenches.
1 Remove the steering bolt and locknut from the
frame assembly with a 13 mm wrench and a 5 mm
Allen wrench.
2 Insert the rear frame into the frame assembly.
4 Securely tighten the (shorter) coupling bolt in the
middle of the frame using two (2) 5 mm Allen wrenches.
2 Insert the front fork into the frame assembly.