7
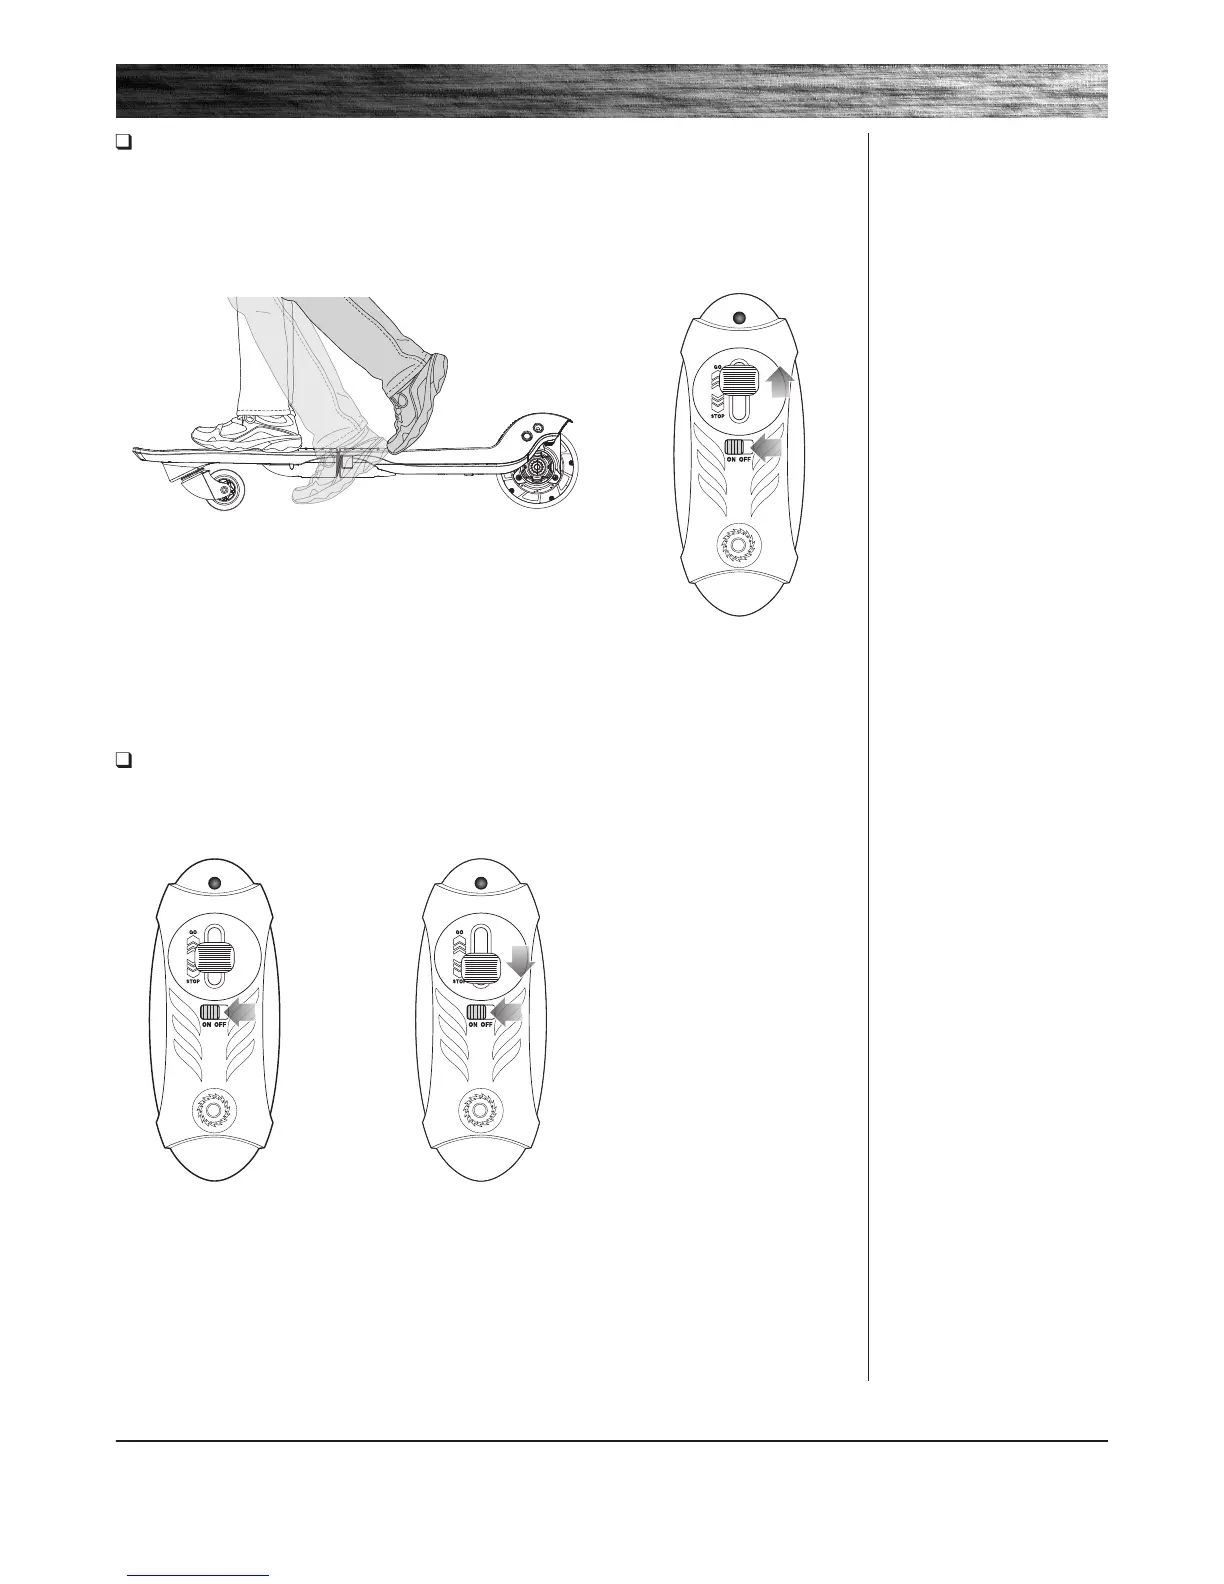
1 While riding, release the remote
lever and it will return to the
“NEUTRAL” position. The product
will slow to a stop with
motor resistance.
2 To slow more rapidly to a stop,
move the remote lever down to the
“STOP” position and hold. This will
engage dynamic motor braking
and the product will slow down
more quickly.
Note: Practice riding only in wide
open areas clear from curbs,
parking blocks and other obstacles.
Impacting the wheels against
any hard surface can damage the
wheels. Wheels are not covered
under the limited warranty.
USAGE
Note: RipStik Electric must be
moving at least 3 mph (5 km/h),
with lever on remote in GO
position, for motor to engage.
Note: As an additional safety
feature, the RipStik Electric is
designed to cut power to the motor
when the lever on the remote is in
the “STOP” or neutral position.
Note: Motor will re-engage,
(without having to kick start), if
the remote is in the “GO” position
before RipStik Electric has slowed
down to under 3 mph (5 km/h).
How to Ride
Do not activate the remote unless you are on the RipStik Electric and in a safe, outdoor environment suitable for riding.
Turn power button to the “ON” position for both the RipStik Electric and the remote.
Place one foot on the front deck plate and with the other foot, push (kick start) RipStik Electric while holding the lever
on the remote in the “GO” position. Place other foot on rear deck plate once motor has engaged.
How to Stop
The RipStik Electric, like regular RipStiks or skateboards does not have a conventional “brake”, however the
RipStik Electric can coast to a stop or can use “dynamic motor braking” to slow more quickly.
Note: Stepping off the product also works to stop. Releasing the remote lever will cut power to the motor.
 Loading...