5-1
5-2
5-3
5-4
5-1
5-2
5-3
6-1
6-2
6-3
8
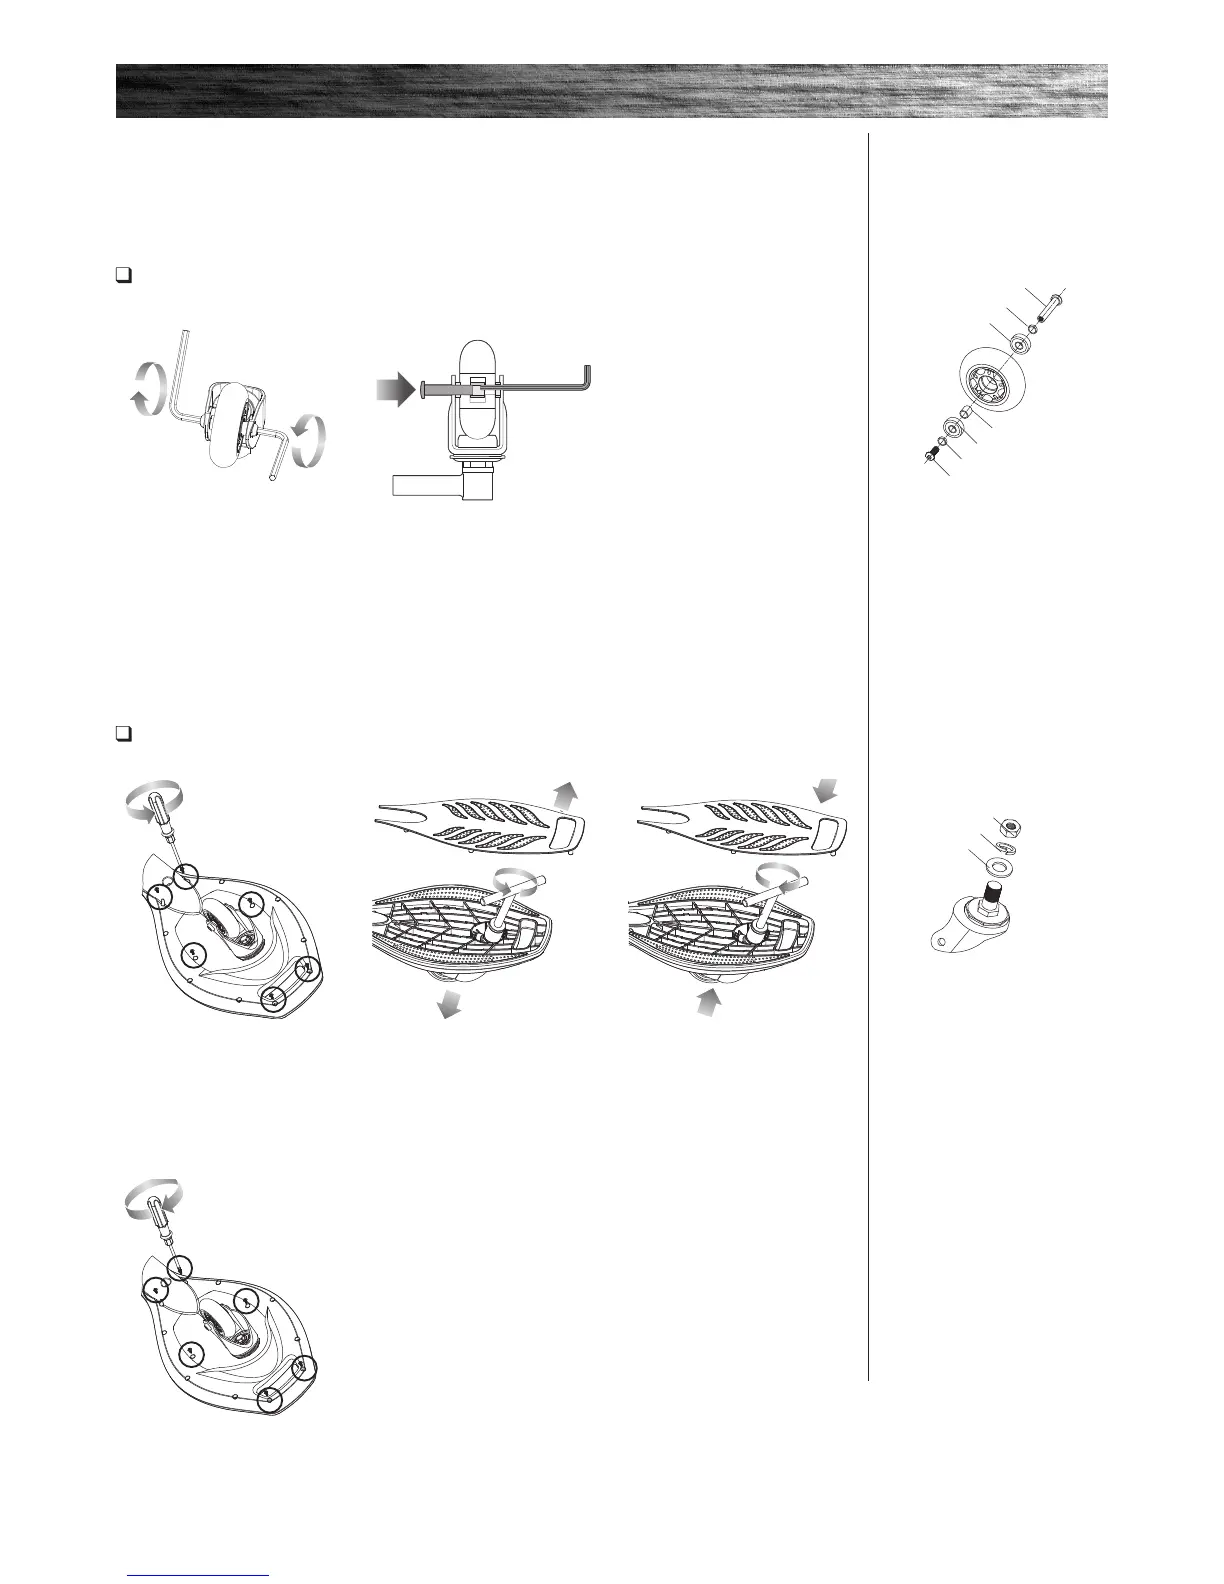
REPAIR AND MAINTENANCE
1 Remove wheel from caster
(refer to step 1 above).
Remove the six (6) Phillip screws
attaching the deck plate to
the platform.
4 Re-attach the deck plate to
the platform with the six (6) Phillip
screws removed in step 1.
2 Turn product over. Using a
24 mm socket wrench, loosen
the nut on the caster and
remove caster.
3 Insert replacement caster.
Secure in place with nut removed
in step 2.
Re-attach wheel to caster. (Refer to
step 2 above.)
Front Caster Replacement
Tool Required: Phillips Screwdriver and 24 mm Socket Wrench
Before beginning repair or maintenance:
• Read the instructions
• Disconnect charger
• Turn the power button OFF
• Exercise caution around
exposed parts
• Contact Razor Customer Service
if unsure about any repair or
maintenance
1 Turn product over. Using two
(2) 5 mm Allen wrenches, loosen
coupling bolt and remove wheel
from caster.
2 Insert replacement wheel
into caster.
Note: Make sure all three (3)
spacers are aligned with the holes
in the bearings before inserting
the coupling bolt. Secure tightly
into place.
Caster Wheel Replacement
Tools Required: Two (2) 5 mm Allen Wrenches
Caster
6-1 Locknut
6-2 Spring Washer
6-3 Flat Washer
Wheel
5-1 Coupling Bolt
5-2 Spacer (x2)
5-3 Bearing (x2)
5-4 Spacer
 Loading...