7
USAGE
REPAIR AND MAINTENANCE
Need Help? Visit our website for replacement parts, product support, a list of authorized service centers in the US and customer service contact information
at www.razor.com. Please have the product I.D. code (located on the white label of your product) available for better assistance. Additional Customer
Service contact information is listed at the back of this manual.
WARNING: The brake
is capable of causing the electric
motorbike to skid the tire, throwing
an unsuspecting rider. Practice in
an open area free from obstacles
until you are familiar with the brake
function. Avoid skidding to a stop as
this can cause you to lose control or
damage the rear tire.
Note: The brake lever contains a
safety switch to cut power to the
motor when the brake is applied. In
an emergency, applying the brake
will always stop the product from
moving. Do not disable or replace
this lever with anything other than a
genuine Razor replacement part.
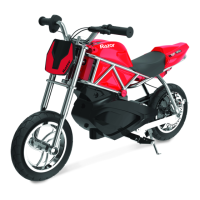
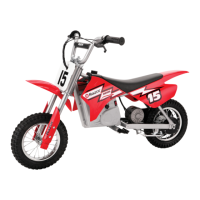
Starting the RSF350
Place both hands on the handlebars. Slowly push forward with one foot and
apply the throttle (A).
Note: Keep both feet on the foot pegs when unit is in motion.
Testing the Brake
To use the brake, squeeze the brake lever to increase the pressure on the brake. The brake lever is fitted with a cable
adjuster to compensate for cable stretch and/or to fine-tune the lever movement to engage the brake. If brake is not
engaging properly, follow instructions for adjusting the brake outlined below.
Stopping the RSF350
Release the throttle (A) and apply the brake (B).
Note: When coming to a complete stop, place both feet on the ground to
balance the unit.
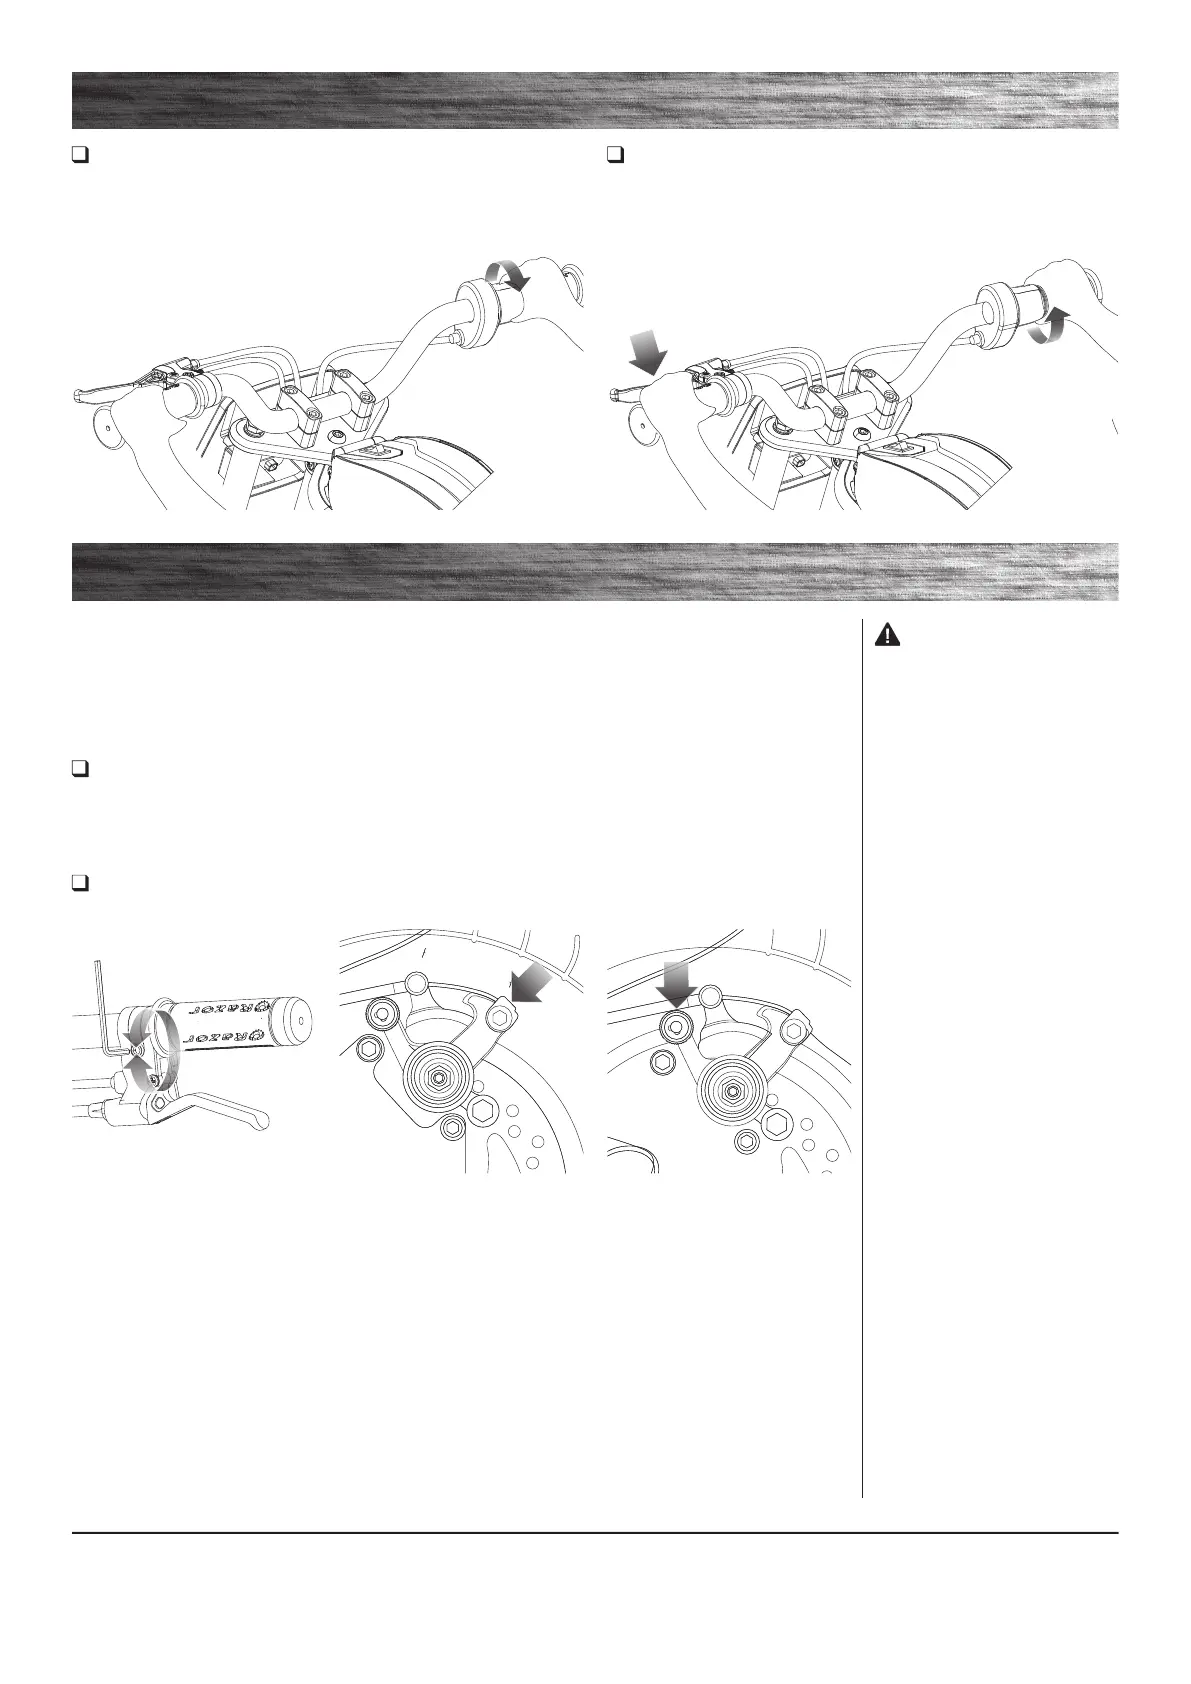
1 To adjust brake cable play, thread
the brake lever adjuster in or out
1/4 to 1/2 turn until the desired
brake adjustment is attained. Most
adjustments are complete at this
step. If brake still needs further
adjustment, proceed to step 2.
2 If the brake has too much slack,
loosen the rear anchor bolt with a 5
mm Allen wrench and pull the brake
wire tighter. The distance of the
brake wire between the end of the
cable and the anchor bolt should be
between 37 mm and 44 mm.
3 If the disc brake is dragging on
the brake pads, use your fingers to
twist the caliper adjuster in either
direction until disc is centered
between the brake pads.
Turn power switch “OFF” before beginning repair or maintenance:
• Read the instructions
• Remove charger plug
• Turn the power switch off
• Secure the product under repair
• Exercise caution around
exposed parts
• Contact Razor customer service
if unsure about any repair or
maintenance
A A
B
Adjusting the Brake
Required Tool: 5 mm Allen Wrench (not included)
 Loading...