2 3
Flag
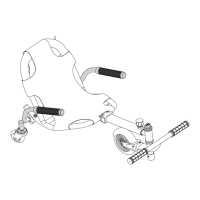
Drift Bars (Left/Right)
Rear Caster Wheels
(Left/Right)
Foot Rests
(Left/Right)
Foot Bar
Adjustment Knob
Seat
Front Wheel
1.
Need Help? Visit our website for replacement parts, product support, a list of authorized service centers in the US and customer service contact information
at www.razor.com. Please have the product I.D. code (located on the white label of your product) available for better assistance. Additional Customer Service
contact information is listed at the back of this manual.
ASSEMBLY AND SET-UP
Attaching the Seat
BEFORE YOU BEGIN
Required Tools
WARNING: DO NOT USE
NON-RAZOR PRODUCTS WITH
YOUR CRAZY CART SHUFFLE. The
Crazy Cart Shuffle has been built to
certain Razor design specifications.
The original equipment supplied
at the time of sale was selected on
the basis of its compatibility with
the frame, fork and all other parts.
Certain aftermarket products may
not be compatible and will void
your warranty.
WARNING: Failure to properly
engage the spring-loaded buttons may
cause the seat to dislodge while riding
and may cause you to lose control. When
correctly engaged the seat will not rotate
nor will it move sideways. Note that
when properly engaged, the spring-
loaded buttons are clearly visible in the
holes on the seat frame.
Two (2) 5 mm Allen Wrenches
(included)
Plastic Bag Contents:
• 5 mm Allen Wrenches
• Owner’s Manual
Product ID Locations:
(See locations to the left)
1. Frame (underneath unit)
2. Barcode on side of box
(not shown)
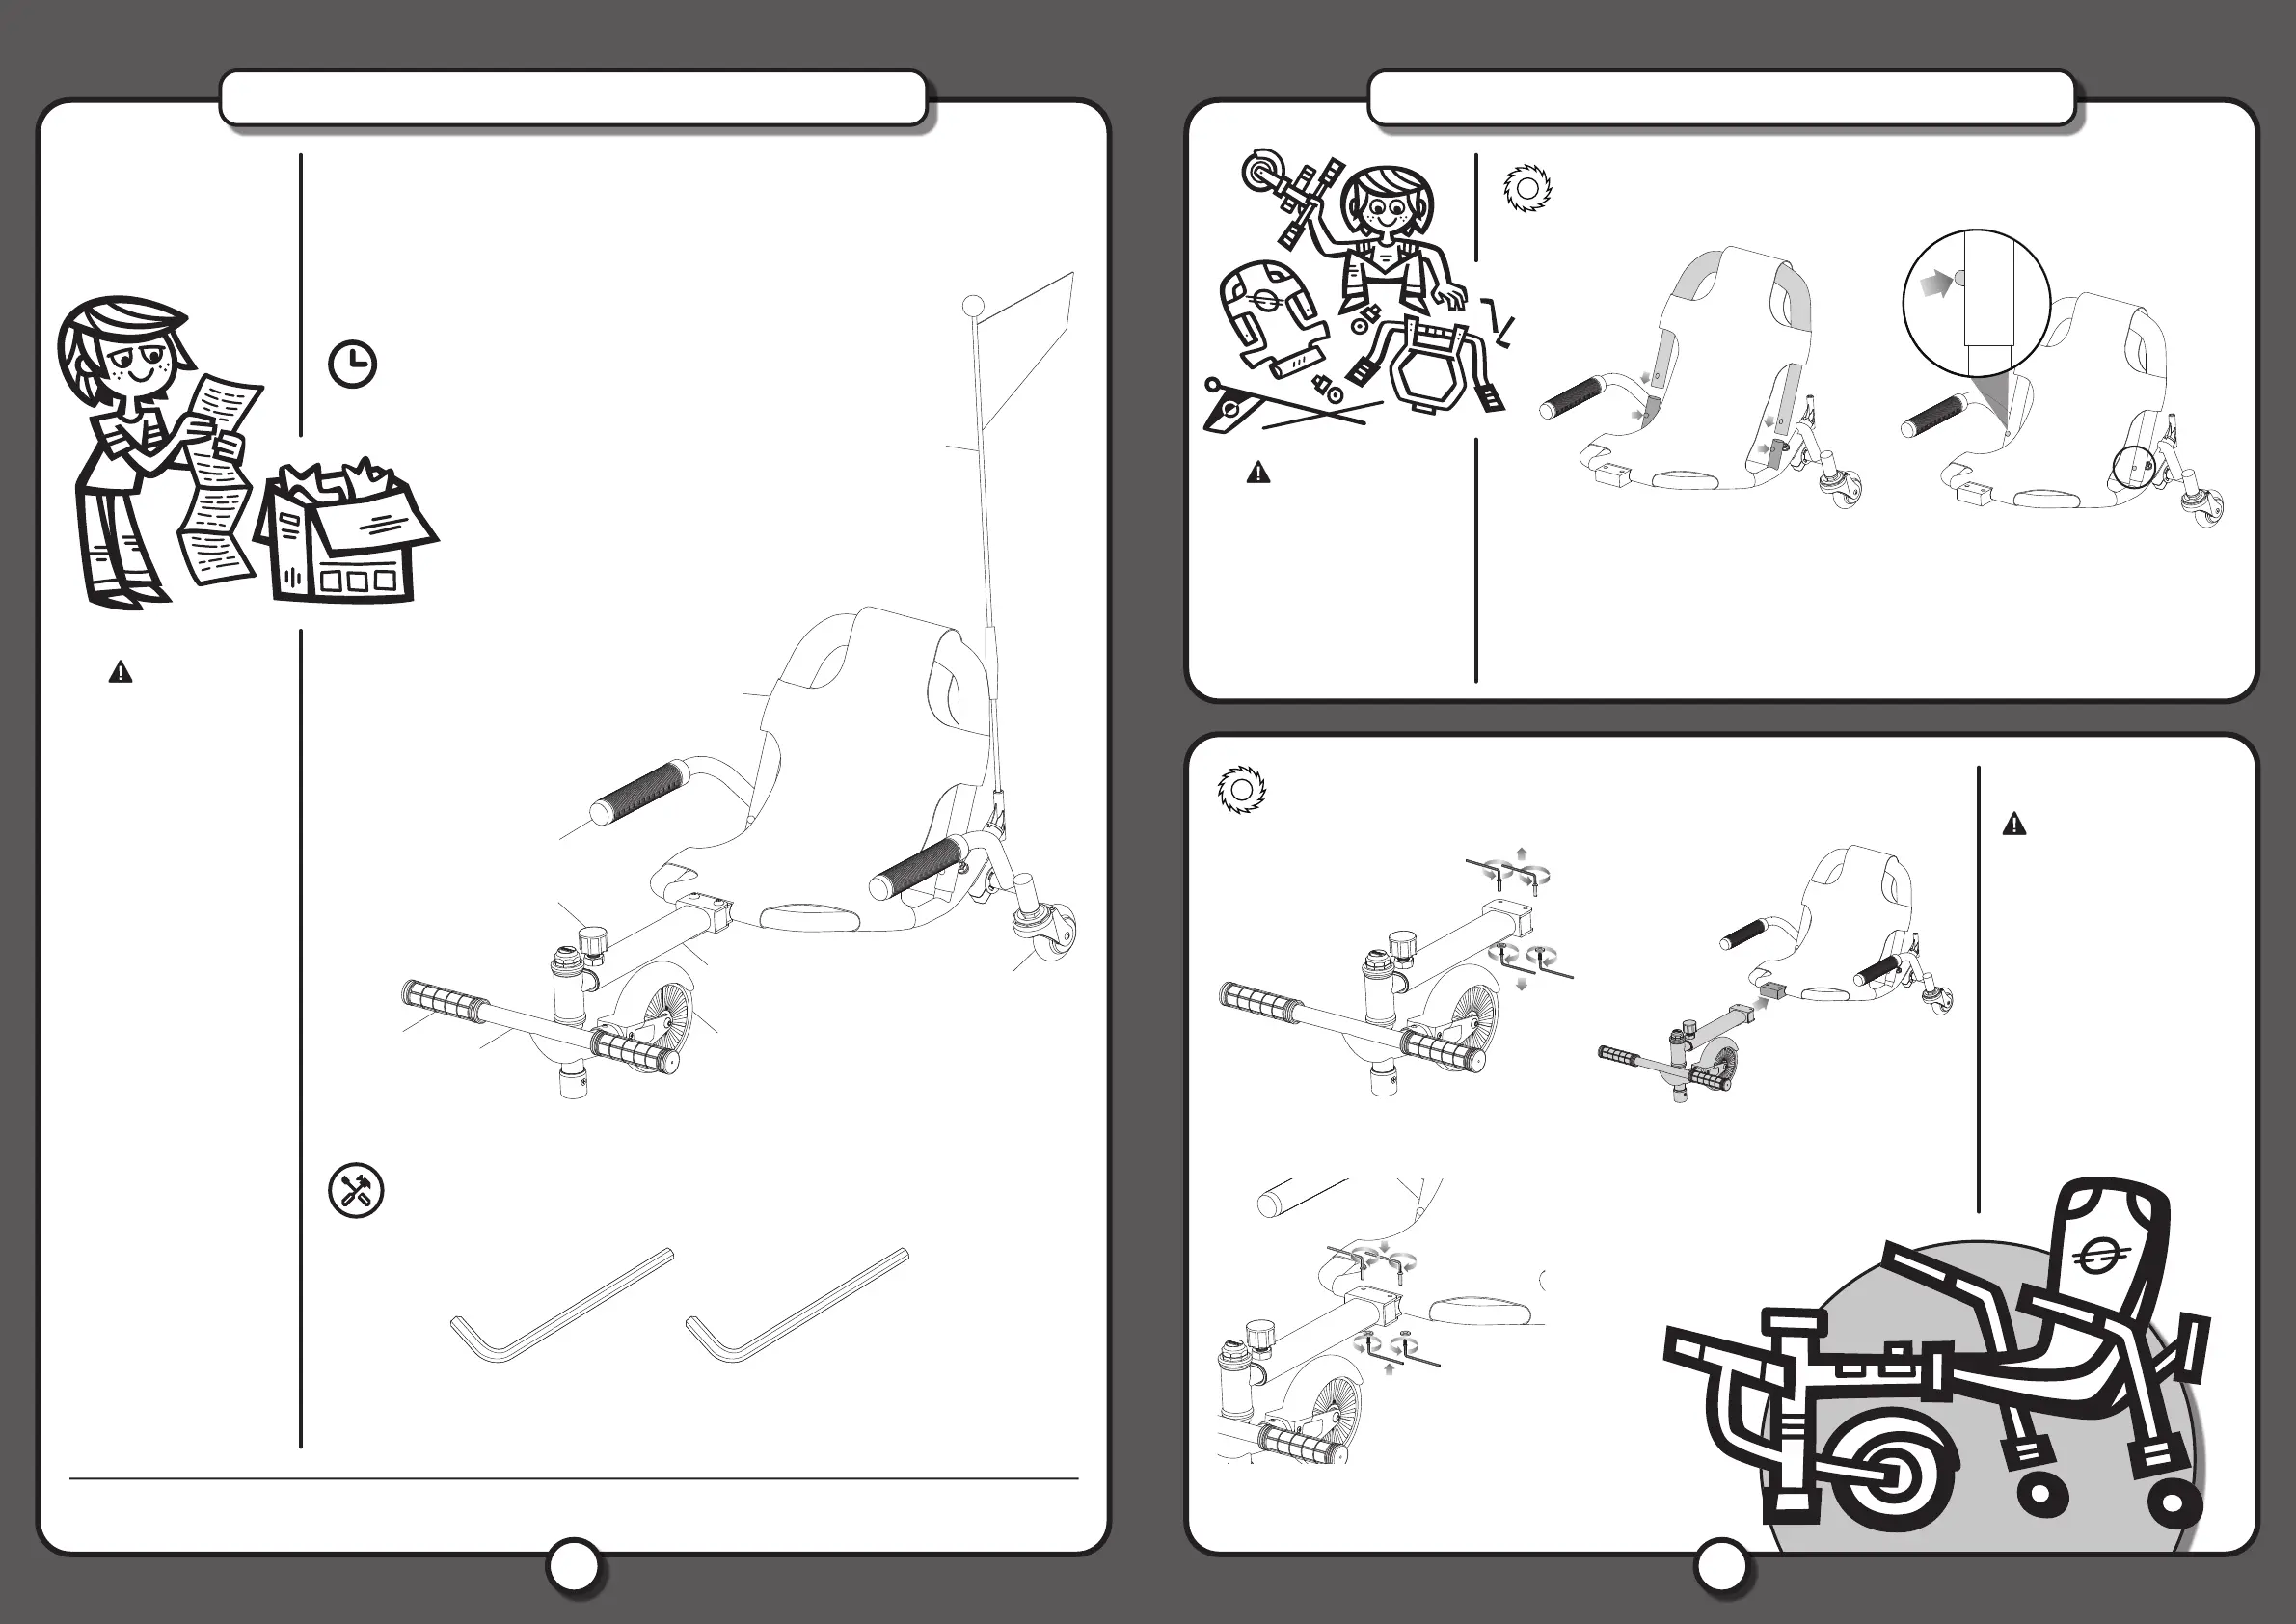
Remove contents from box and check parts against diagram below. Remove the separators
that protect the components from damage during shipping. Inspect the contents of the box for
scratches in the paint or dents that may have occurred during shipping. Because the Crazy Cart
Shuffle was partially assembled and packed at the factory there should not be any problems,
even if the box has a few scars or dents.
1 Using two (2) 5 mm Allen wrenches, remove the four (4)
bolts on the front half of the frame.
2 Install the front half of the frame to the rear half of the
frame, making sure that all holes align.
3 Using two (2) 5 mm Allen wrenches, install the four (4) bolts
through the frame.
Attaching the Frame
Required Tools: Two (2) 5 mm Allen Wrenches (included)
WARNING: Failing to properly
tighten the bolts on the frame can cause
you to lose control.
Estimated Assembly and Set-Up Time
Allow up to 15–20 minutes for assembly. Razor recommends assembly by an adult.
1 Slide the seat back frame tubes (left and right) on to the
seat bottom frame tubes (left and right) until they hit the
spring-loaded buttons on the seat bottom frame tubes. Press
both spring-loaded buttons (left and right) on the seat bottom
frame tubes simultaneously to slide down and install the seat
back frame tubes onto the seat bottom frame simultaneously.
2 The spring-loaded buttons will pop out when
properly installed.
 Loading...