Do you have a question about the RCA CC6364/CC6374 and is the answer not in the manual?
Safety precautions to reduce risk of fire or electric shock. No user-serviceable parts inside.
Instructions for filling out the product registration card for warranty and service purposes.
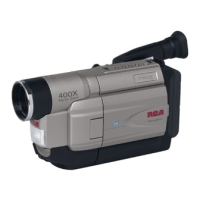
Lists all items included in the camcorder package for verification upon purchase.
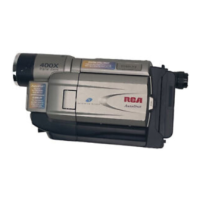
Identifies and describes the function of various buttons and controls on the camcorder.
Basic steps for setting up the camcorder for the first time to begin recording.
Guide to properly fitting and adjusting the camcorder's hand strap for comfortable use.
Instructions on how to attach the lens cap to protect the camcorder's lens.
Steps for connecting the AC power supply to power the camcorder or charge the battery.
How to set the power switch to the desired mode to turn the camcorder on.
Instructions for setting the video light switch to AUTO for automatic illumination control.
Step-by-step guide on how to properly insert a cassette tape into the camcorder.
Explains how to use the LCD monitor and viewfinder to view the recording image.
Details on opening, tilting, and adjusting the brightness of the LCD monitor.
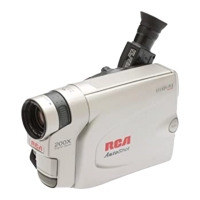
Guide to positioning and adjusting the viewfinder for comfortable viewing.
Procedure for initiating the recording process using the camcorder's controls.
Steps for playing back recorded video content on the camcorder.
Simple instructions for powering down the camcorder by setting the switch to OFF.
Overview of how the camcorder can be powered using a battery or AC adapter.
Detailed steps for charging the camcorder's rechargeable battery pack.
Procedure to discharge and recharge the battery to maintain capacity.
Explanation of the icon that indicates the remaining power level of the rechargeable battery.
Guidelines for proper handling, care, and storage of the camcorder battery.
Information on connecting and using the AC power supply for continuous operation.
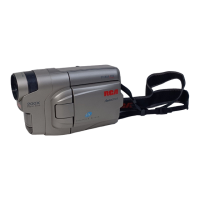
Instructions on how to attach and use the camcorder's shoulder strap for carrying.
Guide to setting the camcorder's date and time for accurate recording information.
How to select the tape recording speed (SP or SLP) to balance quality and recording time.
Procedure to set the tape length for accurate remaining time indication.
How to use the LCD monitor and viewfinder to monitor the recording process.
Details on opening, tilting, and adjusting the brightness of the LCD monitor.
Guide to positioning and adjusting the viewfinder for comfortable viewing.
Explains various icons displayed on the camcorder's screen for status and information.
Describes icons indicating battery status, missing cassette, and head cleaning needs.
Icons related to date/time display, tape status, and error codes.
Icons representing various visual effects like Sepia, Sports, and Monochrome.
Icons indicating preset titles that can be superimposed on video recordings.
Icons for manual white balance settings like Fine, Cloud, and Halogen.
Icons indicating recording status, pause, play, fast forward, and rewind modes.
Icons for Auto Tracking (AT) and Manual Tracking (MT) adjustments.
Icon indicating the current zoom ratio being used on the camcorder.
Icons displayed when adjusting monitor brightness or speaker volume.
Icon shown when manually adjusting the camera's exposure settings.
Icons for various transition effects like Fade, Shutter, Slide, Door, Corner, and Window wipes.
Icons related to manual focus adjustment and auto-focus status.
Icons indicating recording intervals for animation and time-lapse features.
Icon indicating when the digital image stabilization feature is active.
Icon showing the selected tape length for remaining time calculation.
Icon indicating the selected tape recording speed (SP or SLP).
Icon indicating the status of the Time Base Corrector feature.
Icon showing the tape's time counter during playback or recording.
Icon indicating the approximate time left on the inserted tape.
Essential steps and procedures for initiating and managing video recording on the camcorder.
Tips on using different shooting angles and monitor positioning for dramatic results.
Instructions for setting up the camcorder to record oneself by tilting the monitor.
How to use the 5-second recording feature for quick scene transitions.
Method to quickly review the end of the last recorded segment.
Procedure for rerecording specific segments, allowing for corrections.
Explanation of how to use the zoom lever for magnification and its capabilities.
Details on rotating the zoom lever to achieve telephoto or wide-angle views.
How to activate and use the digital zoom feature for increased magnification.
Instructions for enabling digital image stabilization to reduce camera shake.
Guide to operating the built-in video light for better illumination in dim conditions.
Information on video light operation, limitations, and cautions.
Advice for improving picture quality, stability, and overall professionalism in recordings.
Overview of camcorder playback features including search and connection methods.
Fundamental steps for playing back recorded tapes using the camcorder's controls.
How to adjust the brightness of the LCD monitor for optimal viewing.
Instructions for adjusting the camcorder's speaker volume using the zoom lever.
How to eliminate noise bars on playback by adjusting the tracking manually or automatically.
Guide to activating and deactivating the TBC to stabilize video signals and reduce jitter.
How to use the counter memory function to easily locate specific segments on a tape.
Procedure for pausing playback to freeze a single frame on the screen.
Method for high-speed searching through tape content in forward or reverse directions.
Information on connecting the camcorder to other devices like TVs and VCRs.
Guide to using the adapter for playing VHS-C tapes in a standard VHS VCR.
Steps for correctly inserting a VHS-C tape into the adapter.
Instructions on safely removing a tape from the cassette adapter.
How to connect the camcorder to a TV or VCR using audio/video cables.
Steps to view camcorder playback on a connected TV or VCR.
Instructions for transferring video content from the camcorder to a VCR or other recording device.
How to navigate the camcorder's on-screen menu system for detailed settings.
Definitions and explanations for various Camera Menu and System Menu options.
An introduction to the camcorder's advanced creative and functional features.
How to create professional scene transitions using fade-in/out and wipe effects.
Using program AE modes like Sports, Shadow, Haze, and Twilight for specific shooting conditions.
Applying digital effects such as Sepia, Monochrome, Nega-Posi, Mosaic, and Stretch to recordings.
How to manually adjust exposure settings for optimal picture quality in challenging lighting.
Guide to using the auto-focus and manual-focus systems for sharp images.
Explanation of the automatic focus system and situations where it may not work optimally.
Steps for manually adjusting focus to achieve sharp images, especially in difficult conditions.
How to adjust white balance for accurate color reproduction under various lighting.
Procedure for manually setting white balance using a white or colored paper.
How to display and record date and time information on video footage.
Using the camcorder's memory to superimpose preset titles onto video images.
How to shoot a series of still pictures to create an animation effect.
Recording sequential images at preset time intervals to capture slow changes over time.
Solutions for common problems encountered with the camcorder's operation and features.
Specific issues related to the camcorder not powering on or shutting off unexpectedly.
Troubleshooting common issues where menus or features are unavailable or not working.
Solutions for issues preventing recording or causing recording interruptions.
Troubleshooting common issues encountered during tape playback.
Important supplementary information regarding power, charging, and settings.
Key notes on charging conditions, power supply behavior, and operation.
Information about the internal clock battery and date/time setting retention.
Technical details and notes related to the video recording process and its functionalities.
Information on the TBC feature, its operation, and potential picture distortions.
Guidelines and precautions for handling, loading, and unloading cassette tapes.
Instructions for maintaining the camcorder's condition through proper cleaning and care.
Steps to take after finishing use, including powering off and removing the tape/battery.
Detailed procedures for cleaning the camcorder's exterior, lens, LCD, and viewfinder.
Best practices for protecting the camcorder from dirt, damage, and environmental factors.
Guidelines for storing and handling video tapes to ensure their longevity and performance.
A list of actions and conditions that could damage the camcorder or affect its performance.
Advice for safely transporting and using the camcorder while traveling.
Technical details and specifications of the camcorder and its components.
Information on how to contact customer support for help and service inquiries.
Process for sending the camcorder for repair or exchange, including obtaining an SR number.
Key instructions for shipping defective equipment, including packaging and required documentation.
Options and procedures for obtaining a replacement camcorder before returning the original unit.
Steps for locating and using an authorized service center for camcorder repairs.
List of conditions and actions that are excluded from the camcorder's warranty coverage.
Instructions to complete and mail the product registration card for easier contact if needed.
Details of the camcorder's warranty coverage, duration, and service terms.
Regulatory compliance information regarding FCC and Industry Canada rules for radio frequency interference.
Information about available accessories that can enhance the camcorder's functionality and use.
Guide on how to mount and use the AC088 tripod for stable video recording.
| White Balance | Auto |
|---|---|
| Microphone | Built-in |
| Built-in Flash | No |
| Type | Camcorder |
| Focus | Auto |
| Power Source | Battery |
| Focus Type | Auto |