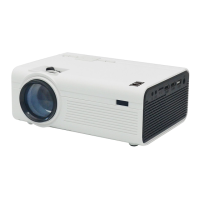
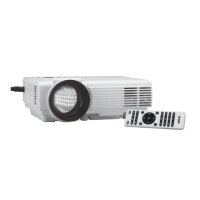
This document describes the RCA RPJ136 Multimedia Projector, an instruction manual detailing its operation, features, and maintenance. The projector is designed for various multimedia applications, offering flexibility in setup and use.
Function Description
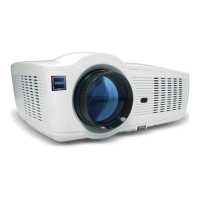
The RCA RPJ136 is a multimedia projector capable of displaying images and videos from multiple sources onto a screen. Its primary function is to project visual content for entertainment, presentations, or other viewing purposes. The projector supports various input methods, including HDMI, AV, VGA, USB, and Micro SD cards, making it versatile for connecting to different devices such as HD players, DVD players, computers, and external storage.
The projector features an intuitive control system, accessible via both a remote control and physical buttons on the unit. Users can navigate menus, adjust settings, and control playback with ease. Key functions include power on/off, input source selection, menu access, navigation, exit, fast search, file selection (next/previous), volume control, play/pause, image rotation/mirroring, and image scaling (zoom).
For audio output, the projector includes an internal speaker, but also offers an audio output jack (Aux Out / Line Out / Earphones) for connecting to external audio systems or headphones, providing enhanced sound experiences.
Usage Features
The RPJ136 offers several usage features designed to optimize the viewing experience and provide flexibility in setup:
- Placement Options: The projector can be installed in four configurations: Front Table, Front Ceiling, Rear Table, and Rear Ceiling. This adaptability allows users to integrate the projector into various environments, whether for quick setup on a table or a more permanent ceiling installation. For ceiling installations, a projector mount is required, and users are advised to ensure the ceiling structure can support the weight.
- Image Adjustment: To ensure optimal image quality, the projector provides controls for adjusting focus and keystone. The "FOCUS ADJ. KNOB" allows users to sharpen the image by rotating the knob, while the "TRAPEZOIDAL ADJ. KNOB" corrects keystone distortion, restoring distorted images to a rectangular or square shape, especially when the projector beam is projected at an angle. The "ANGLE ADJ. knob" also allows fine-tuning of the display angle.
- Vertical Location Adjustment: The manual illustrates how to adjust the vertical location of the projected image, ensuring it aligns correctly with the screen.
- Distance and Screen Size: The manual provides guidance on measuring the projection distance between the projector and the screen, which is crucial for achieving the desired screen size. It recommends moving the projector as close to the center of the screen as possible to reduce image distortion.
- Remote Control: A comprehensive remote control is included, offering functions such as power, flip, search, mute, zoom, navigation, exit, numeric input, menu access, source selection, and volume control. The remote requires two AAA/UM4 batteries.
- Multimedia Playback: The projector supports direct playback of media files from USB devices and Micro SD cards (TF cards). Users can navigate through music, photo, and movie files, with options for pause, fast forward, rewind, and next/previous file selection. Sub-menus provide additional functions for each media type, such as rotating photos, setting playback modes for music, and accessing information for movies.
- Projector Menu Settings: The projector features a multi-page menu system (Menu 1.0, 2.0, 3.0, and 4.0) for customizing various settings:
- Menu 1.0 (Picture Mode): Allows adjustment of picture mode (Standard, Soft, Vivid, User), contrast, brightness, color, sharpness, tint, color temperature (Cool, Medium, Warm), aspect ratio (4:3, 16:9), and noise reduction (Off, Low, Middle, High, Default).
- Menu 2.0 (Sound Mode): Provides options for sound mode (Standard, Movie, Music, Sports, User), treble, bass, balance, auto volume (Off/On), and surround sound (Off/Surround).
- Menu 3.0 (OSD Language & System Info): Enables selection of OSD language, restoration of factory default settings, panel rotation (0, 1, 2, 3 to set screen angle), and displays system information such as model, serial number, software version, and logo.
- Menu 4.0 (Timer Settings): Includes settings for clock, off timer, on timer, sleep timer (10min, 20min, 30min, 60min, 90min, 120min, 180min, 240min), and auto sleep (Never, 4 hour, 6 hour, 8 hour).
- Connectivity: The projector offers a wide range of connectivity options:
- HDMI (2 ports): For connecting HD players and other HDMI-enabled devices.
- AV: For connecting video players using AV cables (yellow for video, white/red for audio).
- VGA: For connecting computers (notebooks or desktops).
- USB: For connecting USB storage devices (up to 32GB).
- Micro SD Card (TF): For inserting Micro SD cards (up to 32GB).
- Audio Out: For connecting external speakers or headphones.
- DC IN: For power input using the included adapter.
Maintenance Features
The manual provides essential safety instructions and troubleshooting tips to ensure the longevity and proper functioning of the projector:
- Safety Instructions: Emphasizes reading and following all instructions, heeding warnings, avoiding water, cleaning with a dry cloth, ensuring proper ventilation, keeping away from heat sources, protecting the power cord, using specified attachments, unplugging during storms or long periods of disuse, and referring servicing to qualified personnel. It also warns against using the apparatus with unstable carts or stands to prevent tip-over injuries.
- Additional Warnings and Precautions: Includes specific warnings such as not looking directly into the projector light, not touching the projector lens, ensuring proper mains adapter connection, caution regarding controls and adjustments to avoid hazardous radiation exposure, warnings about changes or modifications to the unit, and cautions regarding remote control interference. It also advises against filling objects with liquids.
- Lens Cover: Instructions are provided for removing the lens cover before use and closing it when the unit is not in use to protect the lens.
- Battery Installation/Removal: Clear instructions are given for installing and removing batteries from the remote control, including warnings about correct polarity, not mixing old and new batteries, using recommended battery types, and safe disposal.
- Troubleshooting: A dedicated troubleshooting section helps users diagnose and resolve common issues:
- No Image/No Signal: Suggests checking power, lens cover, cable connections, image source settings, and video input signal settings in the menu.
- Lamp Switches Off: Points to potential overheating, blocked ventilation, or dirty air filters. Advises cooling the projector, checking vents, cleaning the air filter, and contacting support if the issue persists.
- Wider Image at Top/Bottom: Explains this as keystone distortion and directs users to use the keystone function to adjust the image.
- Spots on Screen: Recommends cleaning the lens with a vacuum cleaner and contacting support if the issue is not resolved.
- Faded Image Brightness: Suggests checking ambient light in the room and considering lamp replacement if necessary.
- Service Assistance: Provides contact information for service assistance and product information, including a toll-free number and website for Curtis International Ltd., the manufacturer and seller of the product. It also outlines the limited product warranty terms, including requirements for obtaining repairs (original bill of sale, service warranty card) and exclusions (alterations, abuse, misuse, battery corrosion, accidental damage, power failure, transit damage, improper power supply, commercial/industrial use, customer education calls). Users are instructed to obtain a return authorization number before returning products for warranty support.