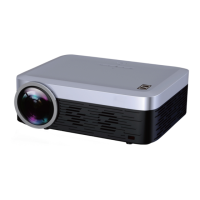
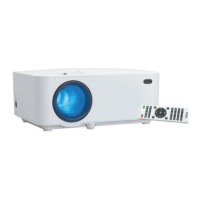
This document serves as a comprehensive guide for the RCA Full HD Projector, Model No. RPJ138, which includes a Roku® Streaming Stick. The projector is designed to deliver a full HD viewing experience and is ideal for dark viewing environments to achieve optimal performance. It is manufactured and sold by Curtis International Ltd.
Function Description
The RCA Full HD Projector is a versatile device capable of projecting images and videos onto a screen. It supports various input sources, including HDMI, AV, VGA, and USB, allowing users to connect a wide range of devices such as media players, computers, and streaming sticks. The inclusion of a Roku® Streaming Stick enhances its functionality, enabling users to stream content from thousands of free and paid streaming channels, including movies, TV shows, live TV, news, and sports. The projector features controls for adjusting focus, keystone correction, and vertical image location to optimize the projected display. It also includes an integrated speaker for audio output, with options to connect to external audio systems.
Usage Features
The projector offers flexible installation options, supporting four configurations: front table, front ceiling, rear table, and rear ceiling. For ceiling installations, a projector mount is required, and users are advised to ensure the ceiling structure can support the weight of the projector and mount. To reduce image distortion, it is recommended to position the projector as close to the center of the screen as possible. The distance between the projector and the screen determines the projection size, with a range of 1m to 6m.
Adjusting the projected image involves several key features:
- Vertical Location Adjustment: A dedicated knob allows users to fine-tune the display angle vertically.
- Focus Adjustment: The focus knob sharpens the image by rotating it, with optimal focus achieved when pixels near the center of the screen are clearly visible.
- Keystone Correction: This feature corrects distorted images, restoring them to a rectangular or square shape, which is useful when the projector beam is projected at an angle to the screen.
The projector can be operated using its onboard controls or the included remote control. The remote provides functions such as power on/off, menu navigation, volume control, and input selection. The Roku® Streaming Stick comes with its own separate remote, which is necessary to control the streaming player's functions.
Connecting Devices:
- HDMI: Connect HDMI-enabled devices like media players. The projector has multiple HDMI ports, including one specifically for the Roku® Streaming Stick. If there's no sound from the projector's speaker when playing a DVD movie via HDMI, users should check the player's digital audio settings and set it to "Auto" or "PCM" mode.
- AV: Connect AV devices using the provided AV cable.
- VGA: Connect computers or other VGA-enabled devices. The manual provides a table to help adjust the output signal from the computer for optimal display.
- USB: The projector has USB ports for media playback (USB 1) and for charging the Roku® Streaming Stick (USB 2). Users can play video, music, and photo files directly from a USB device.
- Audio Output: An auxiliary output (Aux Out / Line Out / Earphones) allows connection to external audio systems or headphones.
Roku® Streaming Stick Setup:
The Roku® Streaming Stick is a key feature, transforming the projector into a smart streaming device.
- Installation: Plug the streaming player into the HDMI® 3 port on the projector.
- Power Connection: Use the included USB power cable to connect the streaming player to the USB port on the projector. Ensure the projector is powered on and HDMI 3 input is selected.
- Remote Pairing: The Roku remote needs to be paired with the streaming player. Batteries are inserted into the remote, and it should pair automatically. If not, troubleshooting steps are provided.
- On-Screen Setup: Follow the on-screen instructions to activate the streaming player, which requires linking to a Roku account via a computer or smartphone.
The projector features a comprehensive menu system, accessible via the "MENU" button on the remote or projector. This menu is divided into several sections:
- Picture Mode: Allows adjustment of picture settings such as contrast, brightness, color, sharpness, tint, color temperature, aspect ratio, and noise reduction. Users can choose from predefined modes (Standard, Soft, Vivid, User) or customize settings.
- Sound Mode: Provides options for sound settings including treble, bass, balance, auto volume, and surround sound. Similar to picture mode, users can select predefined modes (Standard, Music, Movie, Sports, User) or customize.
- System Settings: This section includes OSD language selection, factory default reset, panel rotation (to adjust screen angle), and device information (model, serial number, software version).
- Time Settings: Allows setting the clock, off timer, on timer, sleep timer (to automatically turn off the projector after a set period), and auto sleep function (to turn off after a longer period of inactivity).
Maintenance Features
Regular maintenance is crucial for prolonging the projector's lifespan and ensuring stable operation.
- Lens Cover: Always remove the lens cover before use and replace it when the unit is not in use to protect the lens.
- Cleaning: The projector should be cleaned regularly, especially the filter, which is recommended every three months, or more frequently in dusty environments.
- Filter Cleaning: Turn off and disconnect the projector. Locate and open the filter cover, remove the filter, and gently tap it to shake off dust. A vacuum cleaner can be used to remove deeper dust. Reinstall the filter and close the cover.
- General Cleaning: Use a dry cloth for cleaning. Do not use detergents or solvents. Ensure proper ventilation around the projector after cleaning.
- Troubleshooting: The manual includes a troubleshooting section to help users diagnose and resolve common issues such as no image, image distortion (keystone), spots on the screen, faded image brightness, and Roku® Streaming Stick power issues. For more complex problems, customer service contact information is provided.
Safety Instructions:
The manual emphasizes several important safety instructions:
- Read and keep all instructions and warnings.
- Do not use the apparatus near water.
- Clean only with a dry cloth.
- Do not block ventilation openings.
- Avoid installing near heat sources.
- Protect the power cord from damage.
- Use only manufacturer-specified attachments/accessories.
- Unplug during lightning storms or long periods of disuse.
- Refer all servicing to qualified personnel.
- Use caution when moving the apparatus on a cart to prevent tip-over.
- Do not look directly into the projector light or touch the projection lens.
- The mains adapter is the disconnect device and should remain readily operable.
- Avoid hazardous radiation exposure by not performing procedures other than those specified.
- Changes or modifications not expressly approved could void the user's authority to operate the equipment.
- Fluorescent lighting may cause remote interference.
- Do not open the unit due to shock hazard.
- Avoid exposure to rain, moisture, dripping, or splashing.
- Do not place liquid-filled objects on the apparatus.
- Battery safety: Do not expose batteries to excessive heat, ensure correct polarity, do not mix old and new batteries, use only recommended battery types, and do not dispose of batteries in fire or attempt to recharge them.
- FCC RF Radiation Exposure: Maintain a distance of at least 20cm from nearby persons.
The projector is designed for optimal performance in dark viewing environments, and its brightness is measured in ANSI lumens. The specific viewing environment will influence the required lumen output.