DIGITAL INCUBATOR
11
3. Function Settings
(1)Incubator Start&Termination /
Return to Factory Setting
(2) Changing Cels.&Fahr.
How to change Cels. & Fahr.
How to terminate incubation
Return to factory setting
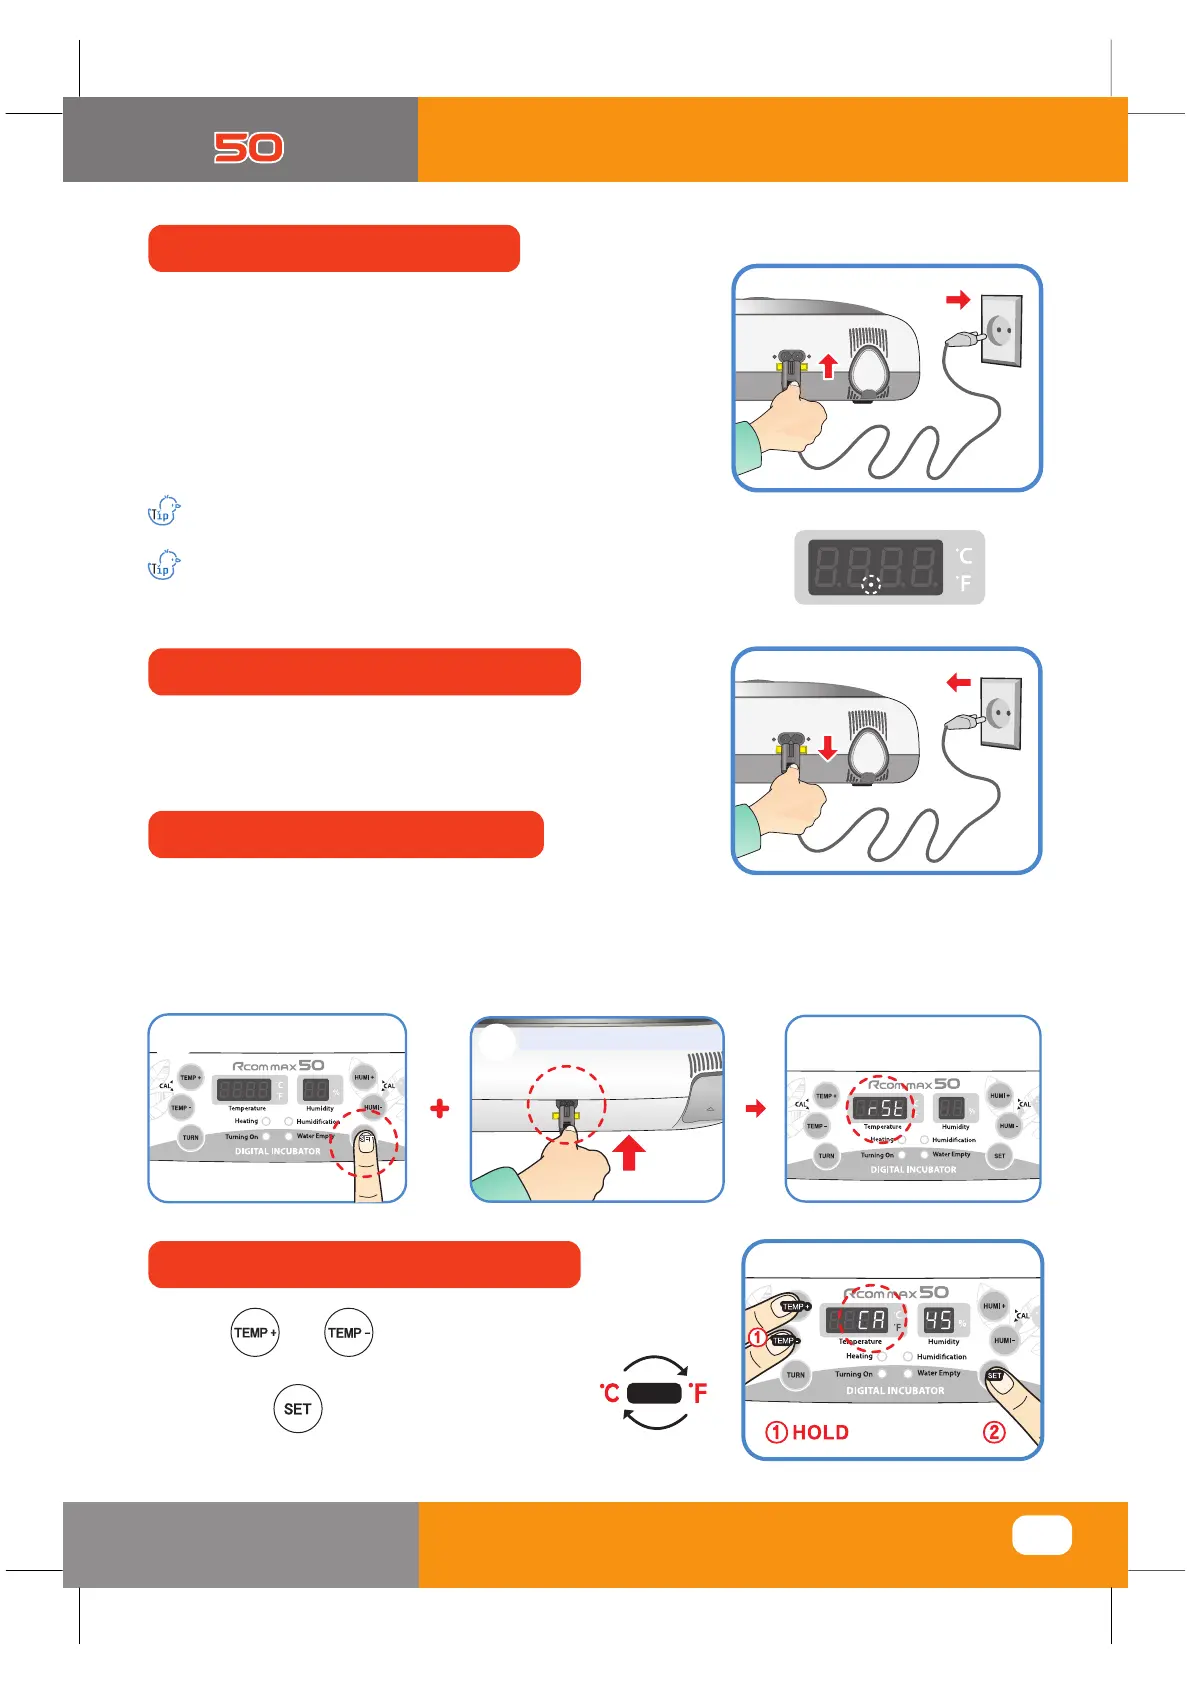
How to start incubation
▶ Press and buttons at the same time
and CA will show on Temp. display.
Then press button, it will change
as shown on the right.
repeat
▶ It is for returning to the factory default setting.
▶ It is for initializing the incubator setting or calibration to the factory settings when you handle the incubator
improperly so that the value has changed. Unplug the power supply and hold SET button and re-plug the
power supply as shown on picture. Then, rSt will show on the display, and the incubator will be initialized to
factory setting.
▶ If you connect the incubator with power cord,
second dot " . " of temp. display is blink with alarm.
Press SET to remove blink and then it starts incubation with
existing temperature and humidity.
[Factory default setting - Temp. : 37.5℃ (99.5℉), Humidity : RH 45%]
▶ After all eggs are hatched, you should REMOVE
the power cord for incubation termination.
(The incubator has no separate power switch.)
▶ Be sure to turn ON egg turning before incubation starts
and turn OFF before 3 days of hatching. At this time, it's
recommendable to raise humidity up to 60~70%.
[Refer to Egg Turning ON/OFF on Page 13.]
There can be some smell the first time you use the incubator,
that is normal.
Power Failure Notification : When firstly input power, or power
failure during incubation, second dot " . " of temp.
display is blink with alarm. Press SET to remove.
HOLD
①
Keep pressing SET button
Re-plug the power supply
"rSt" will show on the display as
below, and the incubator initialize to
factory setting.