28
If the probe is shorter than 185 mm or longer than 725 mm, you will be offered to install the type
"User’s L» or «User’s H», respectively. In this case, you will have to make zero installation of a
measuring head.
Attention!
Effective range is 846 mm, the probe type
“User’s H” will be set.
OK
Zero installation is recommended to make in automatic mode, for this you should press button
“MAKE”
.
If necessary, you can make more correct manual setting, increasing or decreasing the
value in the box "Exact". In this case the deviation of the relative position of range start will be
indicated in the lower field in the form of a line with an indication of percentage value (from the
value of the full range). Allowable deviation is within the whole window; going beyond its limits
will be displayed by flashing, colored in red, figures of percentage value.
Sensors of modifications ES2X, ES2XL, ES2XXL, ES4X, ES4XL, ES4XXL are produced
according to given ranges of probes’ length and do not need calibration. The program
automatically determines the model of the sensor. If the connected sensor’s model is one of
listed above, there is not the tab "Calibration".
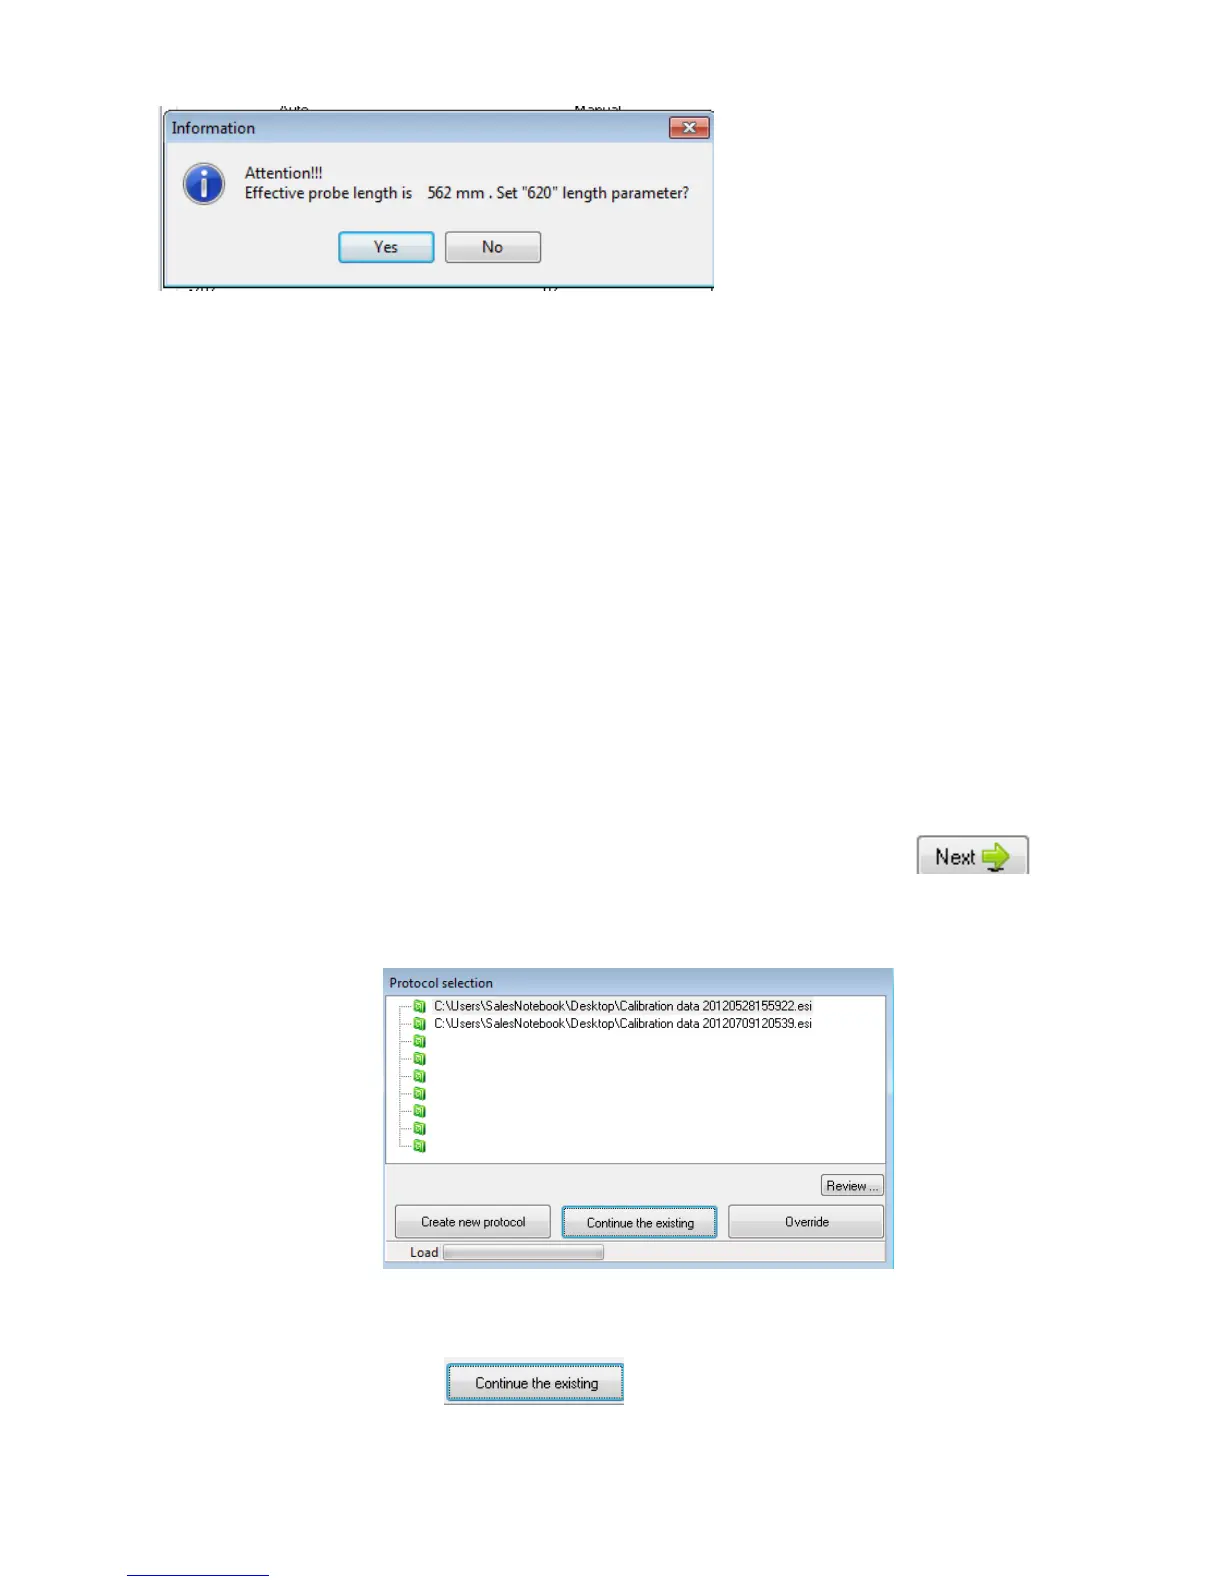
To continue the work and transfer to the tab "Calibration" it is necessary to select the protocol
and filling the data of calibration protocol. By pressing to the button “NEXT” the
program will offer you to select the protocol. If everything is done right, on your screen the
window of protocol select will appear.
Next, you have to create a file calibration protocol or select a necessary one of created before
(if the calibration, for whatever reason has not been completed and it is necessary to continue
it). In the window "Protocol select", the newly created protocols are available. To view those
saved before use the button
and navigate to the choice of protocol by
operating system tools.
 Loading...