5. Service lock. Adding / removing a "master" remote.
The service lock is a function that disables the operation of remotes added to the receiver for the duration
of e.g. maintenance works on the installation. Turning on the lock causes that the receiver does not
respond to the signal from the remote controls.
To activate the service lock, it is necessary to add a "master" remote to the receiver. Adding "master"
remotes is independent of adding remotes to control the channels. The "master" remote control can be
used both to control channels and to activate the service lock. Up to 5 "master" remote controls can be
introduced to the receiver to enable / disable the service lock.
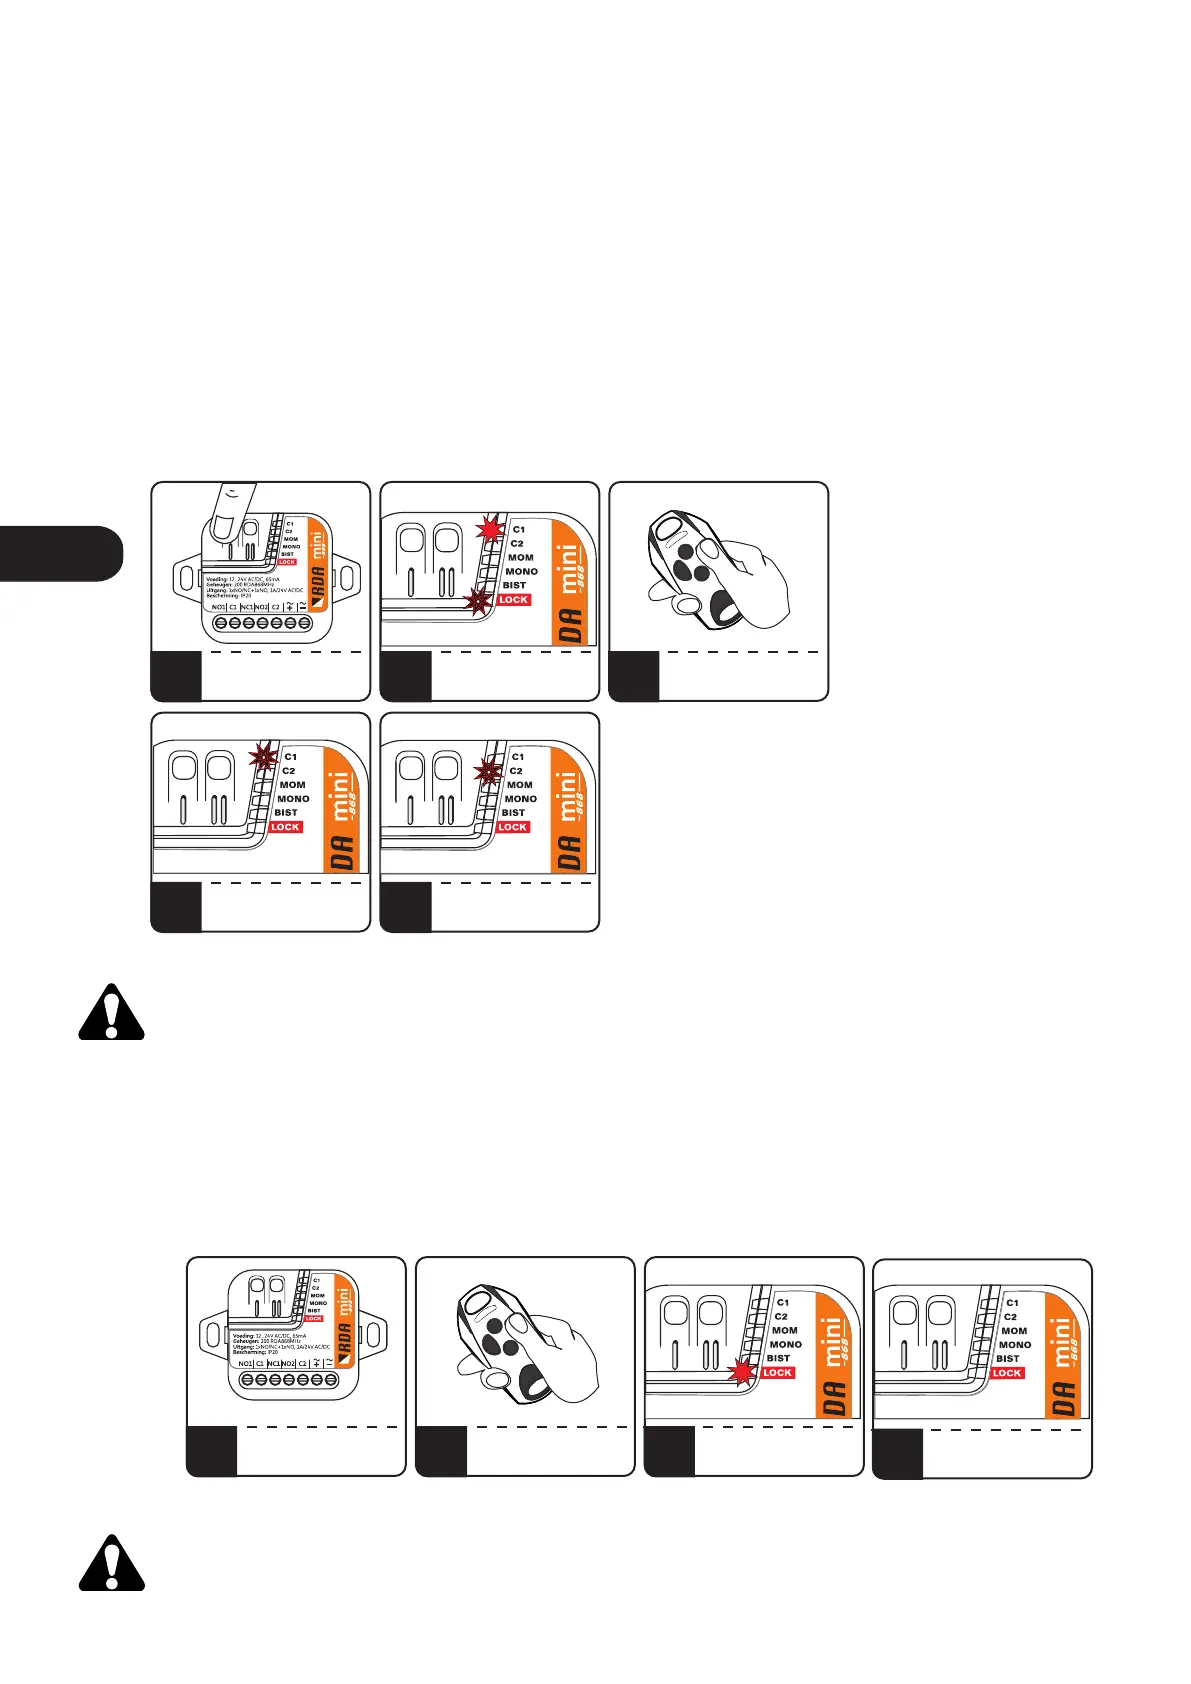
To add / remove the "master" remote control, press the C1 or C2 button. The C1 or C2 LED will light up as
well as the LED indicating the currently set MOM / MONO / BIST mode. Press repeatedly C1 or C2 button to
light the LOCK diode. The LOCK LED will flash. During this time, press and hold the remote button for 3
seconds. Adding the "master" remote control is signaled by the C1 diode blinking, while the "master"
remote control removal is indicated by the C2 diode blinking.
It is recommended that the "master" remote control was not paired with the receiver and that it
should only be used to enable / disable the service lock.
6. Enabling / disabling service lock.
To enable / disable the service lock it is necessary to have a "master" remote control. In order to activate /
deactivate the service lock, within the receiver's range press five times, within no more than 5 seconds, any
button of the "master" remote. The activation of the lock is indicated by the LOCK diode on, the
deactivation of the lock is indicated by the LOCK diode off.
The service lock is removed after the receiver's memory is formatted.
1
4a
2
4b
3
3b
PRESS C1/C2
REPEATEDLY TO LIGHT ON
THE G/LOCK LED
LOCK GOES OFF
C1 BLINKS
- „MASTER” REMOTE ADDED
LOCK WILL PULSE
PRESS AND HOLD
REMOTE BUTTON
FOR 3 SECONDS
Fig.6 Adding / removing the „master” remote.
1 2
3a
IN RECEIVER RADIO RANGE
PRESS x5 „MASTER”
REMOTE BUTTON
G/LOCK LIGHTS ON
- SERVICE LOCK ON
Fig.7 Enabling / disabling service lock.
3s
x5
LOCK GOES OFF
C2 BLINKS - „MASTER”
REMOTE DELETED
„MASTER” REMOTE
G/LOCK LIGHTS OFF
- SERVICE LOCK OFF
ENEN
 Loading...