2 INSTALLATION GUIDE
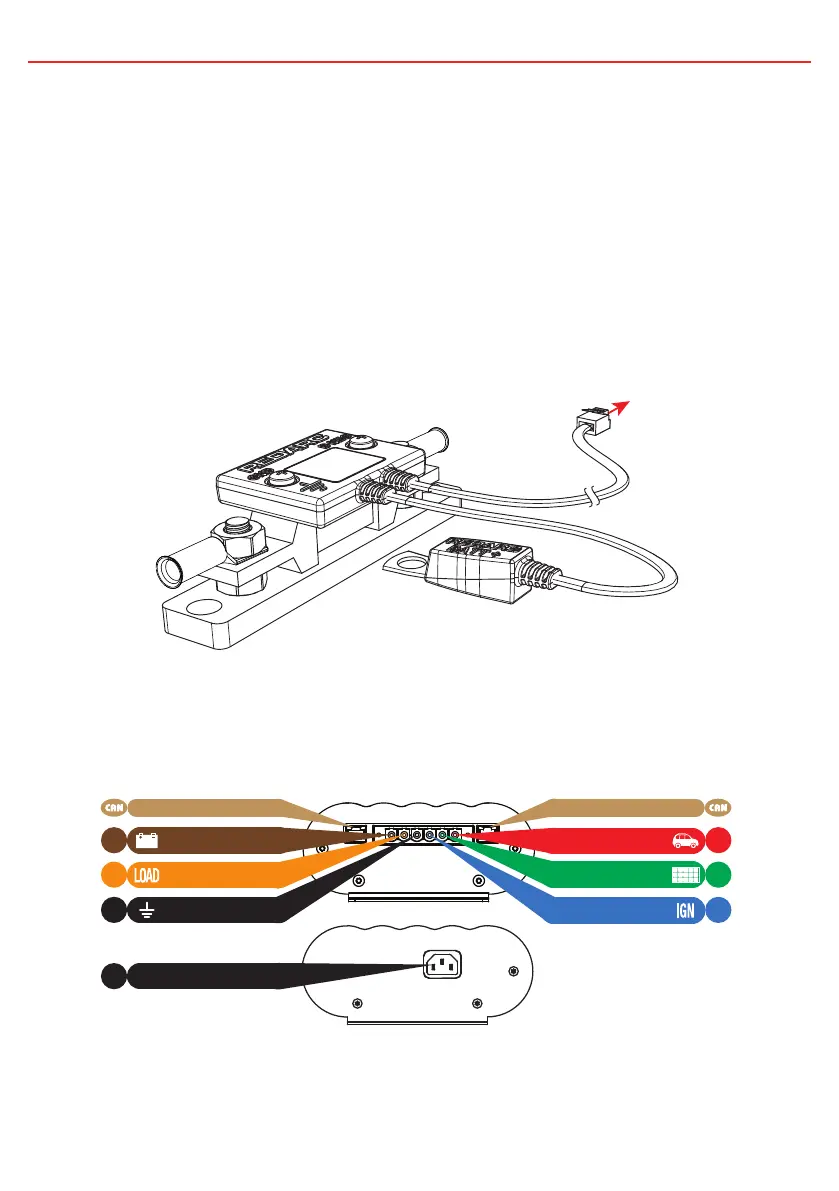
2.4.3 Connecting the Battery Sensor
Wire the Battery Sensor as shown in Figure 2.4.3.1 ensuring that the “BNEG” stud
connects to the House Battery negative terminal and the “GND” stud connects to the
vehicle common ground point. The Battery Positive Lead connects to the house battery
positive terminal, this lead measures voltage and temperature at the battery. Connect the
CANBus Connection cable to either of the main unit CANBus interfaces.
NOTE: When securing the cables to either side of the shunt using the provided nut,
ensure the head of the bolt is also held by a spanner, to prevent twisting and damage
to the shunt. Do not over tighten.
Figure 2.4.3.1 - Battery Sensor connections
to Vehicle
Common
Ground
to House Battery
Positive Terminal
to House Battery
Negative Terminal
to CANBus
Interface
CAN Bus
Connection
2.4.4 Wiring the Main Unit
Refer to Figure 2.4.4.1 for required connections and to Figure 2.4.4.2 typical setup.
Ground
1
3
5
6
Solar Input
AC Mains Input
DC Input
Battery Output
4
2
Load Disconnect
Ignition Trigger
CANBus Interface
AC
MAINS
CANBus Interface
Figure 2.4.4.1 - Required connections.
NOTE: If a longer Display cable is required, a replacement CAT5 patch cable may be
used, up to a length of 10m.
19
 Loading...