www.redbackaudio.com.au
Redback® Proudly Made In Australia 19
Redback® A 4505C Lockdown Timer with Network Access
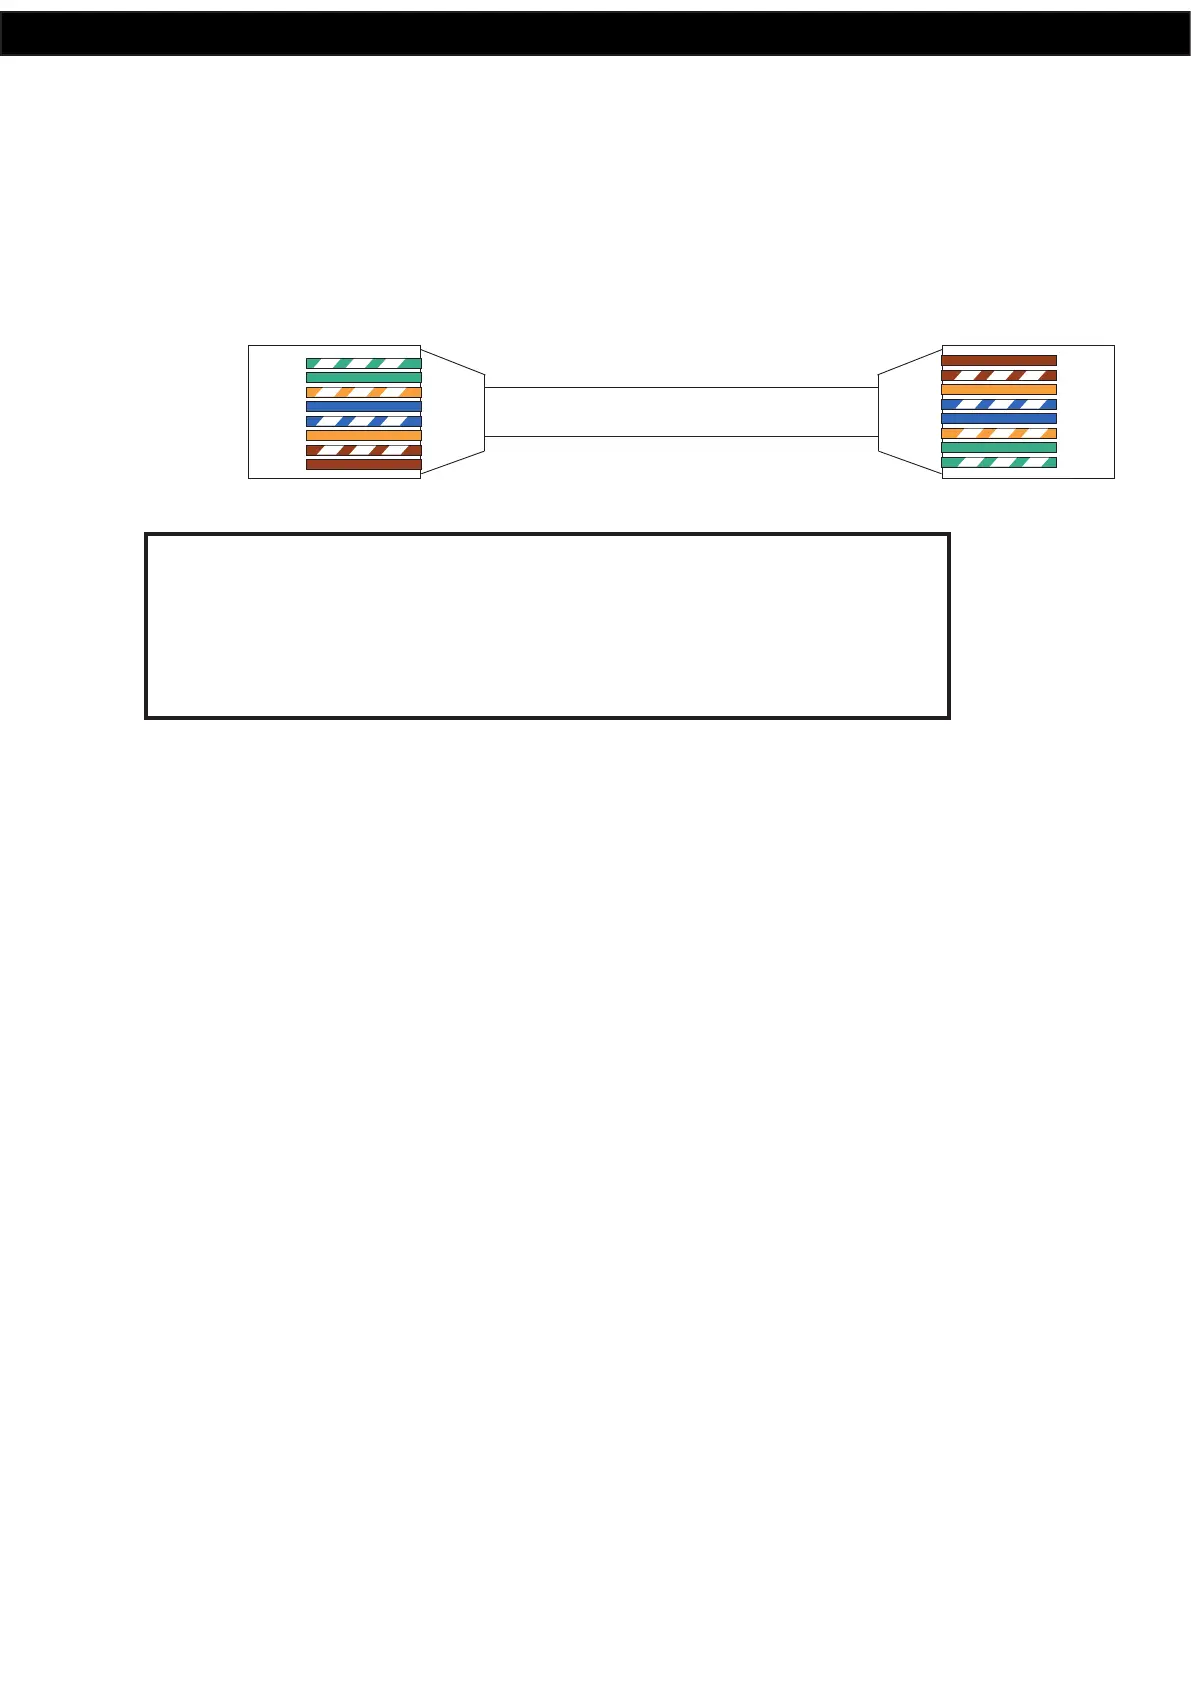
5.2 RJ45 cabling conguration for system components
(568A ‘Straight through’)
System components are connected using “pin to pin” conguration RJ45 data cabling as shown in g 5.2. When installing
ensure all connections are veried with a LAN cable tester before switching any system component on.
Failure to follow the correct wiring conguration may result in damage to system components.
568A
1 TX+
2 TX-
3 RX +
4
5
6 RX-
7
8
Straight Through
(both ends)
Pins Face Upwards
1 TX+
2 TX-
3 RX +
4
5
6 RX-
7
8
Fig 5.2
WARNING
System components are connected using standard “pin to pin”
conguration RJ45 data cabling. When installing ensure all connections
are veried before switching any system component on.
Failure to follow the correct wiring conguration may result in damage to
system components.
6.0 FIRMWARE UPDATE
It is possible to update the rmware for this unit by downloading updated versions from www.altronics.com.au or
redbackaudio.com.au.
To perform an update, follow these steps.
1) Download the Zip le from the website.
2) Remove the SD card from the A 4505C and insert it into your PC. (Follow the steps on page 8 to open the SD card).
3) Extract the contents of the Zip le to the root folder of the SD Card.
4) Rename the extracted .BIN le to update.BIN.
5) Remove the SD card from the PC following windows safe card removal procedures.
6) With the power lead removed from the rear of the unit, insert the Micro SD card back into the A 4505C.
7) Reconnect power to the A 4505C and turn ON. The unit will check the Micro SD card and if an update is required the
A 4500C will perform the update automatically.