US-14
BCZ250S/BCZ260S/BCZ260TS
MA1a
MA1b
MA1c
MA1d
MA1e
MA1f
every every every
25 50 100
system/compornent procedure before hours hours hours note
use after after after
fuel leaks, fuel spillage wipe out ✔
fuel tank, air filter, fuel filter inspect/clean ✔✔ replace, if necessary
see ■ADJUSTING replace carburetor
idle adjusting screw ✔
IDLING SPEED (p.12) if necessary
clean and readjust GAP: .025in(0.6~0.7mm)
spark plug ✔
plug gap replace, if necessary
cylinder fins, intake air cooling vent clean ✔
muffler, spark arrester, cylinder exhaust port
clean ✔
throttle lever, ignition switch check operation ✔
replace if
cutting parts ✔
something's wrong
cutting attachment guard make sure to attach ✔
gear case grease ✔
screws/nuts/bolts tighten/replace ✔✔not adjusting screws
ENGINE
SHAFT
■ MAINTENANCE CHART
Maintenance, replacement, or repair of the emission control device and
systems may be performed by any non-road engine repair establishment or
individual.
9. Maintenance
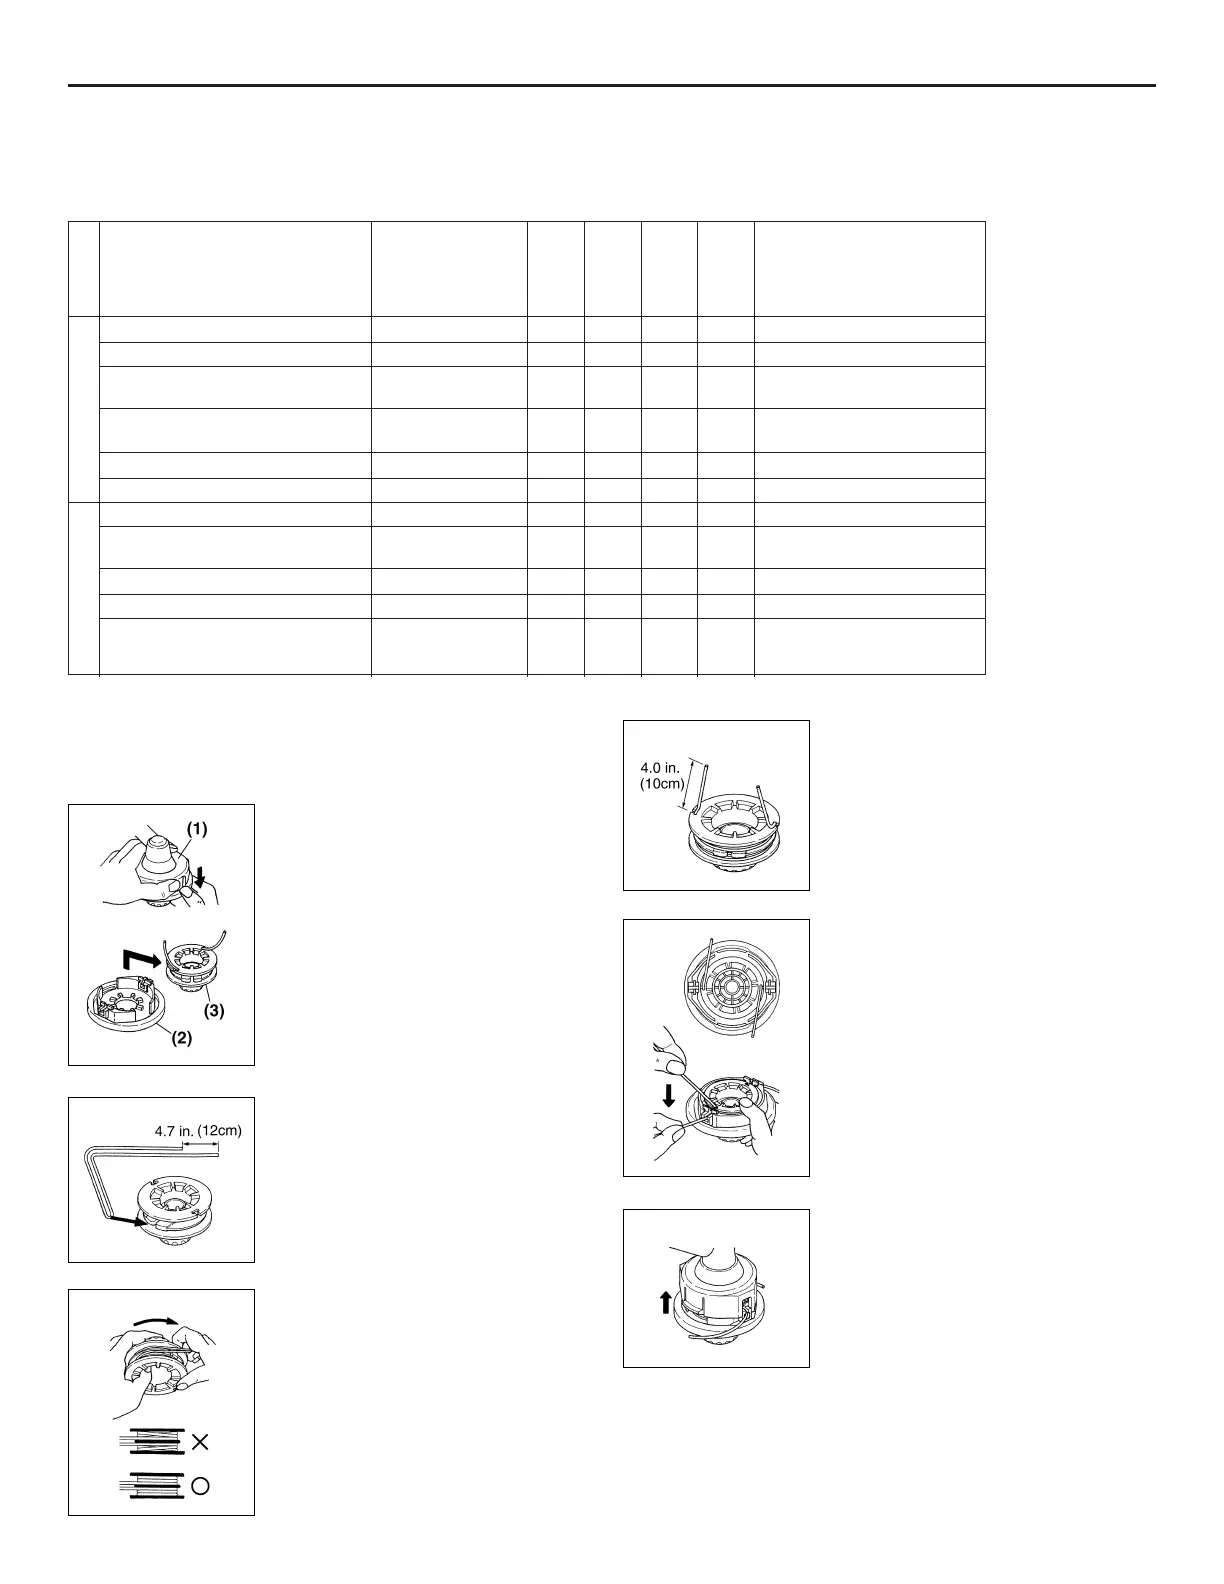
■ REFILLING TRIMMING LINE
For safety reasons, do not use
metalreinforced line.
1. For replacement line, use a diameter of
.095 in (2.4 mm). The cord holder is
capable for a line up to 20 feet (6 m) on
the 4” head. Avoid using a larger line
as it may cut down the trimmer
performance.
2. Pinch the slotted area on the both sides
of the case to unhook the cover.
(MA1a)
(1) case (2) cover (3) cord holder
3. Take out the cord holder and pull off
the old line. Fold new line so that one
half line is 4.7 in. (12 cm) shorter than
another half. And then, hook bended
end in the slot of the cord holder.
(MA1b)
4. Wind up the line in the correct direction
as indicated on the spool. (MA1c)
5. Hook each end of the line in the slot on
the edge of the cord holder. (MA1d)
6. While holding the cord holder against
the cover, pull the line ends to release
them from the slot, and then put the
ends through the eyelets on the cover.
(MA1e)
7. Line up the slot on the cover with the
hook on the case. Make sure the spring
is in place on the case.
Press the cover against the case until it
clicks. (MA1f)