7
In accordance with the policy of continuous improvement, the
manufacturer reserves the right to make any modications to
design, conguration, or specication of the product without
prior notice. The specication allows an error of ±10%.
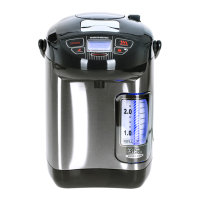
Parts of Appliance (scheme
A1
, p. 3)
1. The inside of the lid
2. Spout with button for water pouring by bringing a cup
3. Temperature maintenance indicator
4. Timer button
5. Carrying handle
6. Reboil button
7. Pump
8. Lid opening handle
9. Button for pouring water
10. Button for enabling and disabling the water supply lock
11. Water temperature setting button
12. Boiling indicator
13.
Water level scale with a mark of the minimum allowable
level
14. Removable lid
15. Metal water tank
16. Timer value
17. Set temperature value for the "Keep warm" function
18. Unlocked water supply indicator
19. Locked water supply indicator
20. Availability indicator
21. Heating indicator
22. Power cord
23. Pump lock
24. Lid release button
25. Display
26. I/O power switch
27. Connector for power cord
I. PRIOR TO FIRST USE
Carefully take the appliance and its detachable parts out of the
package.
Remove all wrapping materials and stickers except for the serial
number identication sticker!
After the appliance transportation or storage at low temperature
keep it at room temperature for at least two hours before plugging
in.
Wipe the base of the appliance with a damp cloth, then let it dry.
Make sure there is no moisture in the power cord socket.
Pour water into the thermopot up to the maximum mark and boil
it to disinfect the appliance and remove possible foreign odours.
Drain water from the thermopot completely. Drain the remaining
water through the right or left side of the thermopot with the lid
removed. Do not allow water to get on the control panel and
power cord socket.