Do you have a question about the Redring PURE 8.5kW and is the answer not in the manual?
Mark and drill holes for wall mounting, ensuring the unit is square and secure.
Drill the lower slotted fixing hole and fix the shower to the wall.
Cut out sections for service entry on the back plate and corner mouldings.
Hang the shower on the initial screws, ensuring it is vertical and square.
Fit the shower back plate and removable corner mouldings, cutting out service entry points.
Remove corner section, flush pipework, and turn off water supply before connecting.
Remove knock-out section, connect water inlet using 15mm pipe and elbow.
Tighten back plate fixing screws to firmly secure the unit to the wall.
Seal rear entry pipework with sealant to prevent water entering the wall.
Turn on water supply, check for leaks at the water inlet connection.
Hide incoming cable and connect earth, neutral, and live terminals correctly.
Strip cable sheath, fit earthing sleeve to earth conductor.
Connect cable to terminal block, ensuring retaining screws are tight and no insulation is trapped.
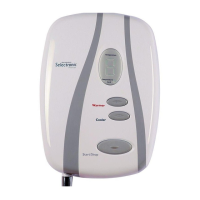
Turn power selector to the cold position (blue line).
Turn temperature control fully anti-clockwise to minimum temperature.
Ensure power selector spindle is left, and temperature spindle is fully anti-clockwise.
Fit front cover carefully, aligning controls, and secure with screws.
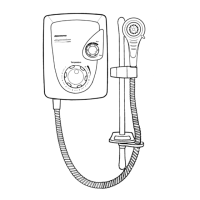
Attach flexible hose to shower outlet with sealing washer.
Establish riser rail position and mark wall for lower bracket, considering user height.
Remove covers from the wall brackets before fitting.
Position top bracket, mark wall, drill, plug, and fix.
Fit rail into top bracket, align bottom bracket, mark, drill, plug, and fix.
Slide height adjuster onto the rail using the push button release.
Replace rail assembly, refit bottom bracket, ensuring correct orientation, and fix to wall.
Snap covers over both brackets.
Firmly attach the shorter conical end of the flexible hose to the shower handset.
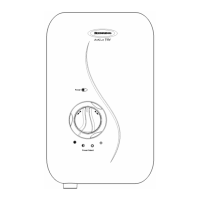
Turn top rotary power selector knob to the Cold setting.
Turn temperature control fully anti-clockwise to minimum temperature.
Ensure water supply is fully on at the mains stop cock and isolating valve.
Check that water is not leaking from the bottom of the case.
Push start/stop button, check water flows freely and is cool.
Slowly rotate temperature knob clockwise to maximum, then return to minimum.
Switch on the electrical supply at the isolation switch.
Turn power selector to Eco 1, check for warmer temperature.
Turn power selector to High, check for further temperature rise.
Adjust temperature control clockwise for hotter water, stabilizing at a comfortable level.
Push the start/stop button to turn the shower unit off.
Switch off at the electrical isolation switch.
Remove shower head to ensure no debris, clean and refit.
Switch on the electrical supply at the isolation switch.
Push the start/stop button for immediate water flow.
Select power setting using the top rotary control (High, Eco 1, Eco 2, Cold).
Adjust temperature control to alter outlet temperature by changing water flow.
Turn temperature control clockwise to increase temperature, decreasing flow.
Turn temperature control anti-clockwise to decrease temperature, increasing flow.
Push the start/stop button to turn the shower unit off.
Clean the shower handset periodically to remove limescale or debris.
Clean the inlet filter periodically to maintain shower performance. Requires a competent person.
Check water supply, front cover mounting, and screws.
Reduce temperature, clean handset, check isolation valves, or select lower power.
Safety pressure relief may have operated; check connections or contact service.
Adjust temperature control to increase flow, then slowly increase temperature.
Check breaker, isolation switch, power setting, water pressure, or contact service.
Clean the spray plate.
Check for solid materials in water supply or unit; contact plumber.
Contact customer service for suitable replacements.
Contact RXG Customer Service for advice if the unit is out of warranty.
| Brand | Redring |
|---|---|
| Model | PURE 8.5kW |
| Category | Plumbing Product |
| Language | English |