Page 4 of 6
Electricians, please ensure a copy of the Installation
Instructions are left with the end user for future reference
Installation Instructions
INSTALLATION
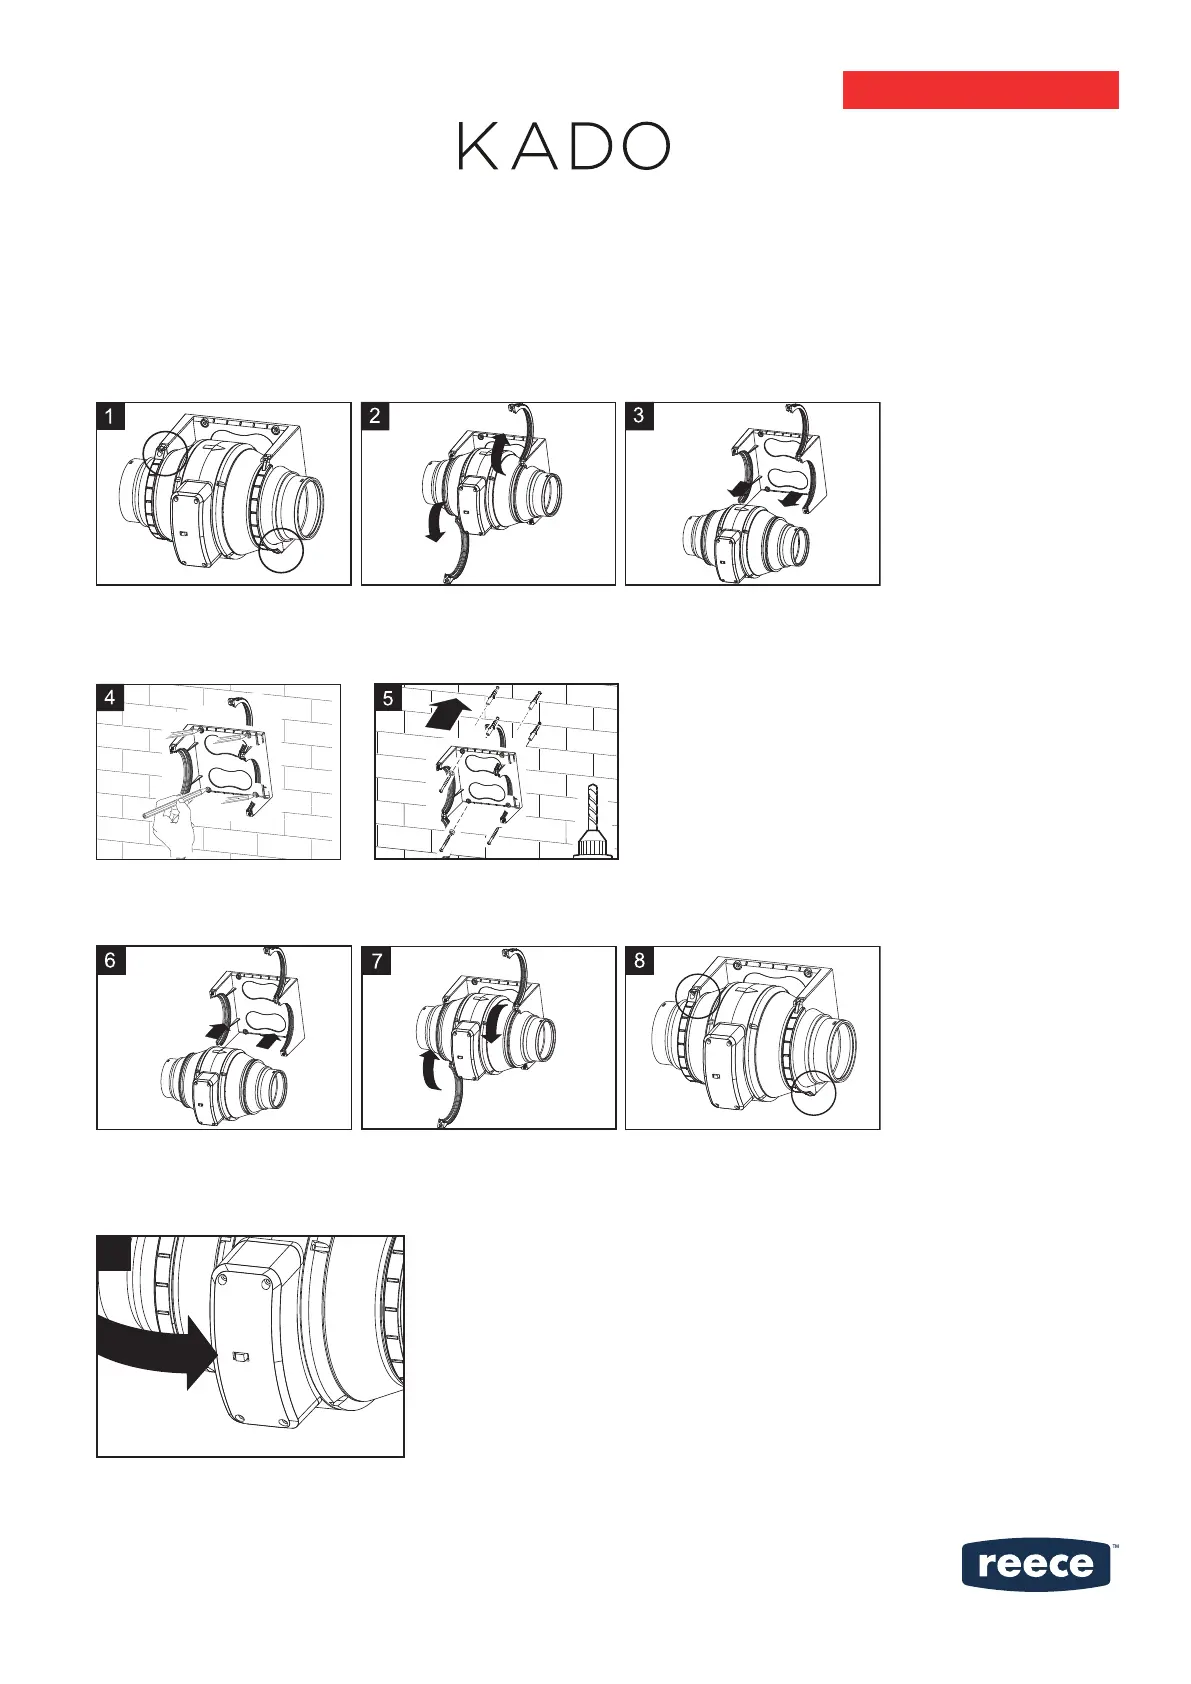
4. To start the installation, the motor wheel assembly must rst be removed. Loosen the two spring clips around the casing and
remove. (Diagrams 1-3 below)
5. Secure the mounting bracket fan ange assembly to a xed structure. (Diagrams 4-5 below)
NOTE: To maximise fan performance, install as near to air outlet point as possible.
6. Replace the fan motor wheel assembly and tighten the two spring clips to secure the product. Please pay attention to the Air
Direction when replacing the motor wheel assembly. (Diagrams 6-8 below)
Kado Aspect Flush Mount Inline Exhaust
7. Select desired airow rate by choosing 'High' (561m
3
H) or 'Low' (438m
3
H) on the speed switch located on the top of the control box of
the fan motor.
High
Low