Page 6 of 6
Installation Instructions
Electricians, please ensure a copy of the Installation
Instructions are left with the end user for future reference
INSTALLING THE FLUSH MOUNT FASCIA KIT
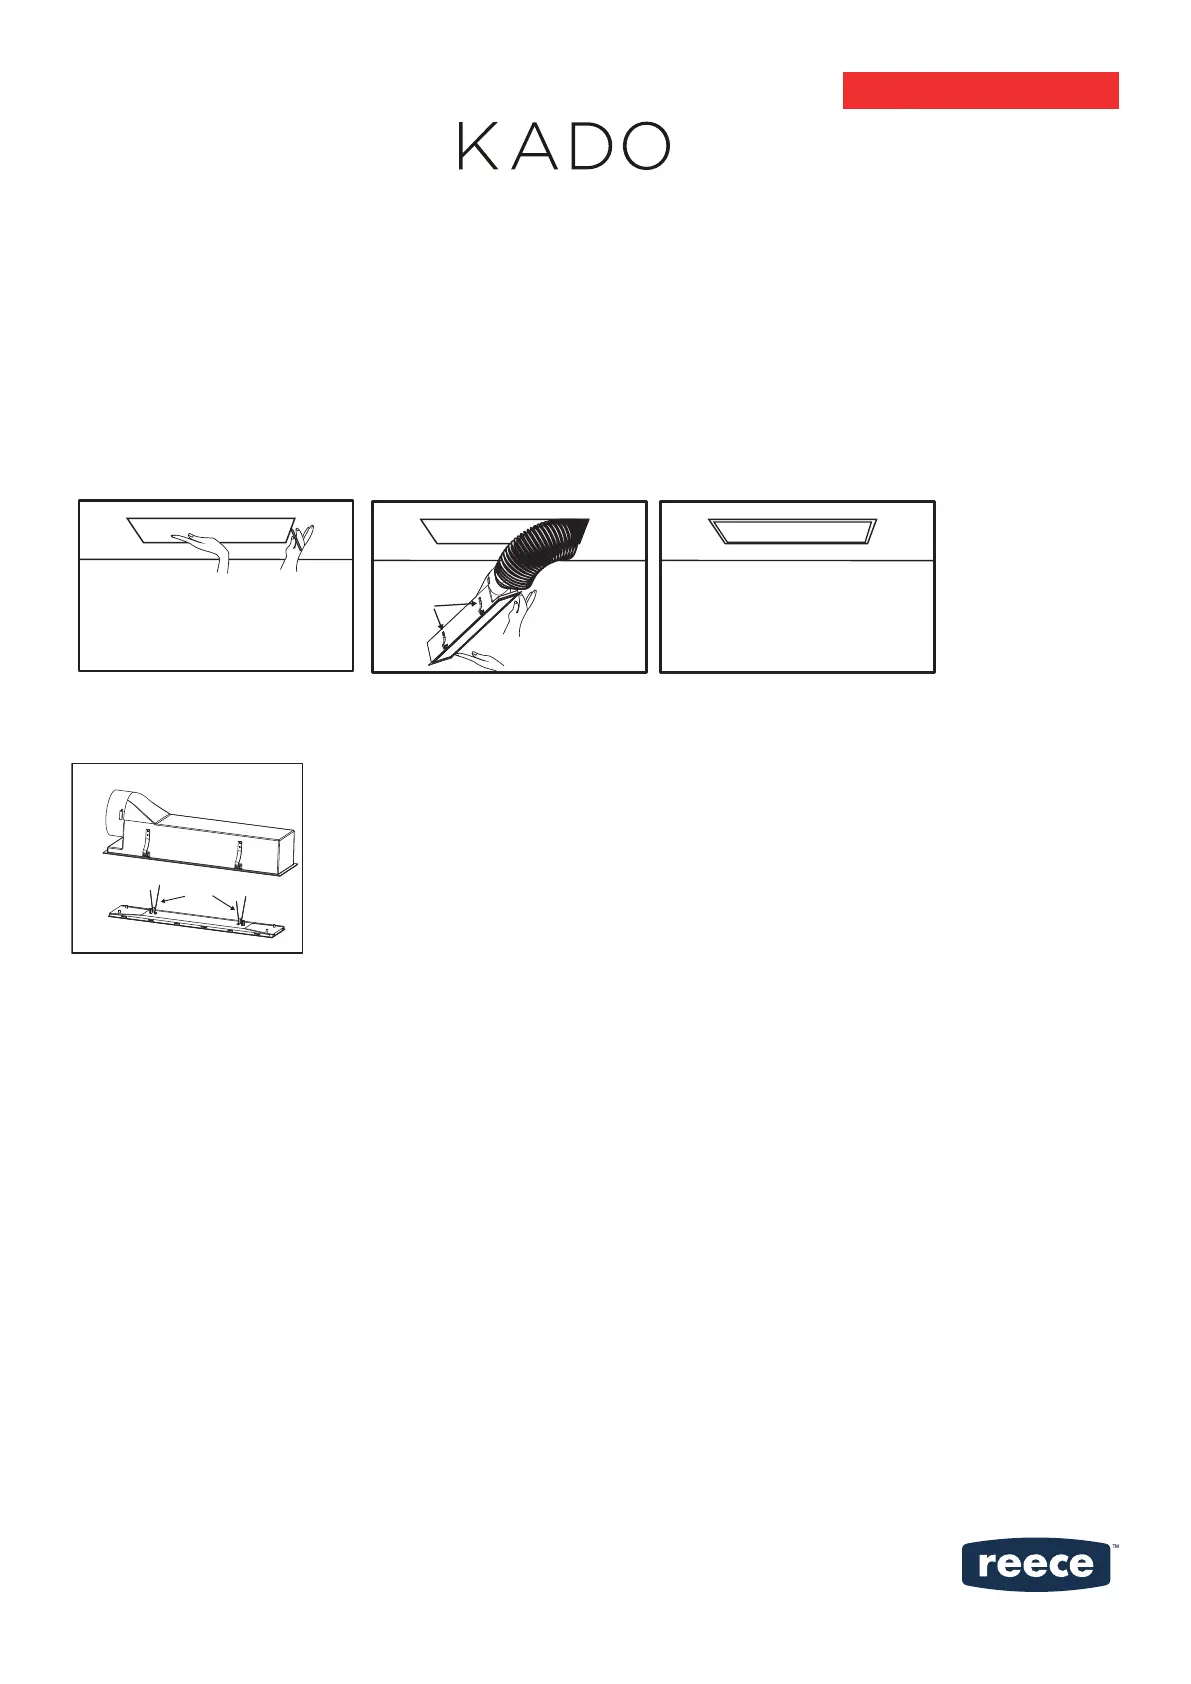
1. Locate a suitable location for the Flush Mount Fascia. Use the template card provided for marking the cut-out hole.
2. Cut a rectangle hole 583 x 153mm into the vents mounting surface.
3. Connect ducting then insert unit into cut-out hole. Ensure the four metal xing springs on side have popped back into position on
the backside of the ceiling board. Fascia may need to be removed to ensure Metal xing springs have fully extended outward onto
back of ceiling board.
cutout template
Metal
xing
springs
Note: To remove Fascia, pull downwards on fascia plate then reach in behind to disengage the spring xing wires.
Spring
xing wires.
Kado Aspect Flush Mount Inline Exhaust
CLEANING AND MAINTENANCE
Before carrying out any maintenance, ensure the power is switched OFF from the mains power supply.
1. Wipe down the fascia and grilles with a wet soapy cloth only. Fascia may be removed for cleaning but do not immerse fascia in
water. Never use petrol, benzene, thinner or any other such chemicals for cleaning.
2. Do not immerse resin parts into hot water over 60
o
C.