Page 5 of 6
Installation Instructions
INSTALLING THE DUCT
1. Cut the required two duct lengths: from the inlet vent to the fan and from the fan to the outlet vent.
2. Secure the duct to inlet side of fan motor with cable ties provided. Attach other end of this duct to outlet on Flush Mount Fascia kit
housing.
3. Repeat step 2 for the fan outlet to the vent outlet.
It is recommended the duct be used in a fully extended position and with minimal amount of bends or turn. This will reduce any
unnecessary friction pressure resulting in reduction of airow.
Electricians, please ensure a copy of the Installation
Instructions are left with the end user for future reference
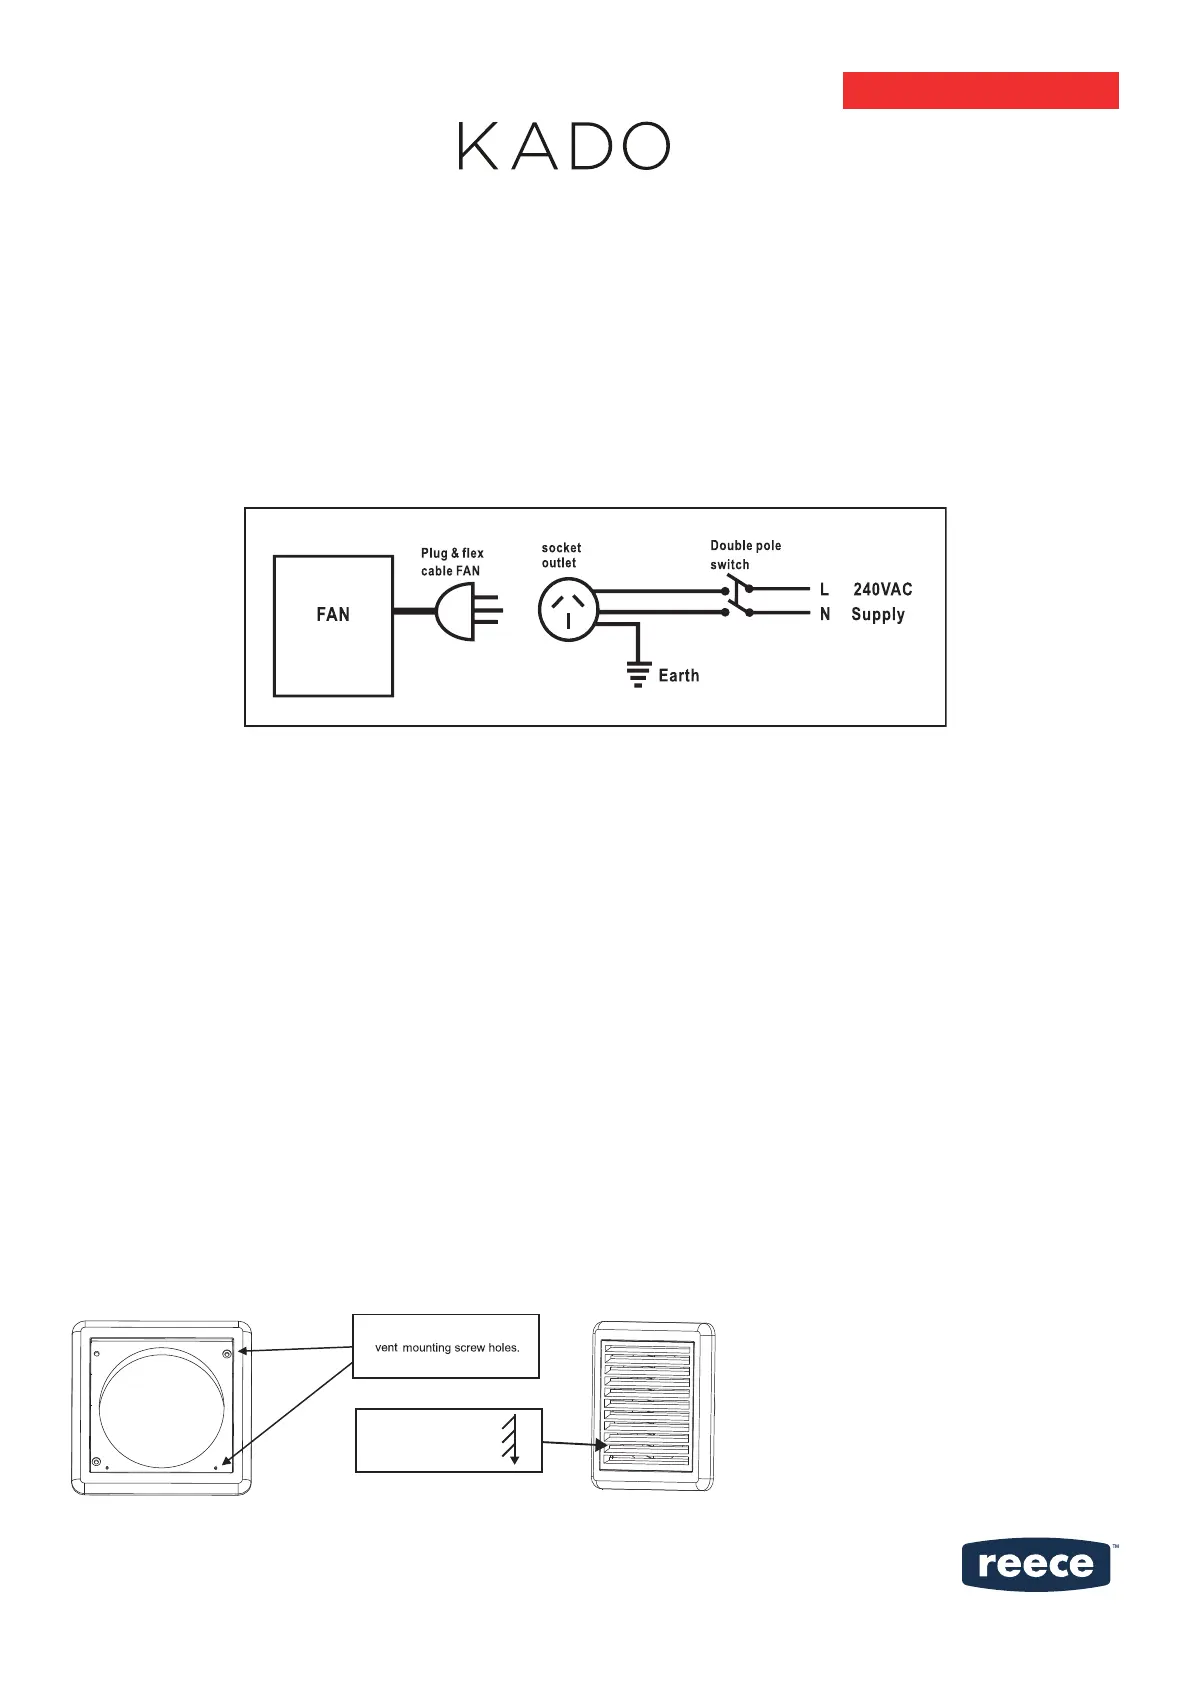
ELECTRICAL CONNECTION
WARNING: All electrical work must be carried out by a licensed electrician. All electrical wiring must be in accordance with the latest
national wiring rules AS/NZS 3000.
WARNING: Ensure the power supply to the exhaust fan is switched OFF before carrying out any installation and maintenance.
Note: A double switch must be included in the electrical wiring of the exhaust fan.
Kado Aspect Flush Mount Inline Exhaust
INSTALLING THE OUTLET VENTS
1. Locate a suitable location for the inlet and outlet vents. For best performance, duct length between inlet and outlet must not be
more than six metres.
2. Cut a 150mm diameter hole into the vents mounting surface. Ensure the area behind cut-out section is clear of electrical wiring,
joists, and structural beams.
3. Remove the grille cover and then insert the vent into the cut out and secure with screws. It is suggested that the duct be secured
prior to xing the vent into position.
4. Click vent louvres back into position, making sure louvres are facing downwards.
Louvres facing
downwards.
Fig. 1.
Fig. 2.