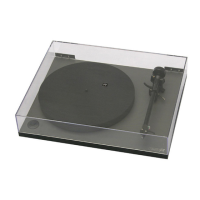
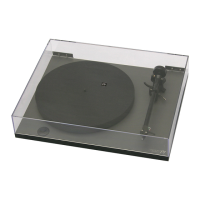
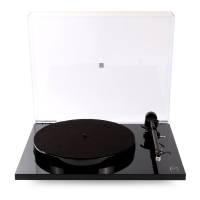
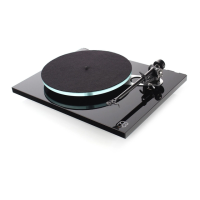
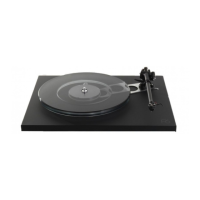
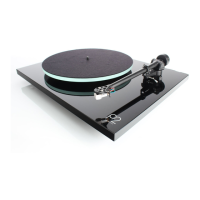
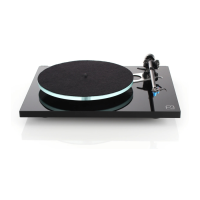
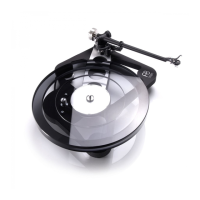
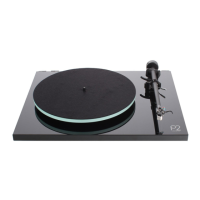
1. PLATTER
2. CARTRIDGE
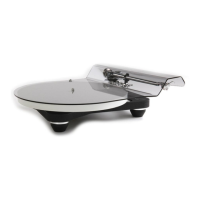
3. TONEARM
4. BALANCE WEIGHT
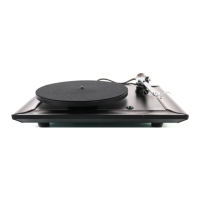
5. PLINTH
6. POWER INPUT
7. PHONO OUTPUT
8. ON/OFF SWITCH*
*UNDERNEATH PLINTH
WARNING: ONLY USE THE SUPPLIED REGA PS2 MAINS ADAPTOR WITH THIS PRODUCT.
LOCATED BENEATH
THE PLATTER
A
B
4
4
1
6
8
7
2
3
5
ENGLISH
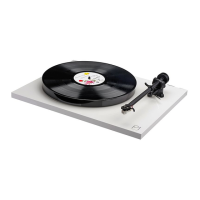
Push the balance weight (4) onto the rear of the tonearm until it reaches the stop point (A). • Connect the power supply to the rear of the turntable
(6). • Connect the phono output (7) to an appropriate phono stage. • Carefully remove the stylus guard from the cartridge. • Turn on the Planar
1 via the on/off switch located on the underside of the plinth (8)
pulley (B). • Bias is automatically set on the RB110, no setting is required.
FRANÇAIS
• Déballez soigneusement la platine en la maintenant toujours à plat. • Enlevez le carton protecteur du sous plateau puis montez le plateau et
le tapis. • Installez le contrepoids (4) à l’arrière du bras et poussez-le jusqu’au butoir (A). • Branchez l’alimentation sur la prise à l’arrière de
la platine (6). • Branchez le bras de lecture (7) sur une entrée phono appropriée. • Enlevez soigneusement le protège-pointe de la cellule. •
Allumez la Planar 1 à l’aide de l’interrupteur marche/arrêt situé sous le socle (8)
(B). • L’anti-skating est automatique sur le bras RB110. Aucun réglage n’est nécessaire.
DEUTSCH
• Bitte entnehmen sie den Planar 1 vorsichtig der Verpackung. Halten sie ihn dabei gerade. • Entfernen Sie die Transportsicherung (Pappe)
unterhalb des Innentellers und legen den Plattenteller und die Matte auf. • Schieben Sie das Gegengewicht (4) vorsichtig auf den Tonarm, bis es
den Anschlag-Punkt (A) erreicht. • Verbinden sie die beiliegende Stromversorgung mit der Buchse an der Rückseite des Gerätes (6). • Schließen
Sie den Plattenspieler (7) an den Phonoeingang eines Verstärkers an. • Entfernen Sie vorsichtig den Nadelschutz vom Tonabnehmer-System. •
Schalten Sie den Planar 1 über den Ein/Aus-Schalter an der Unterseite des Plattenspielers ein (8)
(B). • Die Antiskating-Einstellung erfolgt beim neuen Rega RB110-Tonarm
automatisch, eine Justage ist nicht erforderlich.
ESPAÑOL
• Abrir con cuidado el plato giratorio. Siempre plano. • Retire la tarjeta del embalaje de debajo de la sub plato y montar el plato. • Empuje el
contrapeso (4) en la parte trasera del brazo hasta que llega al punto (A). • Conectar la fuente de alimentación en la parte trasera del giradiscos (6).
• Conecte el cable del brazo (7) a una entrada de fono apropiada. • Retirar con cuidado el protector de aguja de la cápsula. • Encienda el Planar
1 a través del interruptor on/off situado en la parte inferior de la base (8)
correa (B). • La desviación se establece automáticamente en el RB110, no se requiere ningún ajuste.
PS2 (UK)
INPUT
OUTPUT
INPUT
OUTPUT
INPUT
OUTPUT
INPUT
OUTPUT
INPUT
OUTPUT
INPUT
OUTPUT