3
13
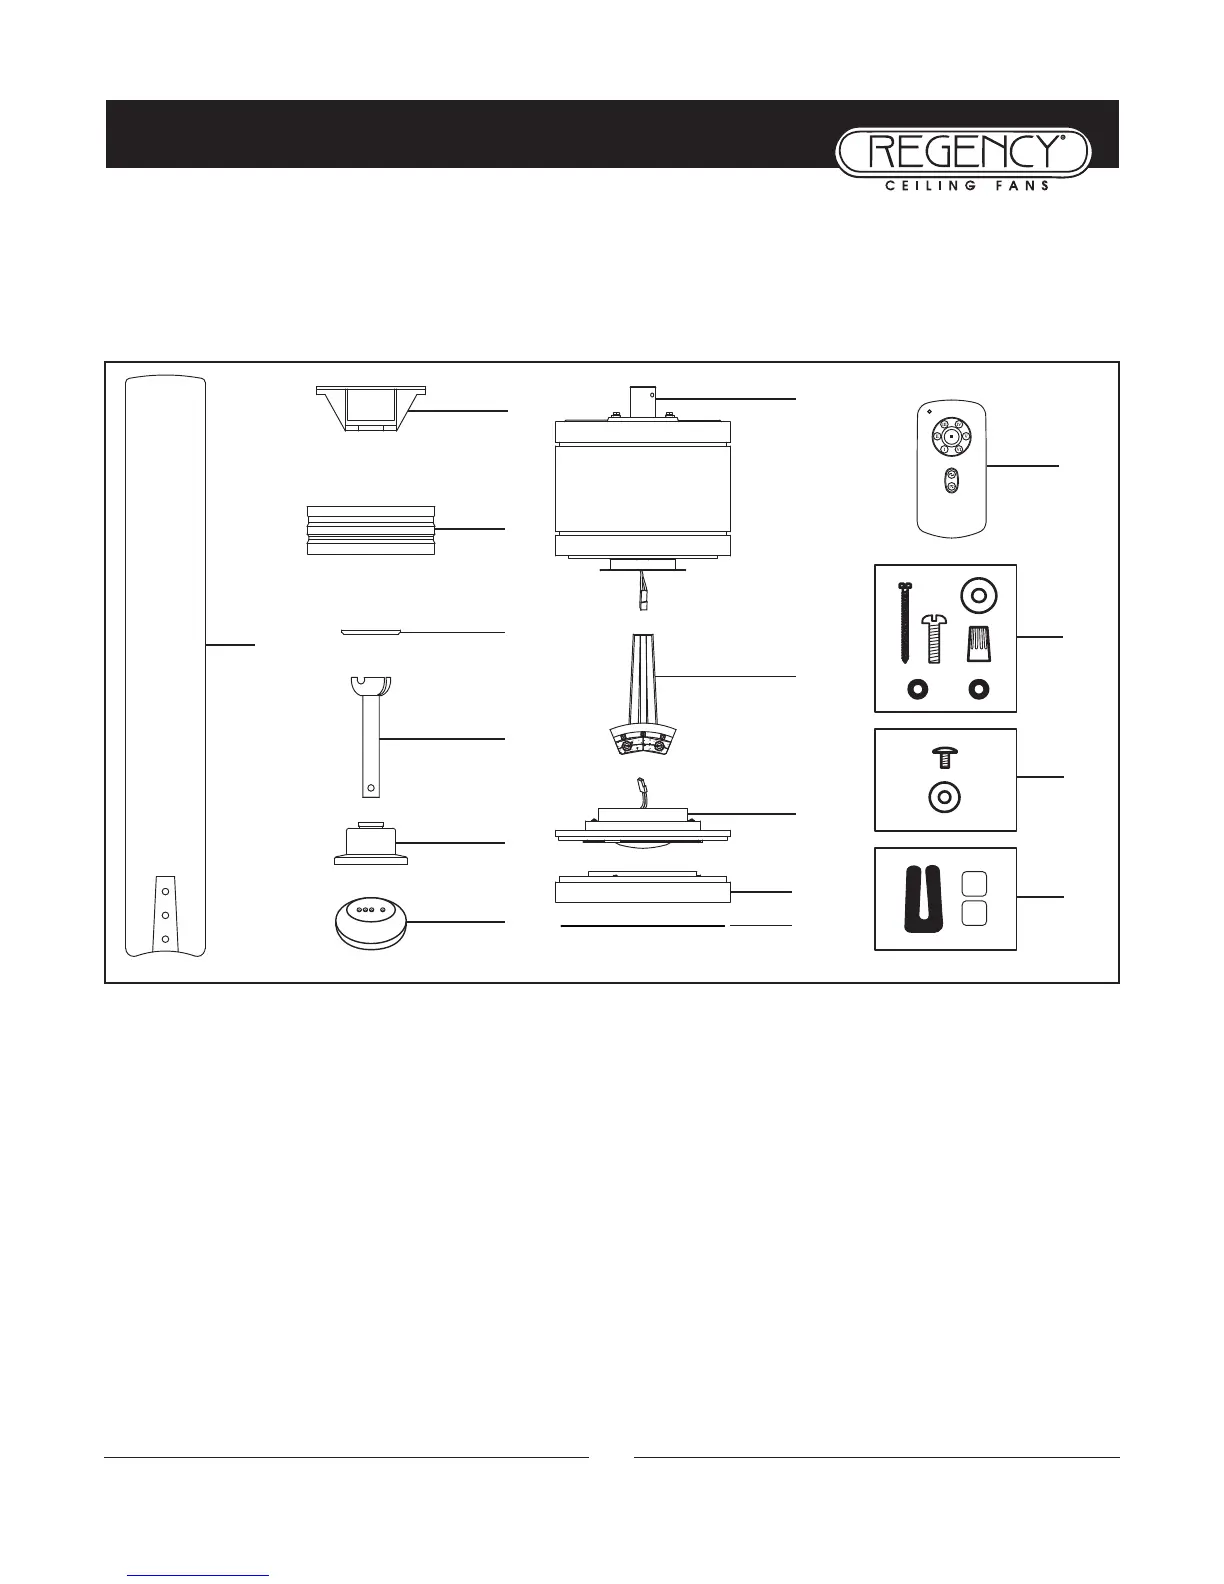
1. Fan blades (8)
2. Hanging bracket
3. Ceiling canopy
4. Canopy screw cover plate
5. Downrod/ball assembly
6. Collar cover
7. Ball moisture cap
8. Fan housing with motor (Remove rubber shipping supports around motor, if included on your fan. Save screws.)
9. Blade arms (8)
10. 16W LED light kit
11. Light cover
12. Metal cover
13. Transmitter+holder+2 mounting screws
14. Bracket mounting hardware (wood screws, screws, lock washers, washers, wire nuts)
15 Blade arm to blade screws, w/washers (25)
*
2 set of screws are provided-a long set and a short set, depending on which type of blades you choose for your fan.
16. Balance kit
NOTE:
Design of parts shown above may look slightly different for your specific model of fan.
UNPACKING YOUR FAN
1. Unpack your fan and check the contents. Do not discard the carton. If warranty replacement or repair is ever
necessary, the fan should be returned in original packing. Remove all parts and hardware. Do not lay motor
housing on its side, or the decorative housing may shift, be bent or damaged.
2. Examine all parts. You should have the following:
1
2
6
7
3
4
5
15
14
16
8
9
10
11
12