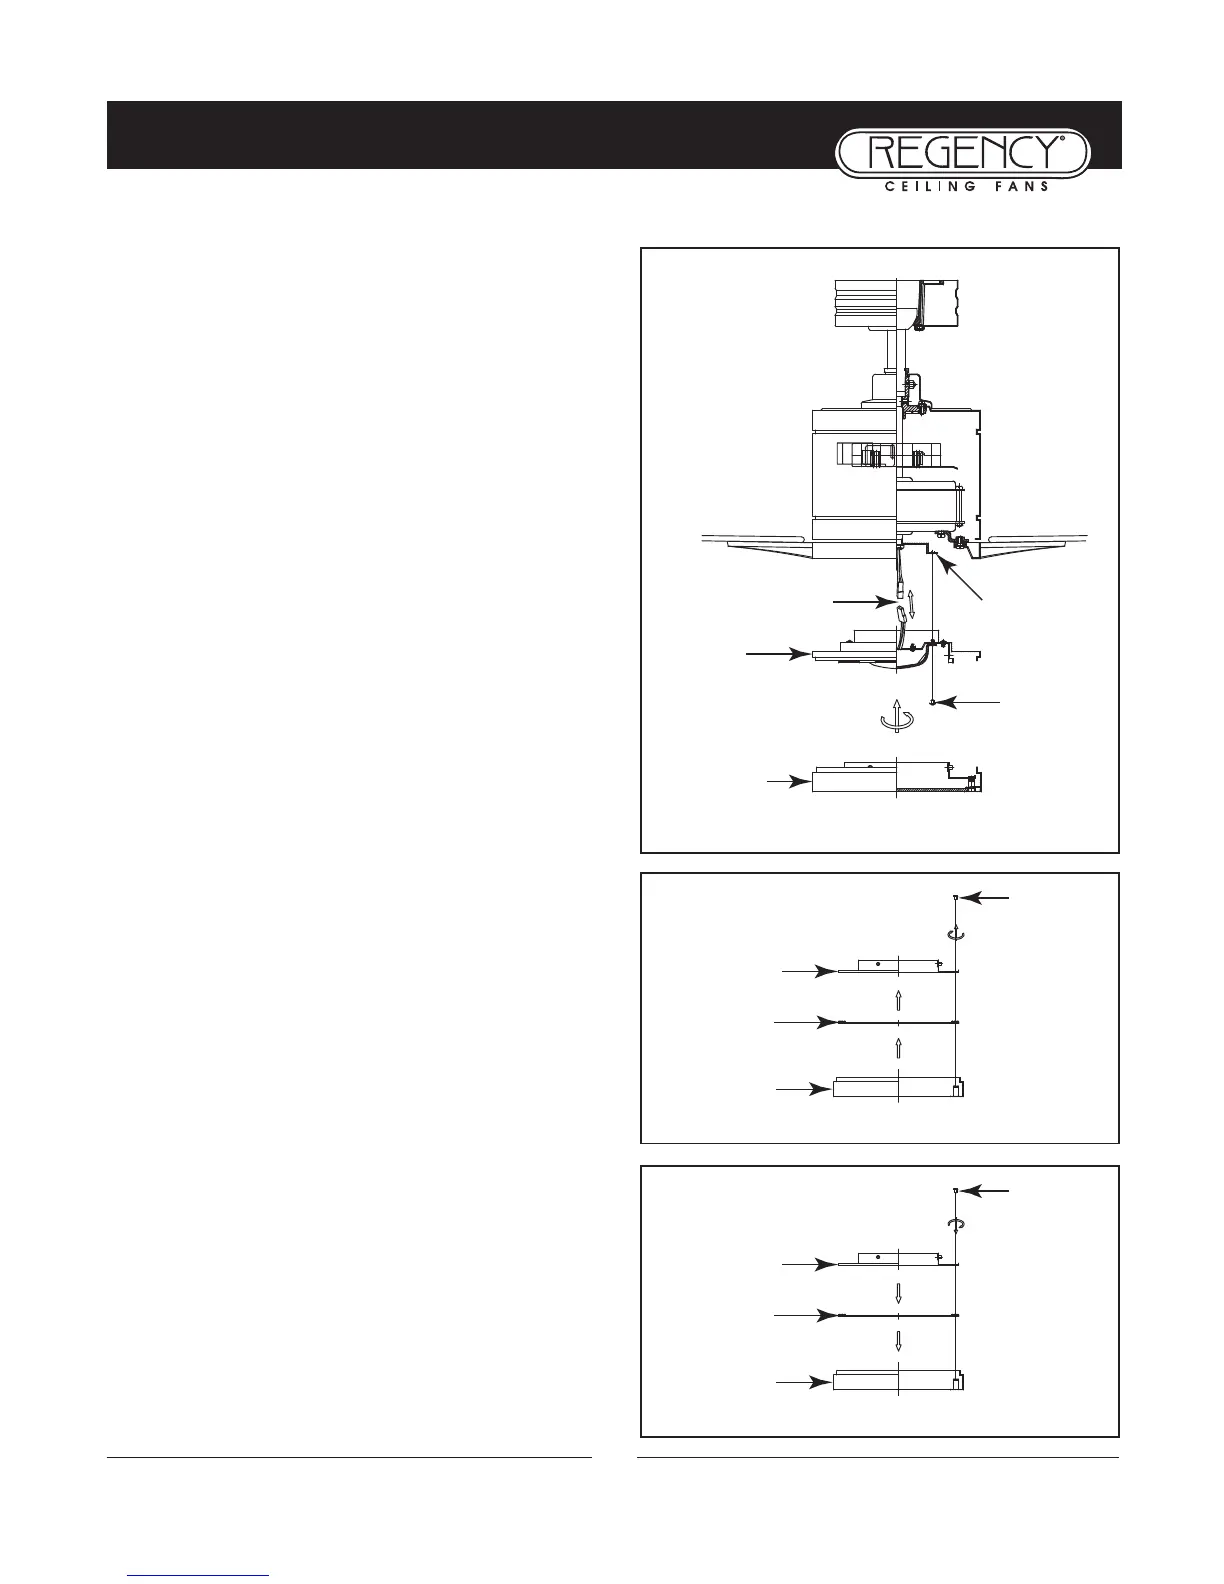
INSTALLING THE LIGHT KIT AND GLASS SHADE
Step1. Remove one of the three screws on the mounting
hub located on the fan motor. (Fig. 1)
Step 2. While holding the LED light kit under your fan,
make the polarized plug connections: (Fig. 1)
- Red to white
- Black to black
NOTE: If you do not plan to install the LED light kit with
your fan at this time, don’t make the wire connections.
Remove the screws and take out the glass board form the
light cover (Fig. 2), then attach the metal cover to the
light cover B and light cover A with the screws provided.
(Fig. 3)
Step 3. Tuck connections neatly into LED light kit, place
the LED light kit to the mounting hub with 3 screws pro-
vided. (Fig. 1)
Step 4. Raise the light cover against the LED light kit and
turn clockwise until snug, DO NOT OVERTIGHTEN.
(Fig. 1)
Step 5. Restore power and your light kit is ready for opera-
tion.
8
Fig. 1
Screws
Mounting Hub
(bottom of motor)
Light Kit
Wire connectors
Fig. 2
Light
Cover B
Light
Cover A
Glass
Board
Screws
Fig. 3
Light
Cover B
Light
Cover A
Metal
Cover
Screws
Light Cover