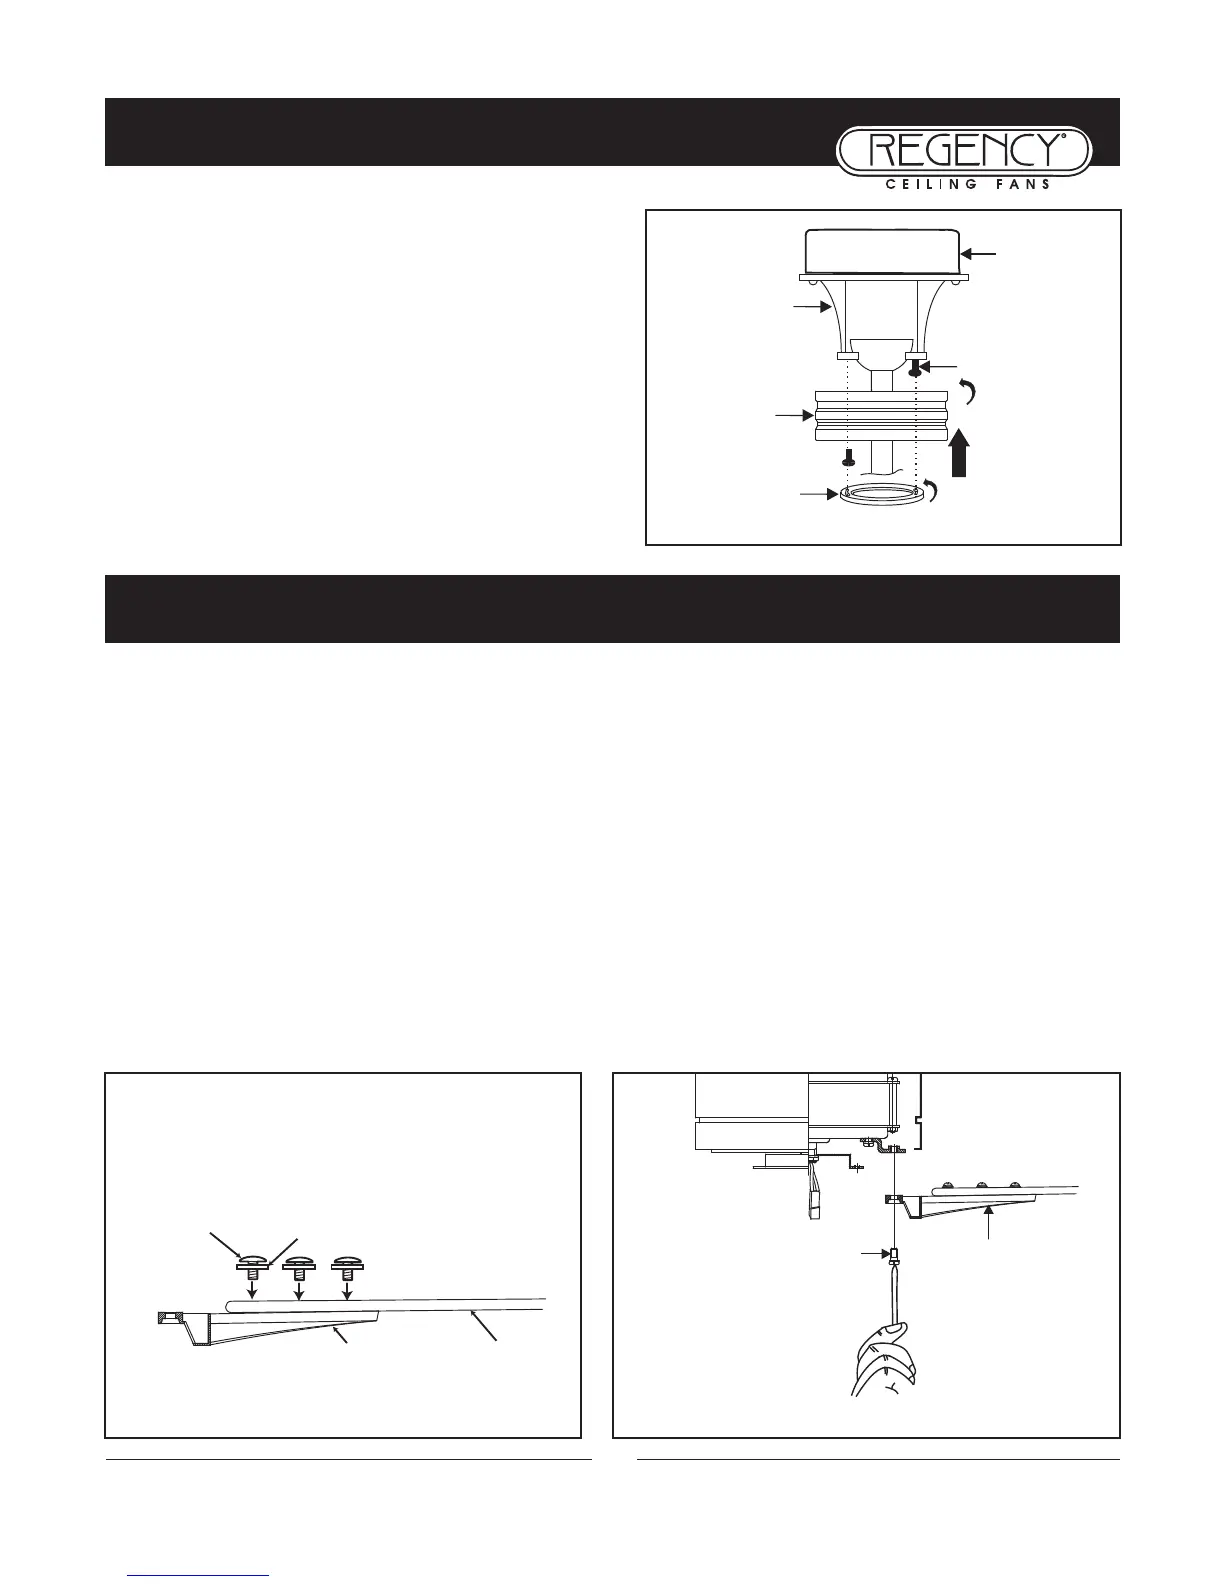
1. Place washer on screw. Insert this assembly through the blade and start the screw into the blade arm. Repeat this
procedure without tightening the screw until all 3 screws have been started into the blade arm (Fig. 1).
NOTE:
Fans that have painted finishes are packed with gaskets that can be used between the blade arm and blade to
help prevent a clicking noise that may develop if blade screws loosen over time.
2. Tighten each screw starting with center screw.
3. Fasten blade assembly to motor with provided screws and lock lockwashers. Repeat procedure for remaining
blades (Fig. 2). Make sure screws are TIGHT!
recommended, as they tend to strip the heads of the screws and usually
will not fully compress the lock washers on the motor screws. Use a large flat blade screwdriver for final tightening to
fully compress the washers. This will help ensure proper alignment of the blades and noise-free, wobble-free running.
7
Fig. 1 Fig. 2
Screws
Blades
Assembly
Screw
Washer
Blade Arm
Blade
Install gasket between
blade arm and blade
(optional)
FINISHING THE INSTALLATION
BLADE ATTACHMENT
1. Tuck connections neatly into ceiling outlet box.
2. Slide the canopy up to mounting bracket and place the
key hole on the canopy over the screw on the mounting
bracket, turn canopy until it locks in place at the narrow
section of the key holes.
3. Align the circular hole on canopy with the remaining hole
on the mounting bracket, secure by tightening the two set
screws. Note: Adjust the canopy screws as necessary until
the canopy and canopy cover are snug.
WARNING:
Make sure the hook on the hanging bracket
properly sits in the groove in the hanger ball before attaching
the canopy to the bracket by turning the housing until it
drops into place.
Canopy
Screws
Canopy Screw
Cover Plate
Ceiling Fan
Outlet Box
Hanger
Bracket
INSTALLING THE FAN