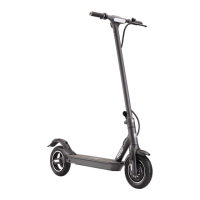
This document outlines the operation and features of the Reid Sphinx II and Ananda D16 display, designed for electric bicycles. It serves as a comprehensive guide for users, covering everything from basic functionality to advanced parameter settings and troubleshooting.
The display unit is designed for ease of use and provides essential information to the rider. Its primary function is to show real-time cycling data, including speed, mileage, and battery level. The display also integrates control functions for the electric bicycle's assist system and lighting.
Function Description
The instrument provides a wide array of functions to enhance the electric bicycle riding experience:
- Battery Level Display: Shows the current remaining battery level, with a visual representation using a pixel bar or energy grid. It prioritizes information from the Battery Management System (BMS) and defaults to controller data if BMS information is unavailable. The display uses a green progress bar for sufficient battery and indicates undervoltage with a prompt for immediate charging.
- Real-time Speed/Mileage Data Display: Continuously refreshes the current speed and allows riders to cycle through various mileage-related data by pressing the "start/stop" key. This includes total mileage, trip distance, trip time, maximum speed, average speed, average power consumption, instantaneous power consumption, motor power, cycling power, and remaining mileage.
- Assist Level Display: Indicates the current assist level, which can be adjusted to control the motor's output power. Levels range from 0 (no motor output) to 4 (maximum motor output). The display shows "OFF," "ECO," "SPORT," "SHIFT," and "BOOST" for different assist levels, and "WALK" for the assist walk mode.
- Headlight On and Off: Allows manual control of the headlight. The headlight can be turned on or off by pressing and holding the "headlight" key.
- 6 km/h Assist Walk Function: Activates a low-speed assist mode for walking alongside the bicycle. Pressing and holding the "walk" key illuminates the assist walk sign and engages the mode. Releasing the key exits this function.
- USB Charging Function: Provides a USB port for charging external devices, with an output voltage of 5V and a maximum current of 1A. This function can be enabled or disabled via the menu or by pressing the "plus" key.
- WiFi Function: When activated, a WiFi sign illuminates if connected to a network, indicating wireless connectivity.
- Error Code Display: Automatically shows the code of the latest fault in the electrical control system (controller and instrument) on the main interface, accompanied by a red warning sign.
- One-key Battery Wakeup: Allows the instrument to wake up the battery with a single key press.
- Setting Function Display: Provides access to various settings, including clearing trip data, adjusting light sensing parameters, selecting speed and power consumption units, language selection, factory reset, WiFi status and name, automatic shutdown time, and customized clipping functions.
- Read-only Information Display: Shows firmware and hardware version numbers, serial numbers for the motor, battery, and instrument, total mileage, battery voltage, cycle count, and State of Health (SOH) of the battery.
- Automatic Control of Backlight Brightness: Adjusts the display's backlight brightness based on the intensity of external ambient light.
- Automatic Control of Headlight On and Off: Automatically turns the headlight on or off depending on the external ambient light intensity.
Usage Features
The instrument is designed for intuitive interaction through its key module, which is connected to the display unit via a cable.
- Start/Stop: The instrument powers on automatically when the battery provides output. To shut off the instrument, press and hold the on-off key for 2 seconds. If the instrument is not yet on, pressing the on-off key for 1 second will turn it on. The system will automatically shut down if the battery button is pressed and held, or if the system remains idle for 30 consecutive minutes.
- Auto-Sleep Mode: The instrument enters an auto-sleep mode after 5 consecutive minutes of inactivity (configurable via settings), reducing current consumption to below 6 mA.
- Interface Navigation: Upon startup, the display first shows the "ANANDA" interface before transitioning to the main interface.
- Assist Level Adjustment: Use the "plus" key to increase the assist level and the "minus" key to decrease it.
- Menu Navigation: To enter the setting menu, press and hold both the "plus" and "minus" keys. Within the setting menu, press the "start/stop" key to enter a sub-menu or confirm an option. To return to the previous level, select the "return" option and press "start/stop." To return to the main interface from any setting menu, press and hold the "start/stop" key.
- Trip Distance Parameter Reset: In the settings menu, navigate to "Reset Trip" and select "Yes" to clear single trip data.
- Light Sensing Parameters: Adjust backlight levels (20%, 40%, 60%, 80%, 100%, or Auto) in the "Light Sensing" option. The factory default is 80%.
- Speed Unit Setting: Choose between "km/h" and "mph" as the speed unit. The factory default is "km/h."
- Power Consumption Unit Setting: Select "Ah" or "Wh" for power consumption units. The factory default is "Ah."
- Language Setting: Choose between "English" and "French." The factory default is "French."
- Factory Reset: Select "Yes" in the "Factory Reset" option to restore all data to factory defaults.
- Automatic Shutdown Time: Configure the idle time before automatic shutdown (5min, 10min, 15min, 20min, 25min, 30min). The factory default is 5 minutes.
- Function Clipping: Customize which data fields are displayed on the main interface. A "O" symbol indicates a revoked function, while a " " symbol indicates a chosen function.
- WiFi Settings: Enable or disable the WiFi function and set the WiFi name. Changes take effect after restarting the instrument. The factory default is "Enable."
- Read-Only Information Access: View detailed information about the motor, battery, and instrument, including firmware versions, hardware versions, and serial numbers.
Maintenance Features
The instrument is designed for durability and ease of maintenance, with clear guidelines for troubleshooting and repair.
- Collision Protection: The instrument should be protected against collision as much as possible. In case of damage, it should be sent for repair promptly.
- Error Code Troubleshooting: The display provides error codes to help diagnose issues with the electrical control system. A table of error codes and their definitions and solutions is provided:
- 21 Abnormal current: Restart; if the issue persists, inform the supplier.
- 22 Handle fault: Check the crank before powering on the system.
- 23 Motor phase loss: Check if the motor phase line is connected properly to the controller.
- 24 Abnormal motor hall signal: Test the cable; if the fault persists after reset, inform the supplier.
- 25 Brake fault: Check the crank before powering on the system.
- 28 Other faults: Test and check if the instrument connection is intact.
- 30 Abnormal communication: Check if the connections are intact.
- 31 Start key is sticky when started: Test the key and replace the instrument key if the fault persists.
- 32 Abnormal operating pressure: Replace instruments.
- 33 Self-check fault: Replace instruments.
- 34 Assist walk key is sticky: Test the key and replace the instrument key if the fault persists.
- Error Code Clearing: Fault codes will disappear automatically once the underlying issue is resolved.
- Automatic Shutdown for Critical Errors: In case of error code 30 (abnormal communication), the instrument will alarm and display the code within 5 seconds, then automatically turn off after 60 seconds.
- Software Updates: The manual acknowledges that there may be differences between the meter software version on a bicycle and the manual's specifications, with the actual product prevailing. This implies that software updates may occur, potentially introducing new features or improvements.
- Warranty Information: The product comes with a 30-month warranty from the date of purchase, covering faults arising from product quality under normal use. Exclusions include unauthorized disassembly, incorrect operation or installation, cosmetic damage (shell scratching, wire breakage), force majeure events, and expired warranty.
The device is designed to conform to EN 15194:2017 and CE certification requirements, and its WiFi functionality meets RED certification requirements, ensuring a reliable and safe user experience.