Do you have a question about the Rekluse EXP and is the answer not in the manual?
Symptoms of EXP assembly wear include clutch slippage, stalling, or dragging with correct free play.
Defines 'Light' and 'Heavy' inspection ranges based on rider use and terrain conditions.
Remove the EXP assembly from the bike and clean off any debris or oil.
Measure EXP width from friction pad to friction pad and check against minimum thickness requirements.
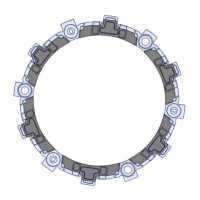
Push and release wedges to ensure they move easily and spring back without catching.
Inspect EXP for tab hammering, damage, missing friction pads, and glazing.
Push and turn pins to unlock and remove pins and springs for disassembly.
Inspect EXP ramps for raised outlines (burrs) or indentations; replace if damaged.
Inspect Teflon pads in wedges for proper seating and signs of damage like nicks or cuts.
Reassemble EXP bases, wedges, springs, and pins, ensuring wedges move freely.
The Rekluse EXP assembly is a crucial component in a clutch system, designed to manage power transfer and engagement. It is built with high-quality materials, but like all clutch components, it is subject to natural wear and tear, which varies based on rider usage and terrain. The primary function of the EXP assembly is to allow for automatic clutch engagement and disengagement, providing a smoother riding experience and preventing engine stalls.
The EXP assembly operates by utilizing internal ramps and wedges that respond to engine RPMs. As engine speed increases, the wedges move outward due to centrifugal force, engaging the clutch and transferring power to the drivetrain. Conversely, when engine speed decreases, the wedges retract, disengaging the clutch and allowing the engine to idle without stalling. This automatic functionality eliminates the need for manual clutch lever operation in many riding situations, enhancing control and reducing rider fatigue. The system is designed to provide consistent performance, but its effectiveness relies on proper maintenance and timely inspection of its components.
The Rekluse EXP assembly offers several usage features that enhance the riding experience:
Regular inspection and maintenance are vital to ensure the longevity and optimal performance of the Rekluse EXP assembly. The manual outlines a comprehensive inspection schedule and detailed steps for maintenance:
This comprehensive approach to maintenance ensures that the Rekluse EXP assembly continues to provide reliable and efficient clutch operation, extending its lifespan and enhancing the overall riding experience.
| Type | Auto Clutch |
|---|---|
| Material | Steel |
| Compatibility | Specific motorcycle models |
| Installation | Requires mechanical skill and tools. |
| Engagement | Automatic |
| Adjustability | Adjustable engagement |