06
10. Itissafetoleavewaterinthepressuretankwhenthesteamcleanerisnot
inuse.Ifitisforanextendedperiodoftime(months)thenitisbesttoush
outtheremainingwater.Todoso,followthewaterremovalinstructions
as outlined in the maintenance of the boiler section.
THIS MODEL IS PROVIDED WITH THE
FOLLOWING FEATURES
RED CONTROL LIGHT (4)
Aredwarninglightsignalsthatthewaterinthetankhasbeenemptied.Abuzzerwill
soundincaseyoudidnotseetheredlight.Acontinuoushummingsoundfromthe
pumpcomesbeforethis.Atthispointswitchoffthesteamcleanerbyturningitto
position“0,”llthetankwithwaterandswitchbackon.
STEAM REGULATION (ON HANDLE)
Withthesteamdeliveryadjustment,itispossibletoselectthesteamquantitythat
youwishduringyourcleaningfromminimumtomaximum.
PRESSURE GAUGE (8)
Thepressuregaugeindicatestheoperatingpressureofthesteamcleaner.Ifthe
needle is in the green section, the product is operating normally. If the needle
is continuously in the red section, reduce amount of steam being used, if this does
not correct the problem the steam cleaner may require service. Please contact
the place of purchase for service.
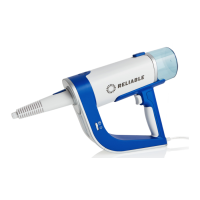
USING THE ACCESSORIES
CONNECTING THE ACCESSORIES
Inserttheplugattheoppositeendofthesteamgun/hose(11)totheconnecting
outlet(10)alltheway,makingsureitcannotbepushedinfurther.Connectthe
handleofthesteamgun(11)totheextensiontubes(12),pressingthelockingbut-
tonlightlyuntilthebuttonsnapsin.Alltheaccessoriesareconnectedthesameway.
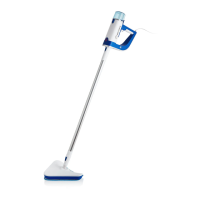
Theangleadapter(16)isusedfortherectangular(13)andtriangular(14)brush
in the following way: hold the brush in one hand with the bristles pointing down while
with the other hand inserts the angle adapter into the brush pointing it downward.
Afterthis,turntheangleadapter180ºsothatthelineontheangleadapterand
thedotonthebrushlineup.Whenthelineandthedotlineup,youcanadjust
thegreylevertothemiddleposition(locked)tolockthebrushsothatitcannot
move,ortothepositionclosesttoyou(rotate)toallowforthebrushheadto
rotate.Toremovethebrush,makesurethegreyleverisinthepositionfurthest
fromyou(assemble)andmakesurethelineontheadapterandthedotonthe
brushlineup.Rotate180ºtoremove.