Page 20
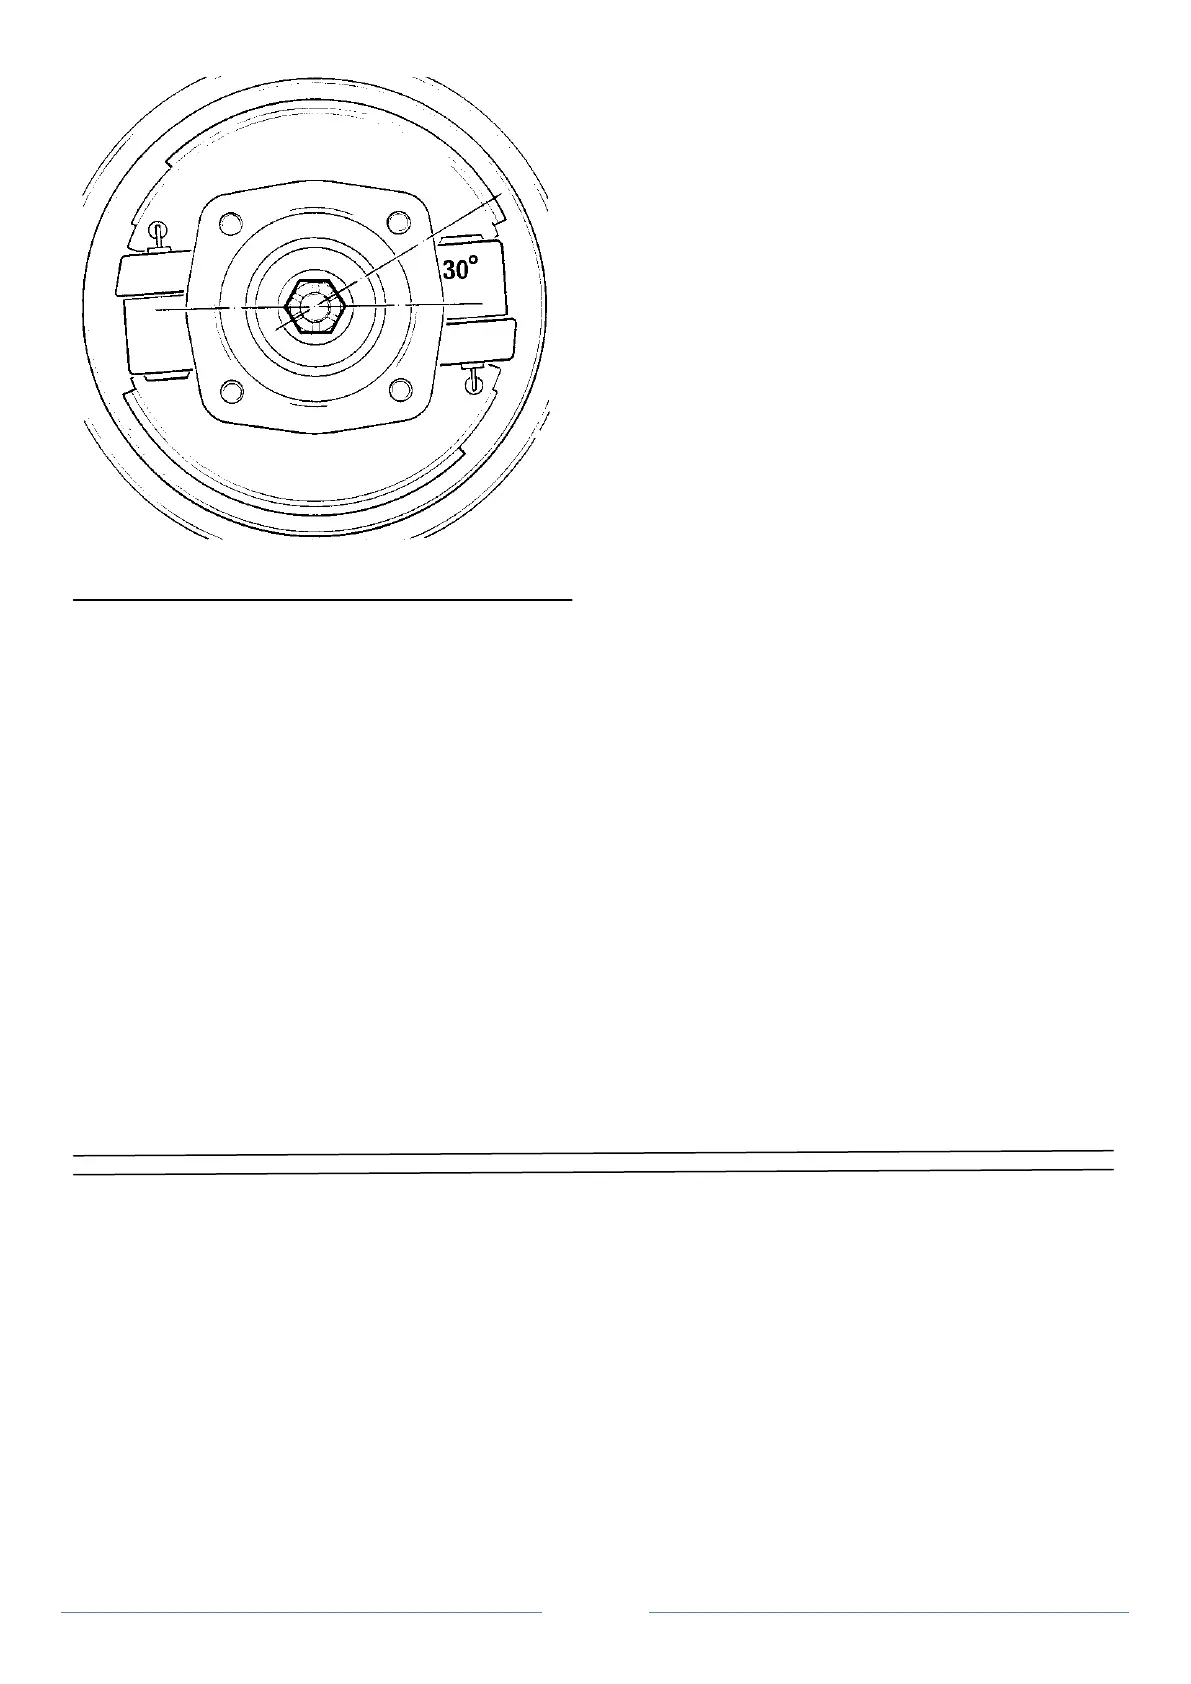
Figure 6 Hub nut adjustment
Re-assembly
1. Locate the outer track of the inner bearing in its housing in
the hub and ensure it is firmly and squarely seated. Pack the inner
cone and roller assembly with the recommended grease (see
lubrication chart Page 13) and insert the cone in to the bearing track.
2. Renew the felt seal. This should be securely attached to the
retainer with "Hermatite" liquid jointing compound or similar oil
resistant adhesive. When dry, soak the seal and retainer assembly
with oil with the surplus squeezed out before firmly fitting it in the
hub.
3. Lightly grease the front hub with the approved grease, in
the area between the inner and outer bearings.
Note: Over packing the hub with grease can lead to overheating and
possible bearing failure.
4. Locate the outer bearing outer track in the hub, again
ensuring that it is firmly and squarely seated. Pack the outer bearing
cone and roller assembly with an approved grease and insert the cone
in to the bearing track.
5. Position the front hub assembly on to the stub axle and
secure with the large retaining washer and the castellated nut,
tightening finger tight until slight resistance can be felt whilst turning
the hub.
6. Slacken the nut back until a bearing float of between 0.05
to 0.15 mm is obtained. A dial gauge is preferable for this operation
but if one is not available, slacken the nut off half a flay, equivalent to
30 degrees (figure 6). Note: The importance of the correct end float
cannot be over emphasised. Over tightening the bearings will cause
overheating and subsequent bearing failure.
7. Fit a new split pin to the castellated nut.
8. Seal the centre vent hole of the hub cap with grease and
apply a quantity to the inside of the cap. Fit the cap to the hub.
9. Refit the brake drum.
10. Refit the road wheel and take the opportunity of testing for
bearing end float by rocking the wheel at the outside diameter of the
tyre. There should be approximately 1.5 mm (1/16") movement at the
tyre periphery.
11. Adjust brakes.
Operation 10 Hub bearing adjustment
Checking
1. Jack up the car and remove the front wheel.
2. Ensure that the brake shoes are not dragging or restricting
movement and rotation of the hub. Slacken off the hoes or remove
the brake drum as necessary.
3. Check the bearing end-float. a correctly adjusted hub will
have end-float within 0.05 to 0.15 mm (0.002 to 0.006 in). a dial gauge
should be used for checking purposes.
Adjusting
4. Prise off the hub cap.
5. Wipe off grease from the end of the stub axle.
6. Remove the split pin from the castellated nut and discard.
7. Tighten or slacken the castellated nut as necessary to
achieve the correct end-float. (see Operation 9)
8. Fit a new split pin.
9. Clean the hub cap and partially fill with fresh grease,
ensuring that the vent hole is sealed with grease.
10. Fit the hub cap.
11. Refit the brake drum (if removed) and adjust the brake.
12. Fit the road wheel and remove car from jack.