Page 39
Operation 4 Oil pump removal and replacement
(with sump removed)
1. Rotate engine to TDC (Section T)
2. Disconnect spark plug leads from terminals.
3. Disconnect the low tension lead from the coil.
4. Unscrew the single retaining bolt at the securing the
distributor clamp to the cylinder block, complete with washer and lock
washer, and remove the distributor. Do not disturb the actual clamp
nut and bolt unless the ignition timing is to be reset.
5. Unscrew two nuts complete with lock washers and remove
the oil pump assembly, including strainer, from the cylinder block
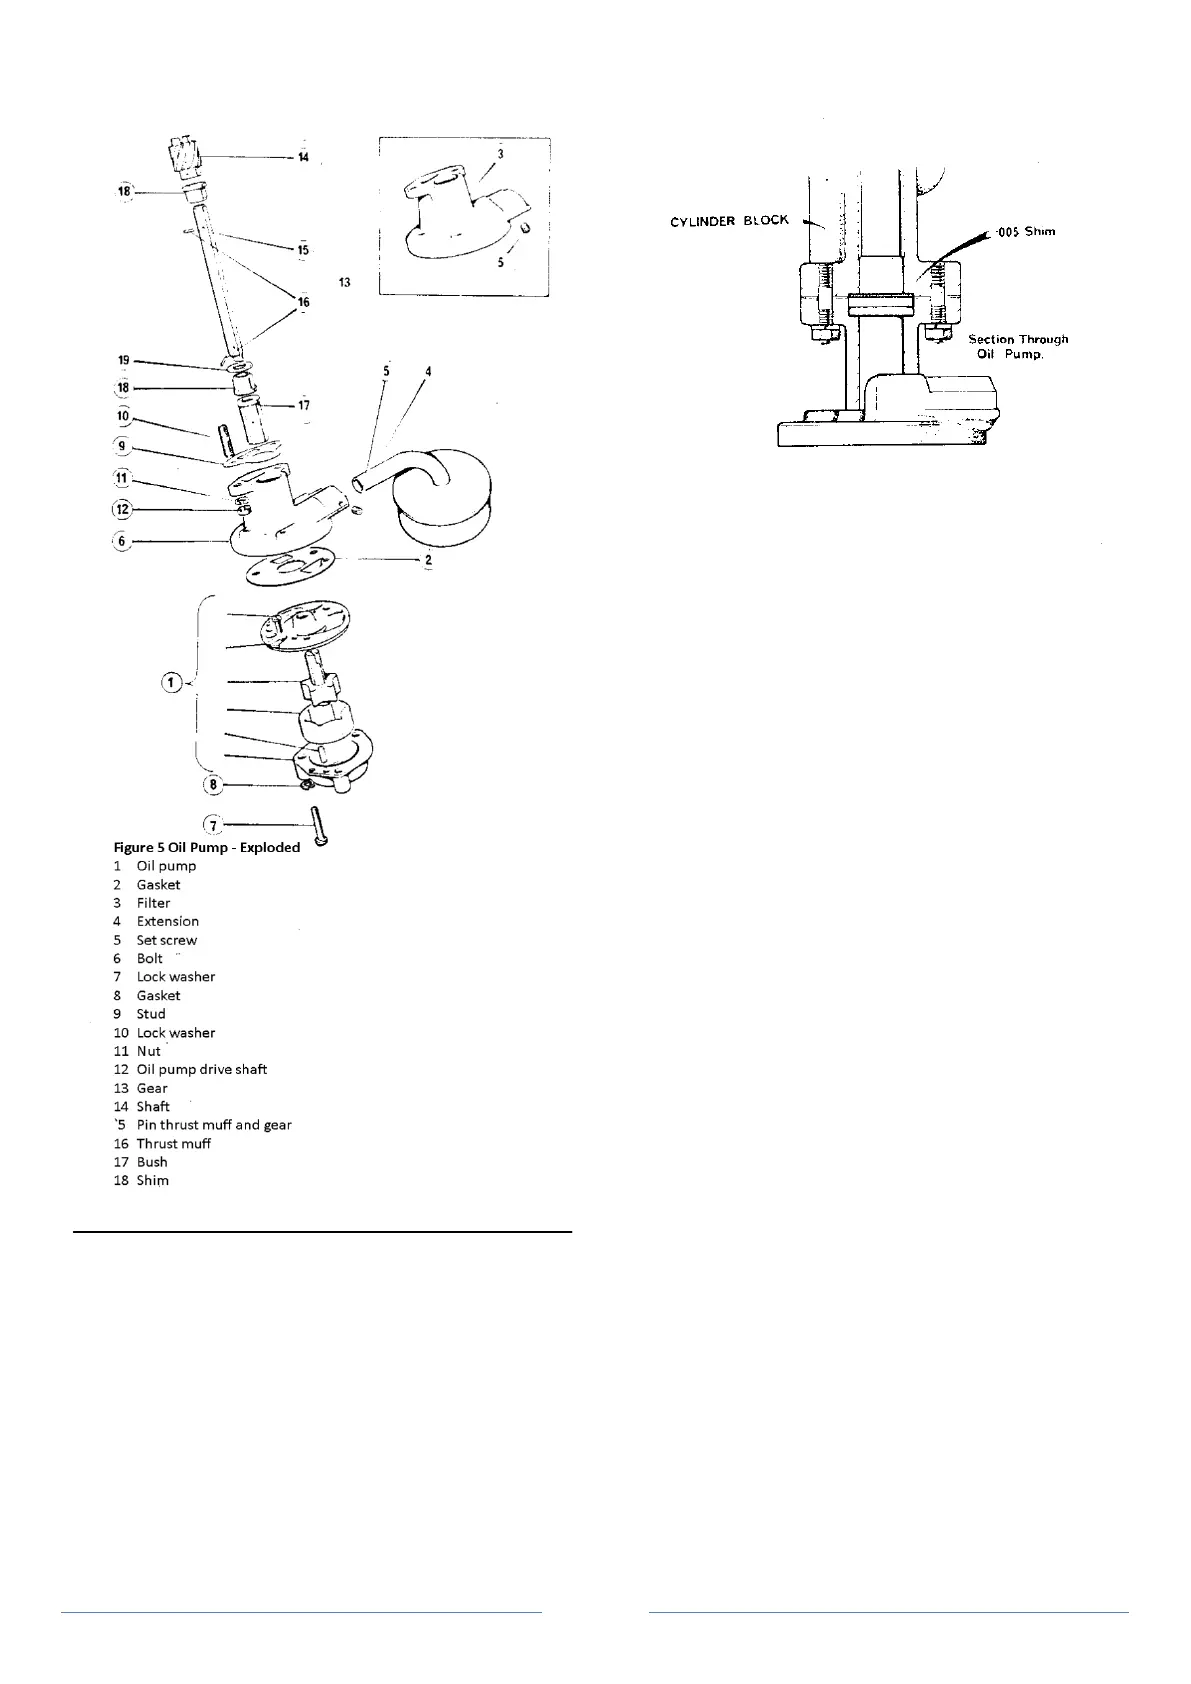
(Figure 5).
Figure 6 Oil pump drive shaft shims
6. Drift out the pin securing the thrust muff to the
distributor/oil pump driveshaft which can then be withdrawn upwards
through the distributor housing.
7. Inspect the oil pump and drive shaft assemblies for wear or
damage and renew if required. Note: In production, it has sometimes
been necessary to fit one or two 0.127 mm (0.005 in) shims between
the oil pump driveshaft bush and the cylinder block (Figure 6). It is not
necessary when dismantling the pump to remove the drive bush or
shim, if fitted. However, if the bush and shim are removed, it is
essential that they are both replaced when re-assembling. failure to
do this will allow excessive end float of the distributor driveshaft
resulting in poor meshing of the oil pump drive gear with resultant
engine noise.
The backlash between camshaft gear and driveshaft gear should not
exceed 0.0762 mm (0.003 in).
Re-assemble in reverse order. Refit the pump to the block, ensuring
that the engine is set to TDC.
When replacing the oil pump driveshaft ensure that the large "D" of
the driving gear offset dog is facing towards the cylinder block with
the slot aligned in a "5 minutes past 7 o'clock" position.
Operation 5 Crankshaft rear cover and oil seal replacement
(with flywheel removed)
1. Unscrew the six set screws and remove the oil seal cover
complete with gasket and oil seal, from the cylinder block.
2. Using a suitable tool, press the old seal out of the cover.
Note: On no account try to drift or prise the seal out as this will
damage/distort the oil seal housing.
3. Carefully press a new seal in to the rear cover. To ensure
the seal is seated correctly, use a press tool similar to that shown in
(Figure 7).
4. Locate the two dowels of the rear cover in the cylinder
block and then secure the cover with the six set screws and lock
washers. (Figure 8)
Operation 6 Timing chain cover, oil seal and gasket
replacement (engine still in car)
1. Drain the cooling system.
2. Remove the radiator, complete with hoses from the vehicle.