Page 84
Operation 3 Fuel pump - Check function, removal,
replacement and overhaul
Testing the fuel pump
Providing there are no leaks or obstructions in the fuel line, a quick
check on the fuel pump efficiency can be made a follows:
1. Disconnect the carburettor feed pipe at the fuel pump
outlet.
2. Connect a slave pipe to the outlet and place in a clean jar.
3. Crank the engine, when a well defined spurt of fuel should
be apparent for each revolution of the engine. If the pump does not
operate satisfactorily an overhaul is needed.
To remove and dismantle (Figure 3)
1. Disconnect the fuel pump inlet and outlet pipes and plug to
avoid leakage or dirt ingress.
2. Unscrew the fixing nuts and lock washers and remove the
pump.
3. Before dismantling, clean the exterior of the pump and
mark the upper and lower halves in line with the tang on the
diaphragm to aid re-assembly.
4. Remove the five screws and separate the upper and lower
halves of the pump.
1
5. Hold the pump in an inverted position, push in and then
turn the diaphragm through 90° to release the pull rod from the key in
the rocker arm assembly.
Note: The diaphragm and pull rod assembly are riveted together and
must not be dismantled.
6. release the circlip and withdraw the rocker arm and
extension spindle from the lower body.
7. Remove the rocker arm and extension, complete with
washers and return spring.
8. Check components for wear and renew if necessary for
subsequent re-assembly.
Note: If the valves are peened in they are not replaceable. If these are
faulty a new pump complete will need to be fitted.
To re-assemble and refit
1. Locate the rocker arm, complete with return spring and
extension into the lower pump body.
2. Insert the spindle, locate the two washers and secure with
the circlips.
3. Position the diaphragm on the lower body seating and pull
rod key plate if fitted.
4. Insert the diaphragm pull rod into the rocker arm extension
key and rotate through 90° to lock in to position.
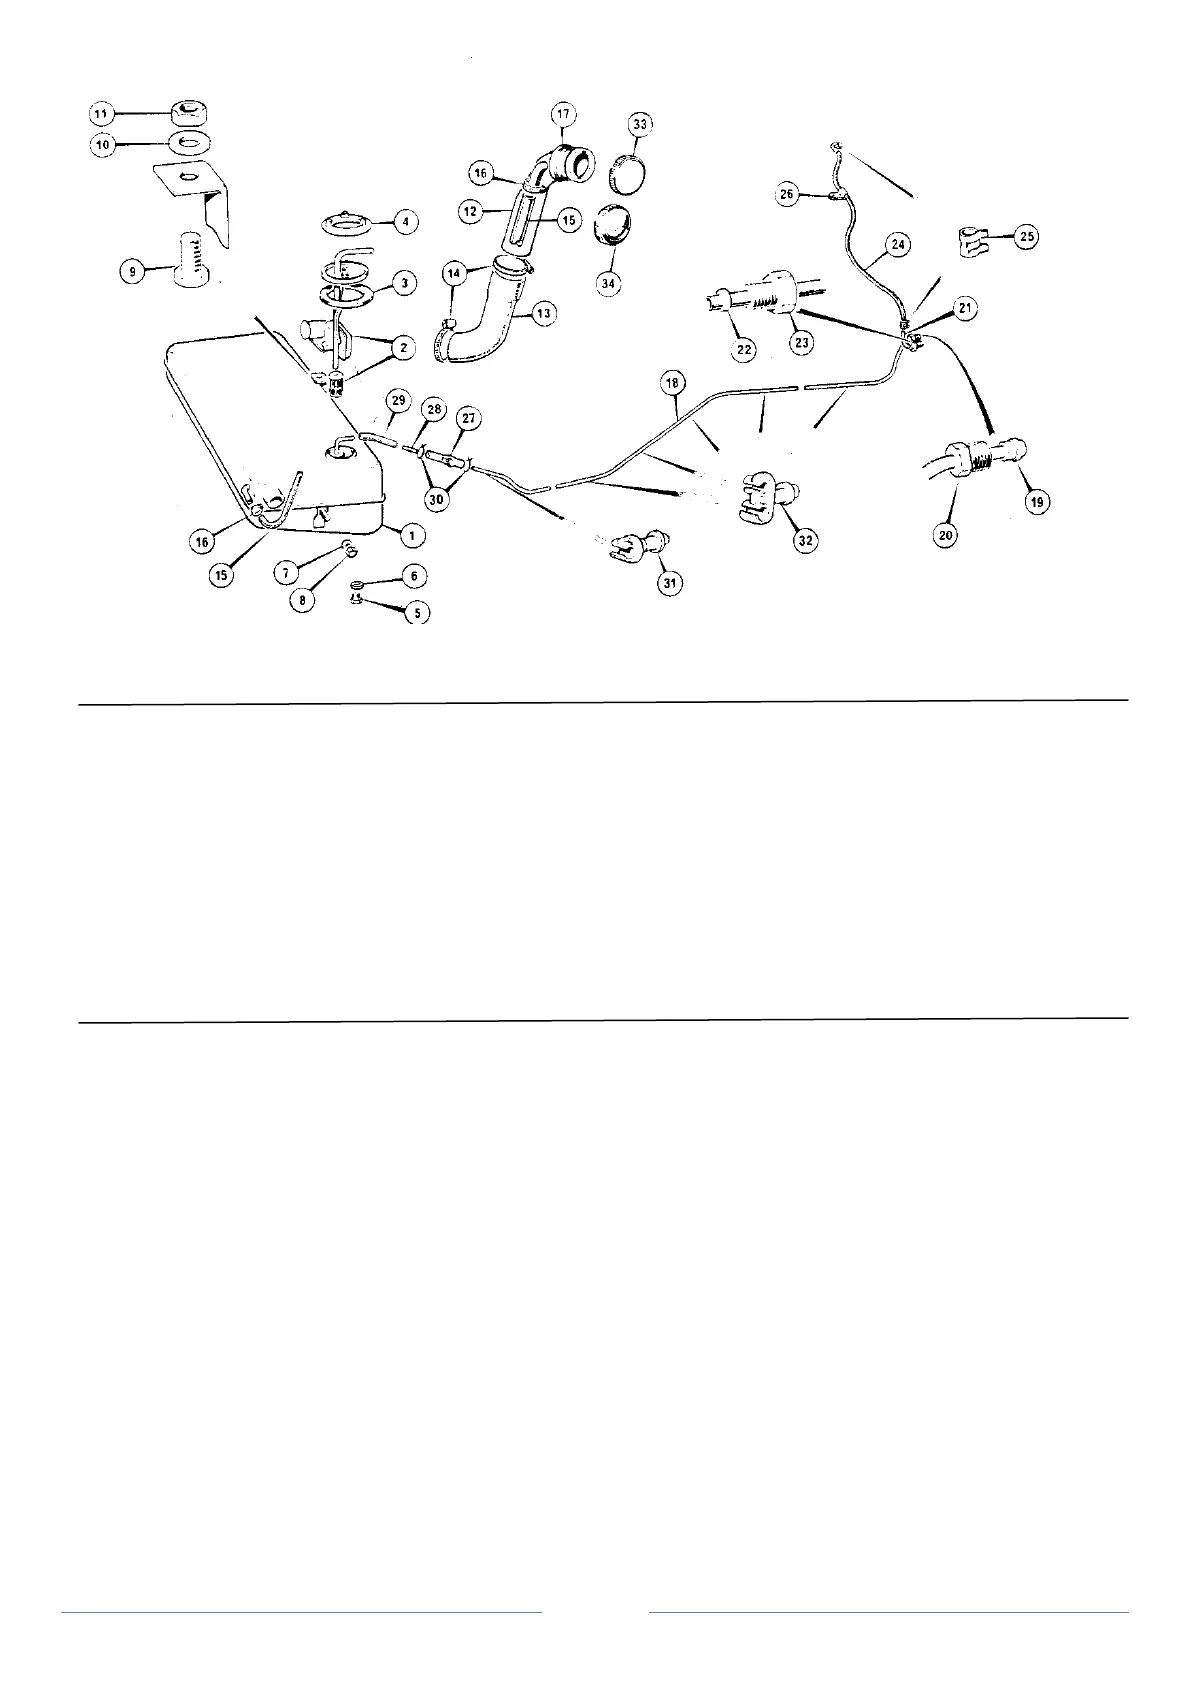
Figure 2 Fuel tank and pipes
1. Fuel tank 13. Hose 24. Pipe, pump to carburettor
2. Sender unit 14. Clip 25. Clip
3. Sealing ring 15. Breather hose 26. "P" clip
4. Locking ring 16. Clip 27. In-line petrol filter
5. Drain plug 17. Grommet 28. Pipe
6. Washer 18. Pipe, pump to filter 29. Sleeve
7. washer 19. Olive 30. Clip
8. Nut 20. Nut 31. Clip
9. Set screw 21. Pipe, filter to pump 32. Clip
10. Washer 22. Olive 33. Petrol cap
11. Nut 23. Nut 34. Filler cap (chrome)
12. Filler tube