Page 98
Operation 20 Rubber bumper sections - removal
& replacement
Both the front and rear bumpers comprise a rubber trim section
supported on a metal channel mounted the full width of the body
moulding. The ends of the bumpers are covered by plastic caps, each
retained by a single screw, screwed to the body, through the rubber
trim.
To remove
1. Remove the single screw securing the bumper end cap to
the side of the body, retained by a clip behind the moulding. repeat
for the opposite cap.
2. Remove the self-tapping screws retaining the ends of the
bumper to the body.
3. The rubber bumper is supported on a metal channel riveted
to the body. Pull the rubber from the channel section.
4. The metal channels may be removed if required, by drilling
out the nine retaining rivets.
Replace in reverse order, ensuring that the rubber section is correctly
engaged in the metal channel before securing with the two self
tapping screws.
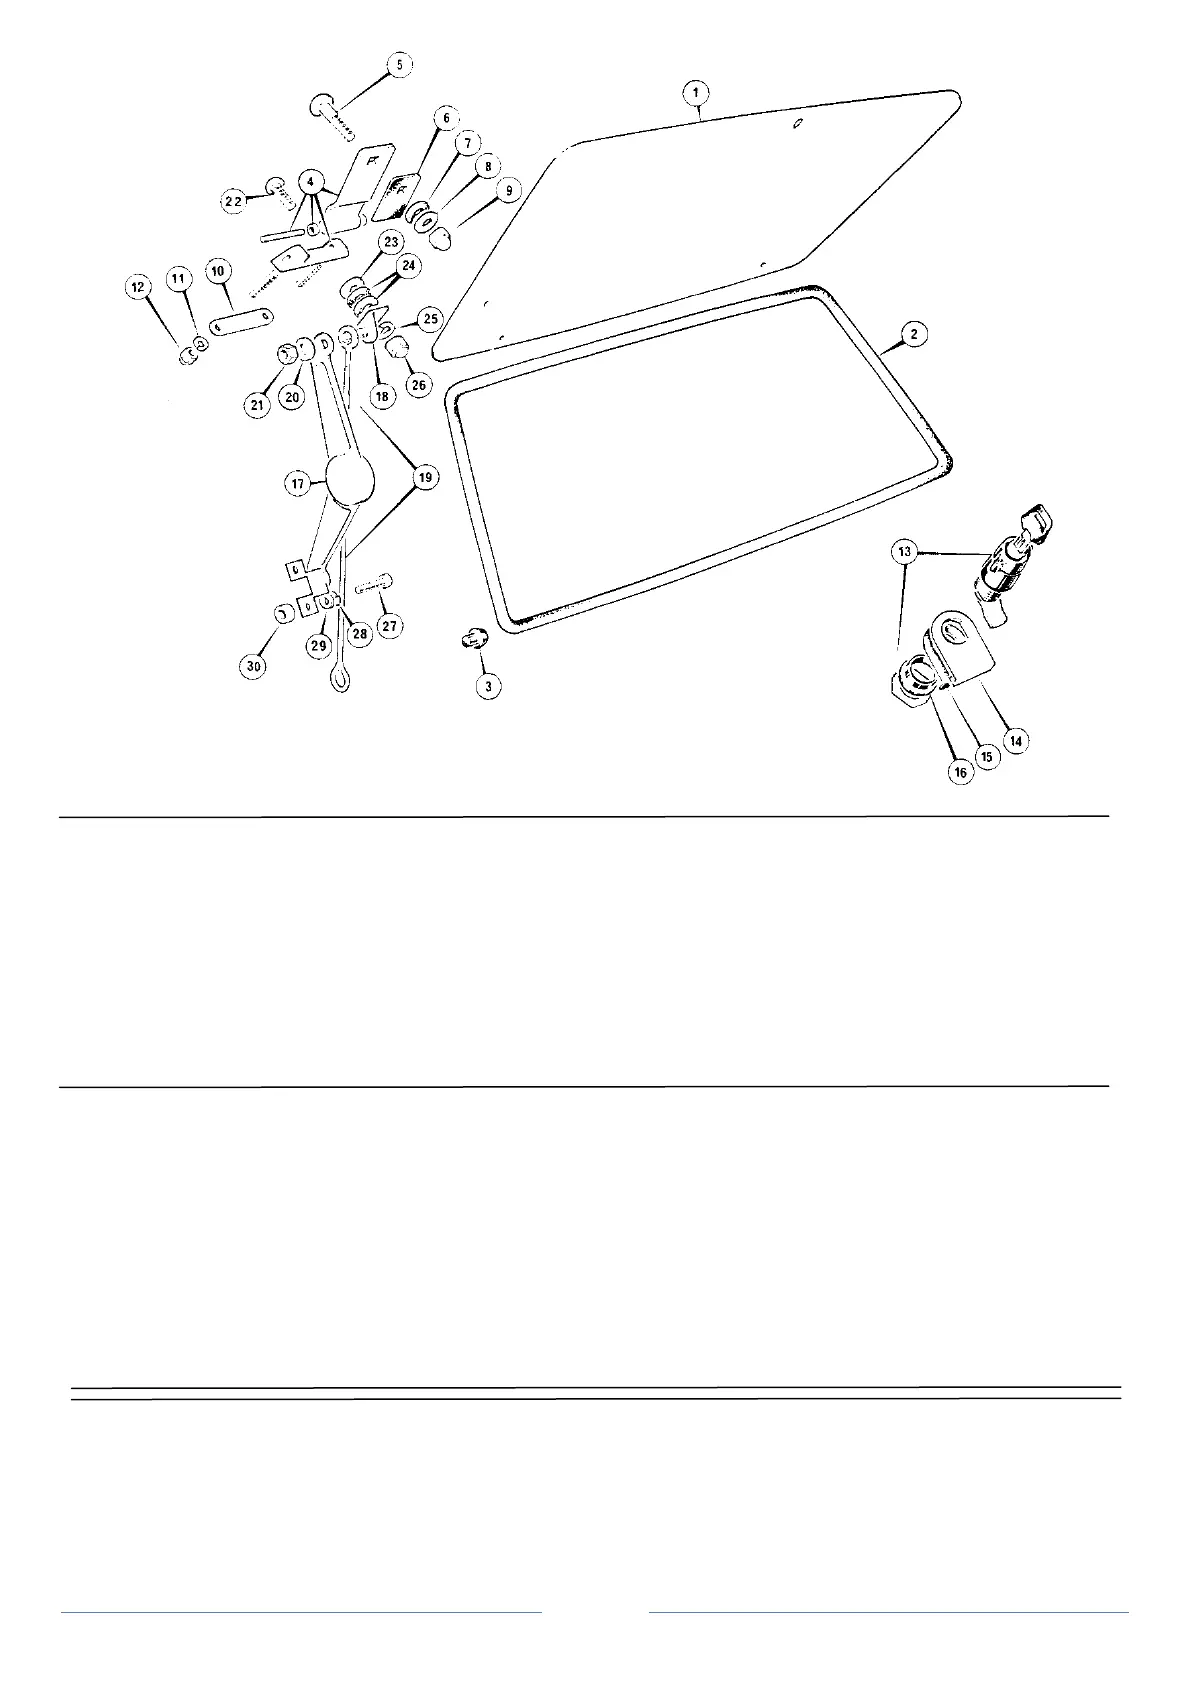
Figure 6 Rear window - Saloon
1. Rear window 11. Lock washer 21. Nut
2. Sealing rubber 12. Nut 22. Coach bolt
3. Buffer 13. Locking handle 23. Lock washer
4. Hinge 14. Retaining plate 24. Washer
5. Coach bolt 15. Gasket 25. Lock washer
6. Gasket 16. Washer 26. Domed nut
7. Insulation 17. Rear window stay 27. Screw
8. Coach washer 18. Bracket 28. Lock washer
9. Domed nut 19. Tonneau lifting stay 29. Washer
10. Backing plate 20. Washer 30. Spacer