4
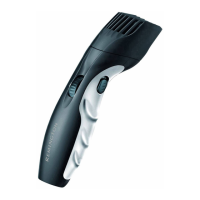
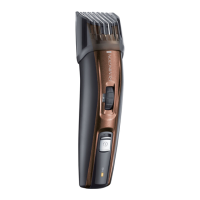
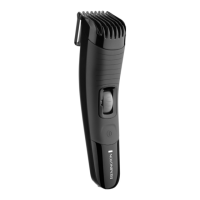
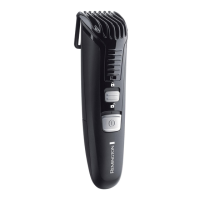
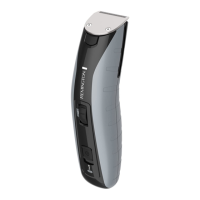
PARTS
1. On/o switch
2. Main blade
3. Vacuum intake
4. Vacuum chamber
5. Vacuum chamber release buttons
6. Detail blade
7. Adjustable beard comb 2 – 18mm
8. Charge indicator light
9. Charger connector
10. Comb lock button
11. Charging adapter (not shown)
12. Storage case (not shown)
13. Cleaning brush (not shown)
CHARGING
Charge your trimmer:
• Before using for the rst time.
• When the charge indicator light is ashing.
• After your trimmer has not been used for a long time.
1. Ensure the trimmer is switched o.
2. Connect the charging adapter to the power connector and then to the mains power
outlet.
3. When charging, the charge indicator light will light up. The light will go out when
charging is complete.
4. A rst time charge should take approximately 2-4 hours. Top up charges should take
approximately 2 hours.
• To preserve the life of your batteries, let them run out every 6 months then recharge
for 16-20 hours.
Corded/cordless use
• When fully charged, your trimmer should provide approximately 60 minutes of
cordless use.
• You can also connect the charger (as if you were going to charge the trimmer) and
operate the trimmer ‘corded’ if desired.
ATTACHMENTS
Exchanging the main and detail blades
Your trimmer is supplied with the main blade already tted. It is easier to remove and
ret the main blade with the vacuum chamber removed.
1. Switch your trimmer o.
2. Hold the trimmer in one hand.
3. Push the top of the blade away from the trimmer body using your thumb (Fig A)

 Loading...