Do you have a question about the Remington PG6020 and is the answer not in the manual?
Instructions on how to charge the grooming kit, including initial charge time and indicator lights.
Step-by-step guide on how to attach and detach guide combs for different cutting lengths.
Advice on preparing facial hair and the groomer before starting the trimming process.
Detailed steps for using the trimmer to thin and shape beards and moustaches.
Guide to creating clean lines for beard and moustache edges using the trimmer.
Instructions on how to trim sideburns effectively using the grooming kit.
Steps for safely and effectively trimming the hair at the nape of the neck.
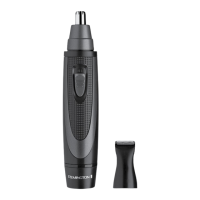
How to use the dedicated attachment for safe and gentle removal of nose and ear hair.
Guidance on using the groomer for precise shaping and trimming of eyebrows.
Advice on comb direction and trimming positions for optimal grooming outcomes.
Instructions for safely attaching and removing different trimmer heads and attachments.
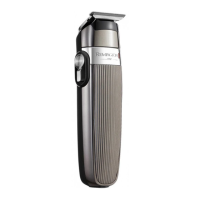
How to use the precision trimmer for detailed facial hair styling and edging.
Guide to using the mini foil shaver for detailing around beard and moustache areas.
Detailed steps for cleaning the groomer, including rinsing, brushing, and oiling.
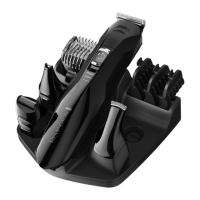
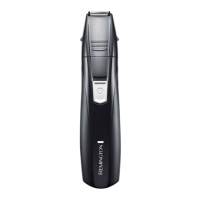
The Remington PG6020 All In One Grooming Kit is a versatile personal care appliance designed for various grooming needs, including trimming beards, moustaches, sideburns, and removing hair from the nose, ears, and eyebrows. This device is suitable for use by children aged 8 years and above, as well as persons with reduced physical, sensory, or mental capabilities, or lack of experience and knowledge, provided they are supervised and instructed on safe use and understand the hazards involved. Children older than 8 years and supervised can perform cleaning and user maintenance. The appliance and its cable must be kept out of reach of children under 8 years.
The PG6020 is an all-in-one grooming kit that offers multiple attachments for comprehensive hair removal and trimming. Its primary function is to provide a convenient and effective solution for maintaining facial hair and removing unwanted hair from sensitive areas. The kit includes a main groomer unit with an on/off switch, various trimmer blades, and guide combs to achieve different hair lengths and styles.
The device is powered by a rechargeable battery. For recharging, only the supplied charger, type reference PA-04701U or SW-047010BS, should be used. The adaptor contains a transformer, and it is crucial not to cut off the adaptor to replace it with another plug, as this creates a hazardous situation. The body of the appliance is not washable or water-resistant, meaning it should not be put in liquid. The battery in this device is not replaceable. The product is designed for household use and is not intended for commercial or salon use.
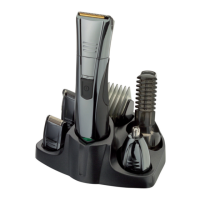
The grooming kit comes with several parts to facilitate its various functions:
Before the first use, the groomer must be charged for 14-16 hours. Ensure the product is switched off before placing it into the stand and connecting the adaptor to the product and then to the mains. The charging indicator will illuminate and remain illuminated once fully charged. The appliance cannot be overcharged. If the product will not be used for an extended period (2-3 months), it should be unplugged from the mains and stored. For subsequent use after storage, a 16-hour recharge is recommended. To preserve battery life, it's advised to let the batteries run out every 6 months and then recharge for 14-16 hours.
To attach a guide comb, ensure the trimmer blade is facing away from you, then slide the comb on top of the blade until it clicks into position. To remove, gently push the guide comb away from the trimmer blade, again with the blade facing away from you.
Always ensure the groomer is switched off before changing attachments. To remove an attachment, hold the groomer with one hand and turn the trimmer head anti-clockwise with the other. To attach, hold the groomer with one hand and turn the trimmer head clockwise with the other.
Comb hair in the direction of growth to ensure maximum height and consistent direction. Since hair growth varies, trying different trimming positions (upwards, downwards, or across) may yield better results. Before using, ensure facial hair is dry and free of waxes or lotions.
To ensure long-lasting performance, it is recommended to clean the groomer after each use. The most hygienic way to clean the groomer head is by rinsing it with warm water after use.
Battery removal should ideally be performed by a professional due to sharp edges in the shaver case and tools. The rechargeable battery must be removed from the appliance before it is scrapped. Disconnect the charging adapter. Ensure the battery is fully discharged by operating the device until it stops. Pry the upper housing with a flat head screwdriver to expose the batteries. Use wire cutters to clip the wires leading to the batteries. The battery must be disposed of at an appropriate official recycling/collection point. Do not attempt to operate the device once it has been opened.
To prevent environmental and health problems from hazardous substances, appliances and rechargeable/non-rechargeable batteries marked with specific symbols must not be disposed of with unsorted municipal waste. Electrical and electronic products, and applicable batteries, should always be disposed of at an appropriate official recycling/collection point.
The product comes with a guarantee period during which defects affecting functionality will be corrected by replacement or repair, provided the product is used and maintained according to instructions. Statutory rights are not affected. The warranty is not valid where it contradicts applicable laws or is prohibited under economic sanctions, export control laws, embargos, or restrictive trade measures (e.g., in Cuba, Iran, North Korea, Syria, and the Crimea region). An extra 1-year guarantee can be claimed by registering the product online within 28 days of purchase at uk.remington-europe.com/product-registration. Consumables are guaranteed only for their recommended lifecycle. Replacement/spare parts (e.g., adaptors, haircare attachments, grooming accessories) are excluded and covered by a 1-year warranty.
| Brand | Remington |
|---|---|
| Model | PG6020 |
| Category | Electric Shaver |
| Language | English |