of 24
Jan.31.2020
At the point of releasing this solution kit version, the IAR Embedded Workbench was not configured for multi-
core debugging (Cortex A7 and Cortex M3 simultaneously).
3.2 Boot a sample application from QSPI flash
To store your binary in QSPI Flash and be able to execute it from there after every new reset, you need to
write the images in flash and set the corresponding U-Boot parameters. Please follow the steps below to do
that.
1. Open an rzn1s_demo_board project for Cortex M3 in IAR, for example:
YCONNECT-IT-
RZN_V1.x\Software\GOAL\goal\projects\00410_goal\led_demo\iar\7_70\rzn1s_demo_board\rzn1s_
demo_board.eww
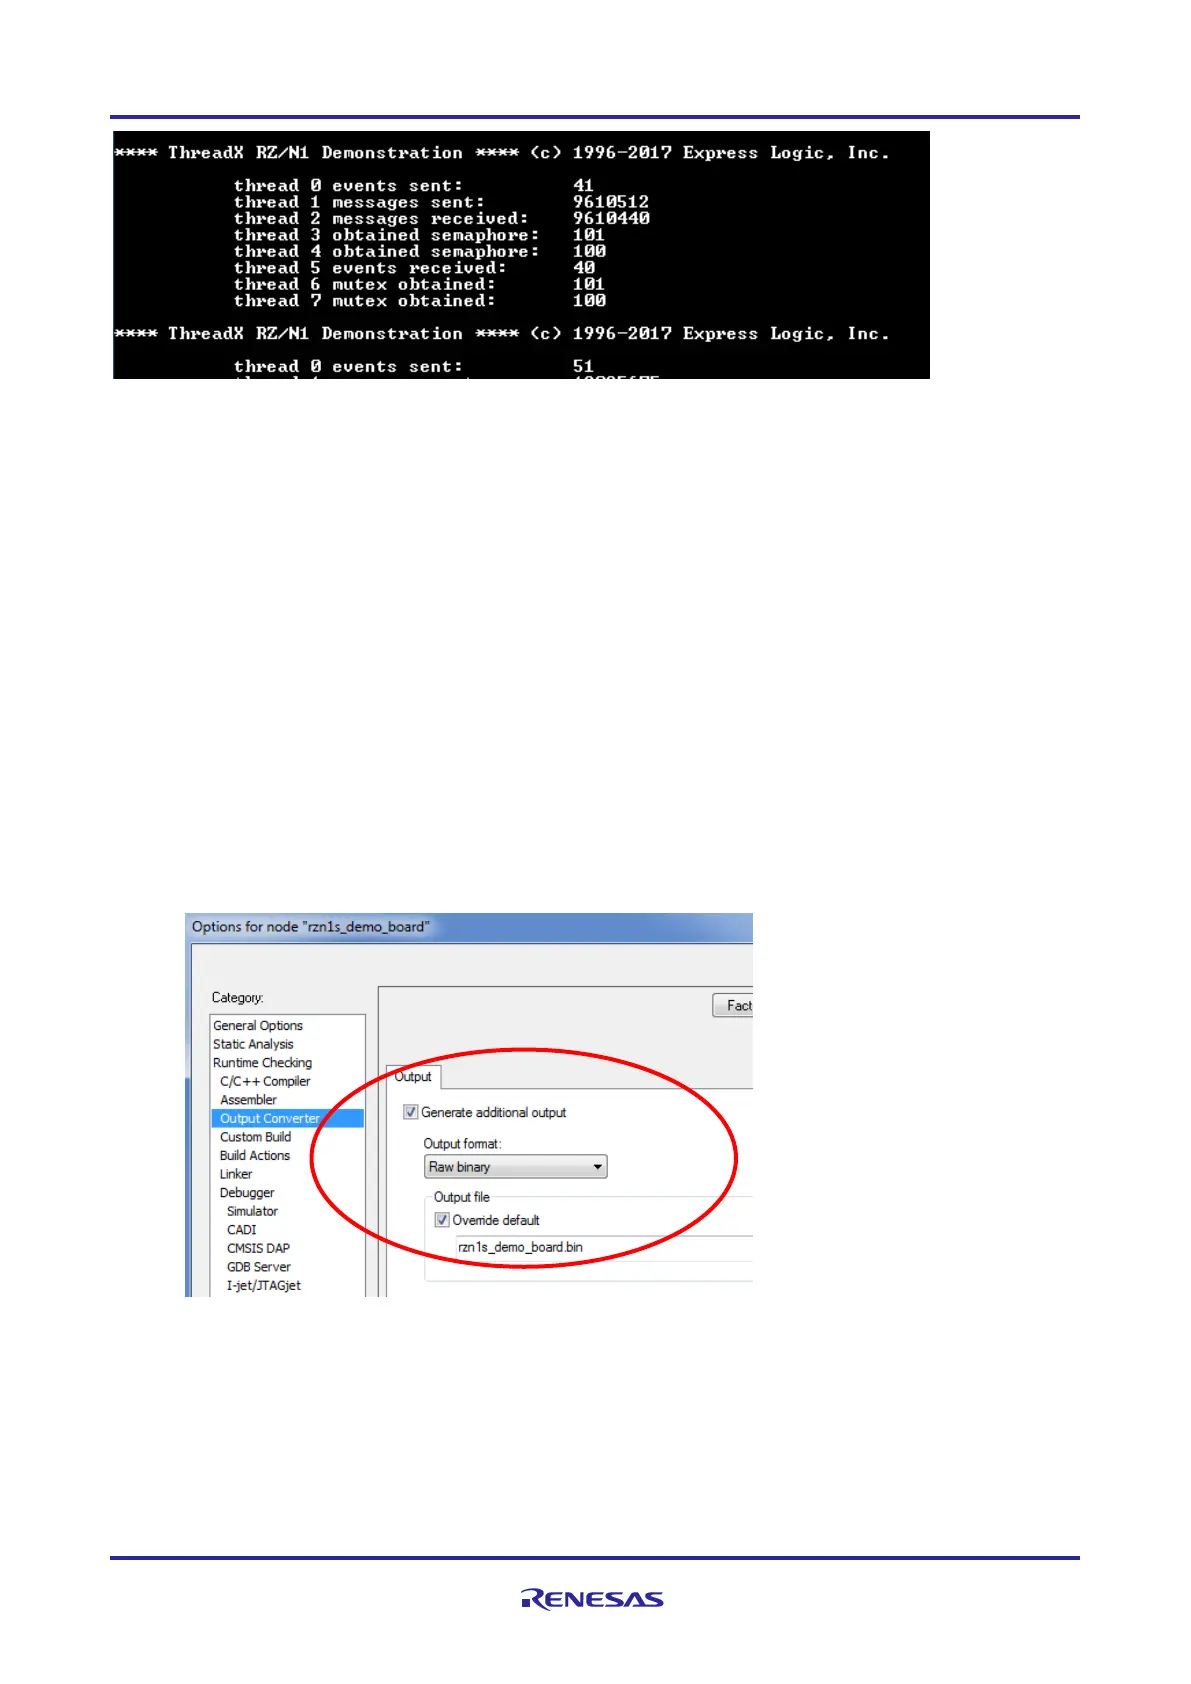
2. Right-click on the rzn1s_demo_board and click on “Options”. Click on “Output Converter” in the left
tab of the options window and tick the box “Generate additional output” and select raw binary output
format.
3. Compile the project. Your raw binary is in the exe folder of the project directory, for example
goal\projects\00410_goal\chase_lights\iar\7_70\rzn1s_demo_board\Debug-RAM\Exe
4. Connect CN3 on the board to a USB Host connector on your PC. This provides USB DFU. Reset the
board (SW9) and open the serial terminal to the U-boot console. In the U-boot console type: dfu
Model: RZ/N1S Demo Board
DRAM: 4 MiB
 Loading...