Accessories setup
2
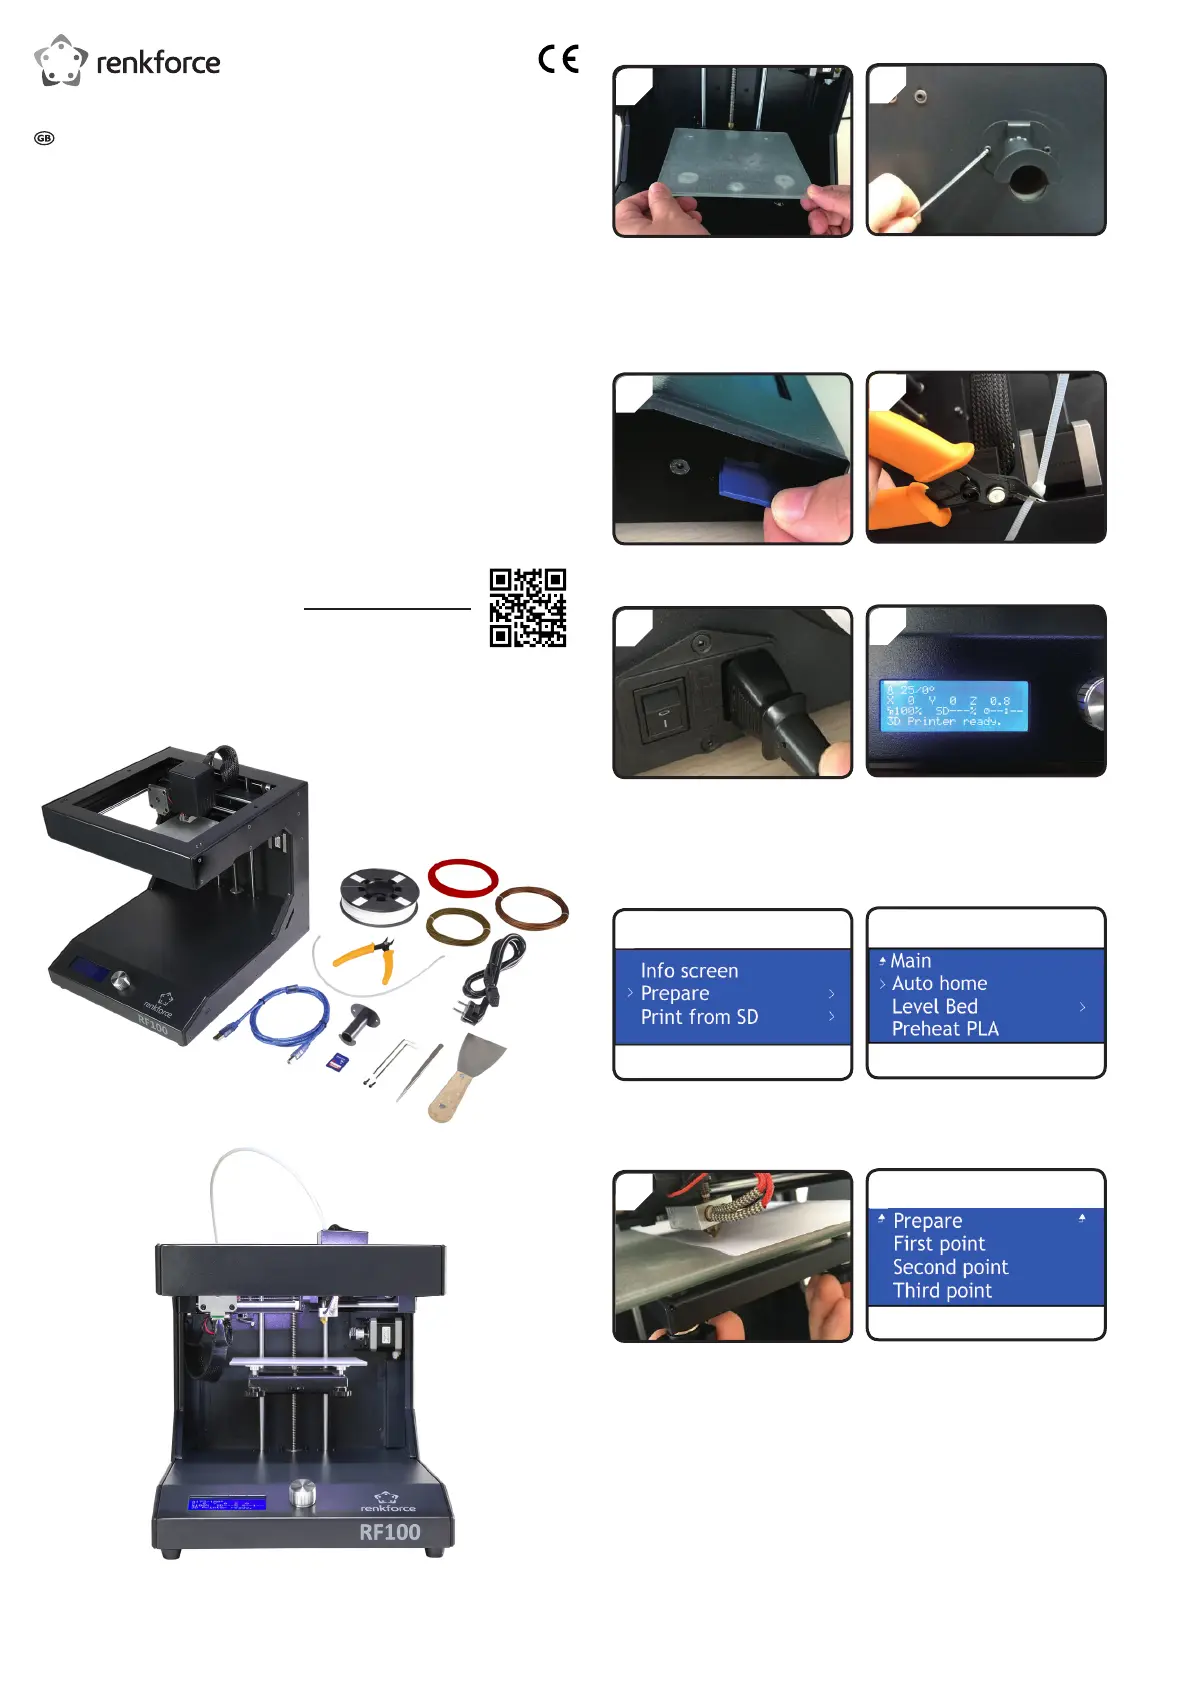
• Use two screws and the 2,5 mm hex
key to install lament spool holder at
the back of the 3D printer.
• The ‘nose’ at the end of the holder
faces upwards.
• Place the build bed.
1
4
• Cut the cable ties on each side with
the side cutter.
• Insert SD card with sticker facing
downwards.
3
6
• < Info screen > appears on the LCD
display. It indicates that the 3D printer
is now ready to use.
• Connect the power cable.
• Switch the 3D printer on.
5
Build bed calibration
2
• Select < Auto home >.• Press the control knob in < Info screen >
to enter < Main Page >.
• In < Main > menu select < Prepare >.
1
4
• Return to < Prepare > menu.
• Enter < Level bed > menu and select
< First point >.
• Repeat STEP 3 to adjust the distance
between nozzle and build plate.
• Adjust 3 screws under build bed to
adjust the gap between build bed and
nozzle until build plate is lying at.
• Gap distance should be between 0.1
and 0.3 mm (i.e. use A4 paper as a
measurement tool). Nozzle must not
touch build plate!
3
Quick-Start-Guide
RF100 3D printer fully-assembled
Item no. 1507428
Delivery content
• 3D printer fully-assembled
• 250 g Genuine Renkforce lament
(1,75 mm, white)
• 8GB SD card with “Cura“ software,
100+ printable 3D Model les
• Power cable
• Quick-Start-Guide (in German, English)
• Filament spool holder
• Filament tube
• USB cable
• Scraper
• Tweezers
• Side cutter
• 2.0 mm hex key
• 2.5 mm hex key
• 2x Screw
• Glass build bed pre-installed with adhesive
surface
• 3 x Genuine Renkforce lament sample
(copper, wood and elastic material
- 1.75 mm - 50 g each)
Detailed Operating Instructions
Download the detailed operating instructions at www.conrad.com/downloads
or scan the QR code shown. Follow the instructions on the website.
Product picture