320
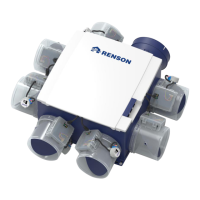
7.2 • Mounting instructions
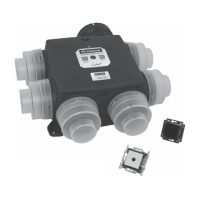
The Cube can be attached to a wall using 4 screws by means of the integrated mounting holes in
the base of the fan casing.
• The appliance can be attached to the wall using the designated screws for the corresponding
type of surface. Preferably mount the unit vibration-free to a solid wall with a minimum mass of
100 Kg/m
2
. Preferably, vibration dampening material is also used between the unit and the
assembly wall. For wall assembly, the equipment must be placed level.
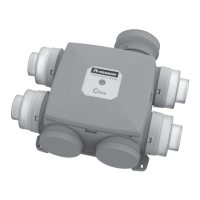
7.3 • Placement Cube
®
: wall / ceiling
• Choose the equipment area in the technical room or elsewhere (near the roof/wall feed-through)
where the fan unit can be placed and where it is easy to connect the duct network.
• Exhaust pipe ø150 mm and limit to 3 metres in a house.
• Install the ventilation system so the pipes can be connected with as little bends as possible.
• Preferably place the fan in an attic, above the „wet“ rooms, such as bathrooms, toilets, etc. Do
not place it above a bedroom to limit possible noise transfer.
• Position the fan in a central place with respect to the rooms to be ventilated so the pipe lengths
are distributed as homogeneous as possible.
• Suction pipes are a minimum of ø80 mm, for flows > 50 m
3
/h this is ø125 mm as a standard.
Place the casing plate
against the wall and mark
the designated screw holes
on the wall with a marker
(wall needs to have a minimal
mass of 100kg/m² in order to
avoid noise transference)
Mount the plugs and screws
(suitable for the surface
type). Make sure that the
heads of the screws min.
stick out 7 mm.
Hook the fan unit over the
4 pre-assembled screws.
Make sure that the exhaust
is pointing in the direction of
the roof outlet.