Mount the Camera
8English7 English
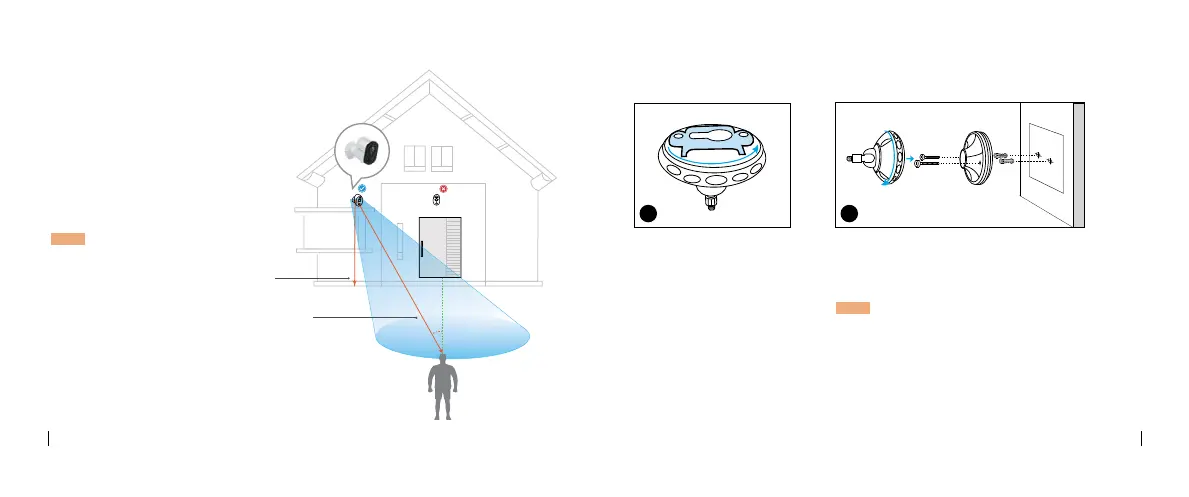
Notes on Camera Installation Position
Rotate to separate the base
ĶƙŲŤƭľĞďƙóĐŘĞƭɔ
Drill holes in accordance with the mounting
template and screw the base of the bracket to
ƭľĞǎóśśɔvĞǓƭɏóƭƭóĐľƭľĞŲƭľĞƙƖóƙƭŲĶƭľĞ
ďƙóĐŘĞƭƭŲƭľĞďóơĞɔ
NOTE: Use the drywall anchors included in the
ƖóĐŘóķĞŃĶŦĞĞėĞėɔ
• Install the camera 2-3 meters (7-10ft) above
the ground to maximize the detection range of
ƭľĞ¦U©ŤŲƭŃŲŦơĞŦơŲƙɔ
ɍHŲƙĞȅĞĐƭŃǍĞŤŲƭŃŲŦėĞƭĞĐƭŃŲŦɏƖśĞóơĞŃŦơƭóśś
ƭľĞĐóŤĞƙóóŦķƵśóƙśǔɔ
NOTE: If a moving object approaches the
PIR sensor vertically, the camera may fail
ƭŲėĞƭĞĐƭŤŲƭŃŲŦɔ
Install the Camera
Â
Mounting Height:
2-3 Meters
PIR Detection Distance:
2-10 Meters
A
B
1 2
 Loading...