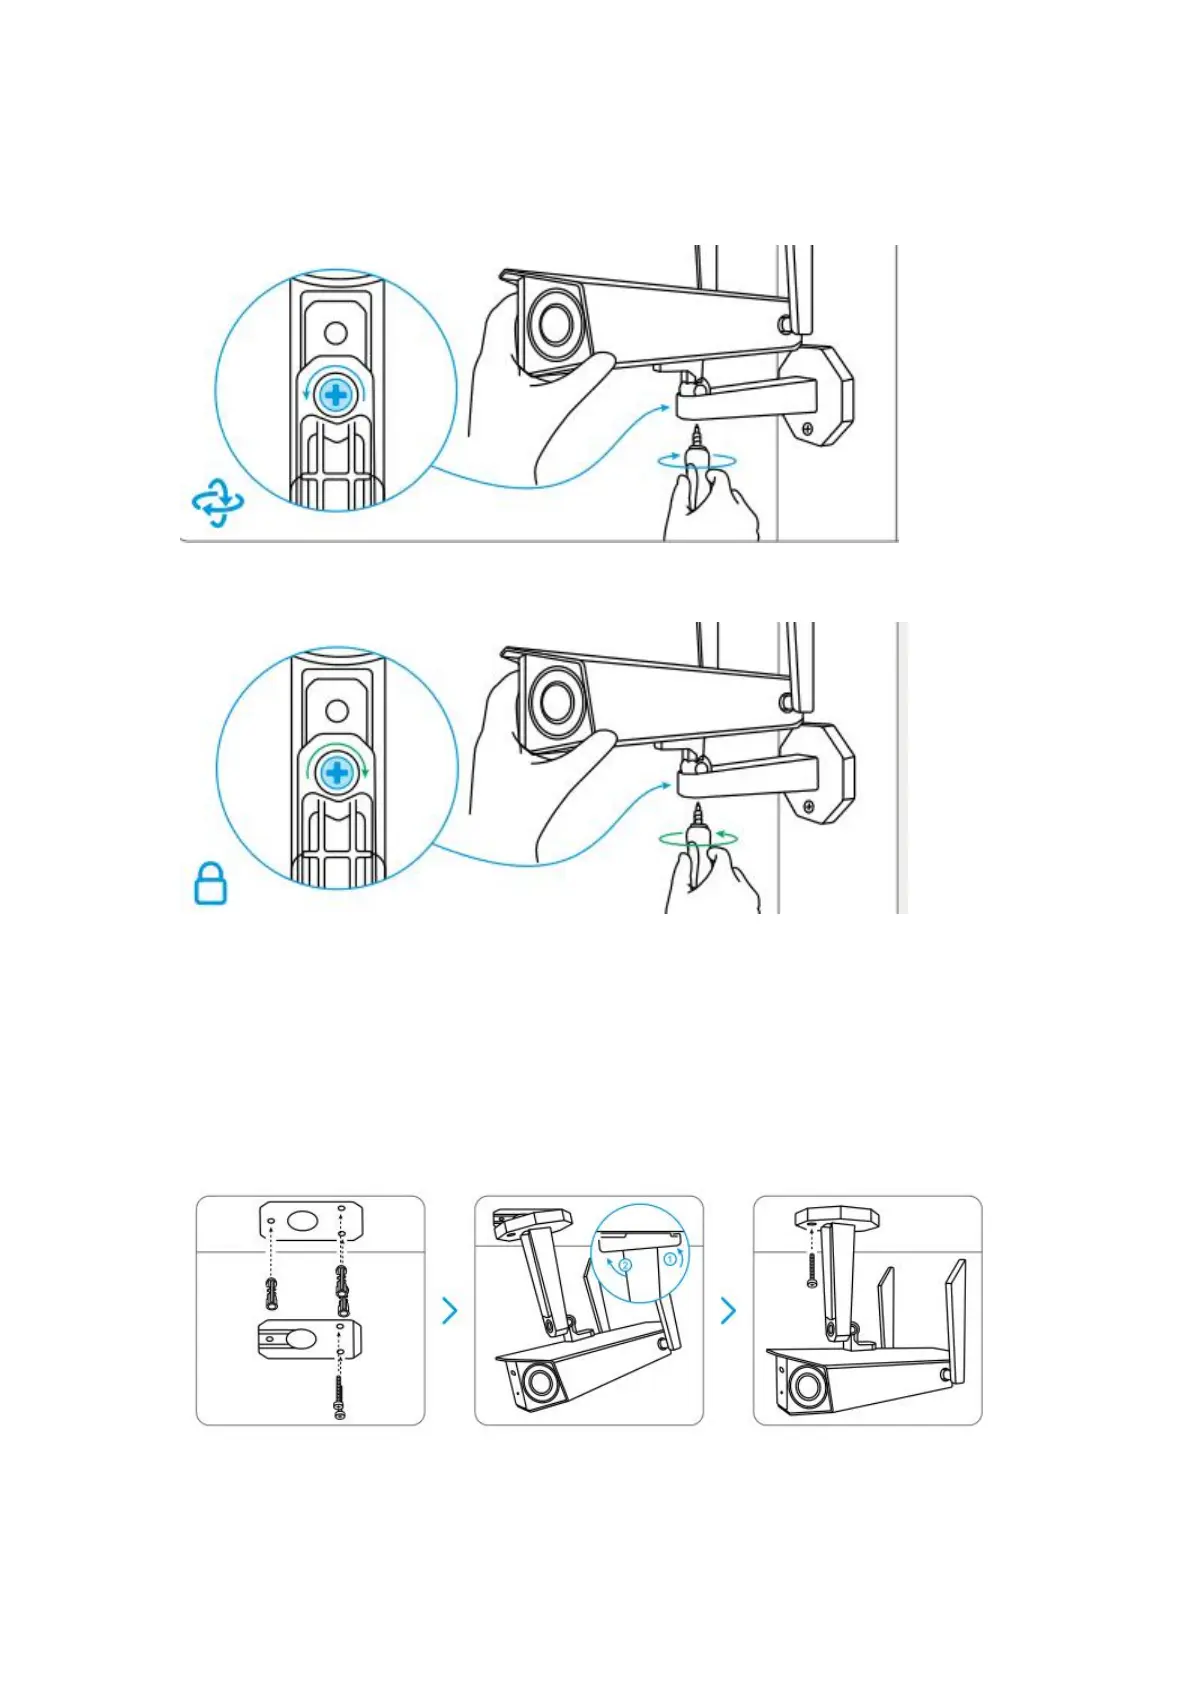
Step 2. Adjust the camera's view.
Loosen the adjustment screw on the security mount with the screwdriver (also
included in the box) and turn the camera until you get the ideal view.
Step 3. Fix the camera firmly.
Tighten the adjustment screw to keep the camera still.
Done! You've successfully mounted your camera on the wall.
Mount the Camera on the Ceiling
Step 1. Screw the camera onto the ceiling.
Drill holes in accordance with the mounting template.
Next, secure the mounting plate on the ceiling with the upper two screws and
hang the camera on it.
Then fix the camera in position with the lower screw.
Step 2. Adjust the camera's view.
Loosen the adjustment screw on the security mount with the screwdriver (also
 Loading...