EasyManuals Logo

Reolink E1 Outdoor User Manual

Reolink E1 Outdoor
14 pages
To Next Page IconTo Next Page
To Previous Page IconTo Previous Page
Page #4 background imageLoading...
Page #4 background image
Japanese Japanese5 6
ステップ 3 Reolink アプリまたはクライアントソフトウェアをダウンロードして起動し、画面の指示に従って初期設
定を完了します。
QR コードをスキャンし、Reolink アプリをダウンロードします。
Reolink クライアントのダウンロードパス : https://reolink.com > サポート > アプリとクライアント。
ワイヤレス設定
イーサネットケーブルを使用せずに Reolink E1 Outdoor を設定する場合は、以下の手順に従ってください。
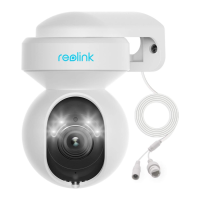
ステップ 1 付属の電源アダプターを使用して、カメラの電源を入れます。
ステップ 2 Reolink アプリを起動して、右上の 「 」ボタンをクリックして、カメラを追加します。 デバイスのQRコー
ドを読み取り、画面の指示に従って初期設定を完了します。
: Reolink クライアントを使用してカメラにアクセスする場合は、「デバイスの追加」アイコンをクリック
し、 「UID」オプションを選択してカメラの UID を入力することができます。UID はカメラ本体に記載され
ています(QR コードの真下)。
Devices
Cloud
the"+"button in the top right corner to add
1
2
3
“click”
“click”
open close
• スマートフォン
• パソコン

Other manuals for Reolink E1 Outdoor

Questions and Answers:

Question and Answer IconNeed help?

Do you have a question about the Reolink E1 Outdoor and is the answer not in the manual?

Reolink E1 Outdoor Specifications

General IconGeneral
AudioTwo-way audio
Image Sensor1/2.7" CMOS Sensor
Color Night VisionYes
Wireless StandardIEEE 802.11a/b/g/n
Wireless SecurityWPA-PSK/WPA2-PSK
Ethernet10/100Mbps
Operating Temperature-10°C to 55°C (14°F to 131°F)
Resolution5MP
Night VisionUp to 12 meters (40ft)
Pan & TiltPan: 355°; Tilt: 50°
ConnectivityWi-Fi, Ethernet
PowerDC 12V/1A
StorageMicroSD card slot (up to 256GB)
Video Resolution2560x1920
LensF=2.0
Digital Zoom16x

Related product manuals