EasyManuals Logo

Reolink E1 Outdoor User Manual

Reolink E1 Outdoor
14 pages
To Next Page IconTo Next Page
To Previous Page IconTo Previous Page
Page #5 background imageLoading...
Page #5 background image
Japanese Japanese7 8
E1 Outdoor カメラの取り付け方法
カメラを壁に取り付ける
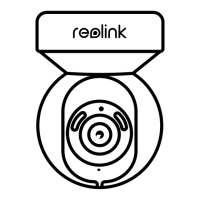
屋外で使用する場合は、防水性能を高めるために E1 Outdoor を上下逆さまに設置する必要があります。
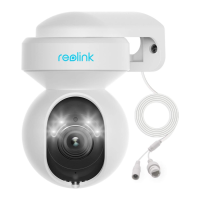
セキュリティーマウントのボタンを引き、ブラケット
のネジを外して 2 つのパーツを分離します。
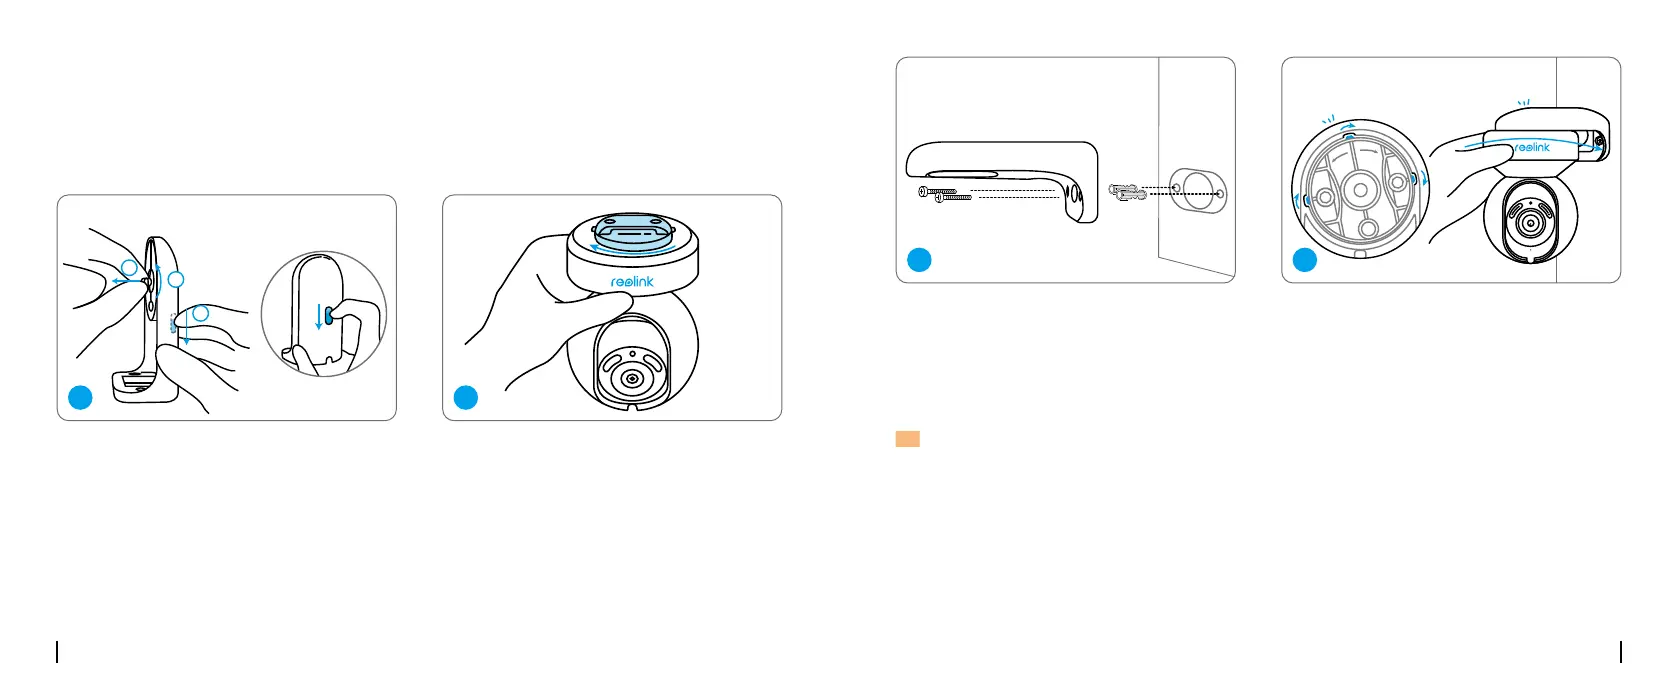
取り付けテンプレートに合わせて穴を開け、セキュ
リティマウントを壁にねじ込みます。
ブラケットをカメラの底面にねじ込みます。
カメラの適切な監視方向を選択し、ブラケットをセ
キュリティマウントに合わせ、反時計回りに回してカ
メラを固定します。
Devices
Cloud
You haven't added any device. Please click
the"+"button in the top right corner to add
1
2
3
“click”
“click”
open close
Devices
Cloud
You haven't added any device. Please click
the"+"button in the top right corner to add
1
2
3
“click”
“click”
open close
Devices
Cloud
You haven't added any device. Please click
the"+"button in the top right corner to add
1
2
3
“click”
“click”
open close
Devices
Cloud
You haven't added any device. Please click
the"+"button in the top right corner to add
1
2
3
“click”
“click”
open close
注: 必要に応じて、付属の乾式壁用アンカーを使用することもできます。
1 2
3 4

Other manuals for Reolink E1 Outdoor

Questions and Answers:

Question and Answer IconNeed help?

Do you have a question about the Reolink E1 Outdoor and is the answer not in the manual?

Reolink E1 Outdoor Specifications

General IconGeneral
AudioTwo-way audio
Image Sensor1/2.7" CMOS Sensor
Color Night VisionYes
Wireless StandardIEEE 802.11a/b/g/n
Wireless SecurityWPA-PSK/WPA2-PSK
Ethernet10/100Mbps
Operating Temperature-10°C to 55°C (14°F to 131°F)
Resolution5MP
Night VisionUp to 12 meters (40ft)
Pan & TiltPan: 355°; Tilt: 50°
ConnectivityWi-Fi, Ethernet
PowerDC 12V/1A
StorageMicroSD card slot (up to 256GB)
Video Resolution2560x1920
LensF=2.0
Digital Zoom16x

Related product manuals