EasyManuals Logo

Reolink Go PT Quick Start Guide

Reolink Go PT
11 pages
To Next Page IconTo Next Page
To Previous Page IconTo Previous Page
Page #4 background imageLoading...
Page #4 background image
English English5 6
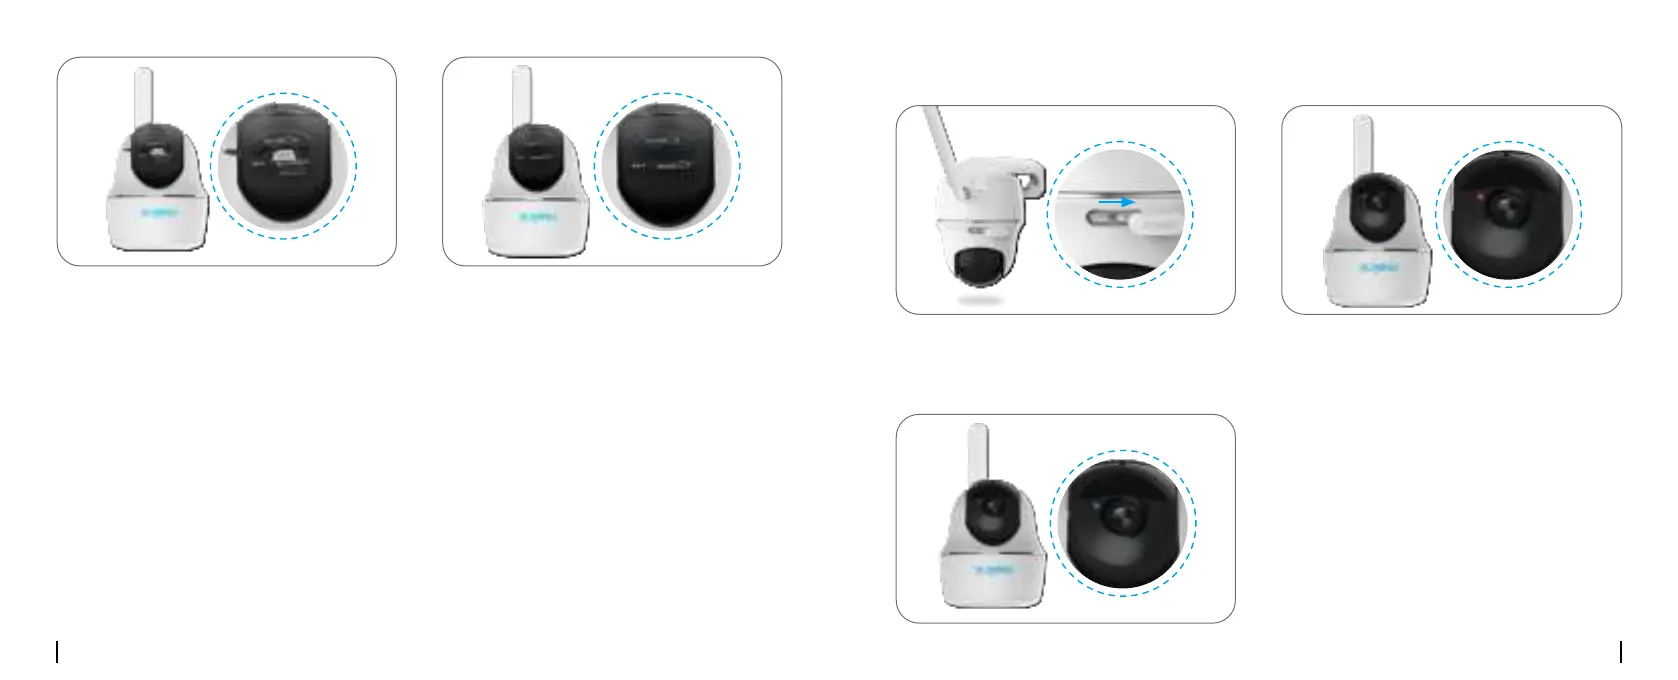
Insert the SIM card.
* The SIM card slot is above the SD card slot. When inserting the SIM card in, remember that the
gold contacts shall face down and you need to push the trimmed corner inside the camera.
* The SD card slot is below the SIM card slot. When inserting the SD card in, remember that gold
contacts shall face up.
Withthesedone,presstherubbercoverfirmly
for better waterproof performance.
With the SIM card inserted, you can turn on
the camera.
Wait a few seconds and a red light will
be on and solid for a couple of seconds.
Then, it will go out.
AblueLEDwillashforafewsecondsand
then go solid before going out. You will hear a
voice prompt “Network connection succeeded”,
which means the camera has been successfully
connected to the network.
Register the SIM Card

Other manuals for Reolink Go PT

Questions and Answers:

Question and Answer IconNeed help?

Do you have a question about the Reolink Go PT and is the answer not in the manual?

Reolink Go PT Specifications

General IconGeneral
Pan & TiltPan: 355°, Tilt: 140°
Connectivity4G LTE
AudioTwo-way audio
Color Night VisionNo
PIR Detection DistanceUp to 10 meters
RecordingMotion-triggered recording
Operating Temperature-10°C to 55°C (14°F to 131°F)
Resolution1080p
Power SourceRechargeable battery
StoragemicroSD card (up to 128GB)
Weather ResistanceIP65
Image SensorCMOS sensor
Video Resolution1080p (1920x1080) at 15 frames/sec
Lensf=4.0mm
AlertsPush Notifications, Email Alerts

Related product manuals