English English3 4
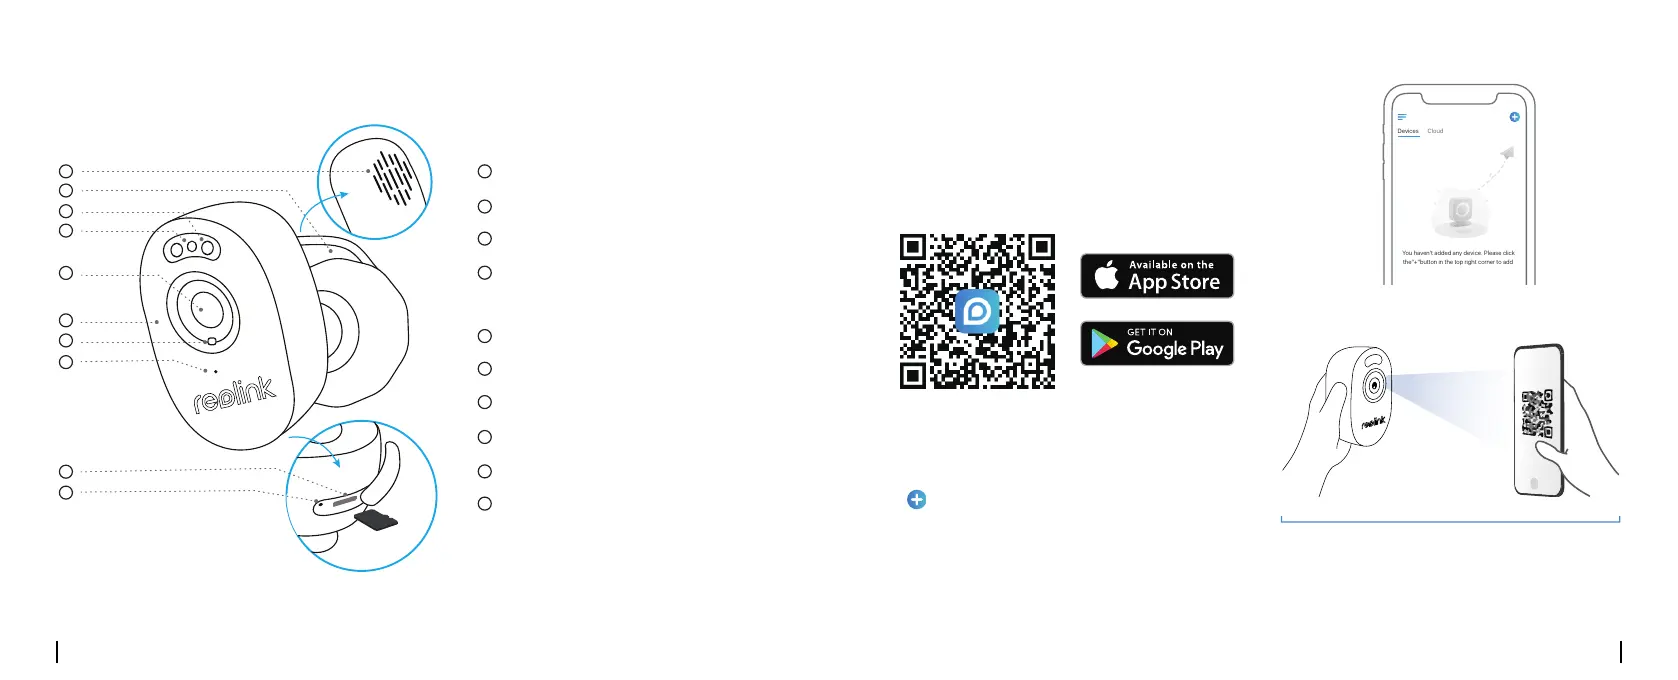
Camera Introduction Set up the Camera
≈30cm
Set up the Camera on Phone
Step 1 Scan to download the Reolink App from
the App Store or Google Play Store.
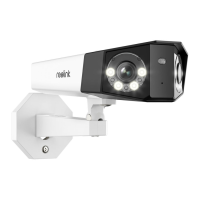
Speaker
Status LED
Blinking: WiFi connection failed
On: Camera is starting up/WiFi connection succeeded
Built-in Mic
Power Cable
Lens
microSD Card Slot
Spotlight
Daylight Sensor
IR LEDs
Reset Button
* Press for more than ve seconds to restore the device
to default settings.
* Always keep the rubber plug closed rmly.
Step 2 Power on the camera.
Step 3 Launch the Reolink App, click the
“ ” button in the top right corner to add the
camera.
Step 4 Follow the onscreen instructions to
nish the initial setup.
1 1
2
2
3
3
4
4
5
5
6
6
7
7
8
8
9
9
10
10
You haven't added any device. Please click
the"+"button in the top right corner to add
 Loading...