7 8
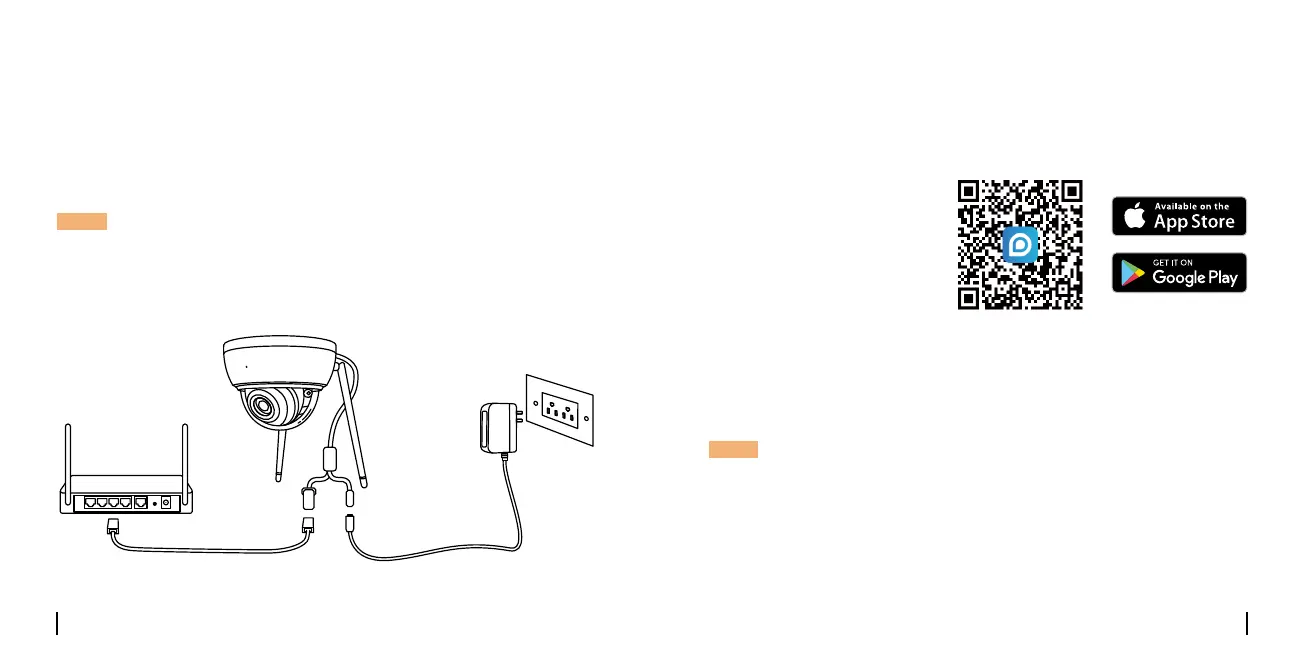
Connection Diagram
Beforeinitialsetup,followthestepsbelowtoconnectyourcamera.
1.ConnectthecameratoaLANportonyourrouterwithanEthernet
cable.
2.Usethepoweradaptertopoweronthecamera.
NOTE: The connection diagram takes the WiFi Camera as an example
andalsoapplytothePoEcamera.ForPoECamera,pleasepowerthe
camerawithaPoESwitch/Injector/ReolinkPoENVRoraDC12Vpower
adapter.(notincludedinthepackage)
Camera
Network Cable
Router
Power Cable
PowerAdapter
Set up the Camera
• On Smartphone
Scan to download
theReolinkApp.
DownloadandlaunchtheReolinkApporClientsoftware,andfollowthe
onscreeninstructionstonishinitialsetup.
NOTE:
•WhensettinguptheWiFicamera,youneedtofollowtheonscreen
instructionstonishtheWiFicongurationrst.
•IfyouareconnectingthePoEcameratoaReolinkPoENVR,pleaseset
upthecameraviatheNVRinterface.
English English
 Loading...