English English5 6
4.Follow the steps on the monitor to complete the initial setup.
NOTE: In the second step, UID is disabled by default. You’re
recommended to enable it for remote access on smartphones or
computers. Or you can set it later in “Settings > System >Info”.
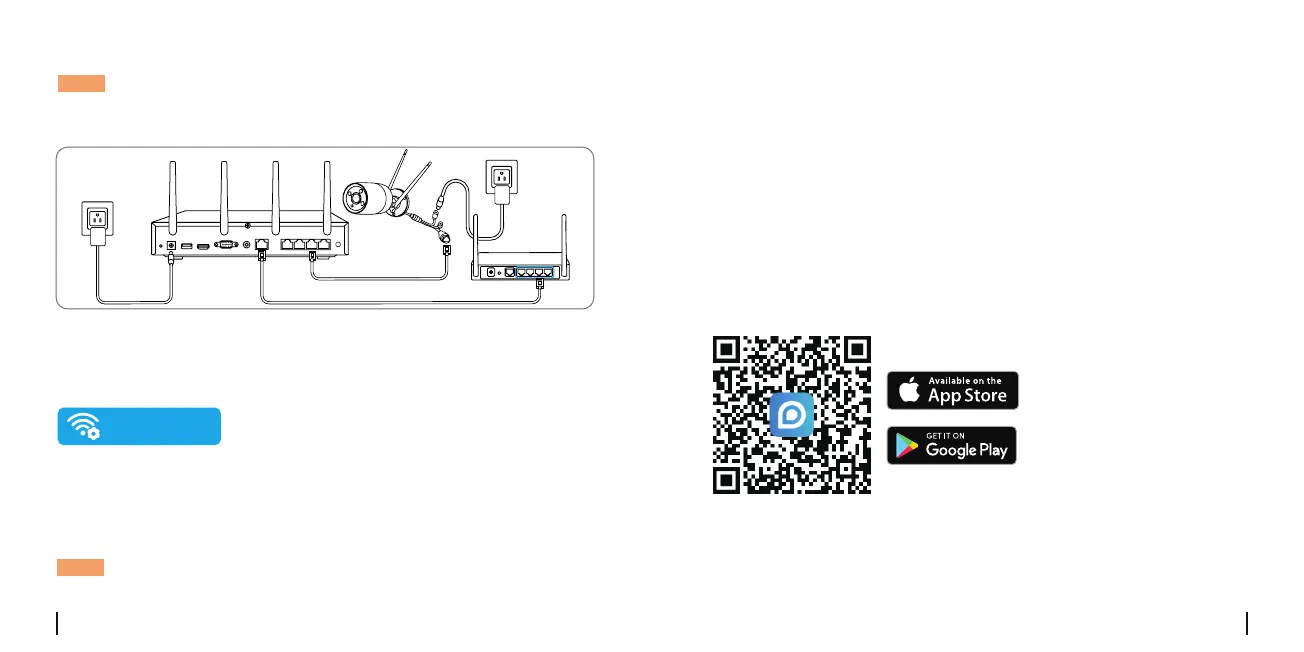
5.Power on your WiFi Cameras and connect them to the LAN ports
(for IPC) on the NVR via Ethernet cables.
6.Click Sync WiFi Info to connect the cameras to the NVR’s WiFi.
7.After the sychronization succeeded, remove the Ethernet cables
and wait for a few seconds for them to be reconnected wirelessly.
installedatthedesiredlocation.
NOTE: There are no cameras included in the package.
8.Afterthewirelessconnectionissuccessful,thecameracanbe
Sync Wi-Fi info
NVR
Router
• On Smartphone
Scan to download the Reolink App.
• On PC
Download path: Go to https://reolink.com > Support > App & Client.
1. Connect the NVR to a router using the included Ethernet cable.
2.Download and launch the Reolink App or Client and follow the
instructions to access the NVR.
Access the NVR via Smartphone or PC
 Loading...