Do you have a question about the Retevis RA19 and is the answer not in the manual?
Warning about damaged antennas causing mild burns.
Warning about conductive materials causing short circuits and burns.
How to power the device and adjust audio volume levels.
Instructions for transmitting and receiving audio signals.
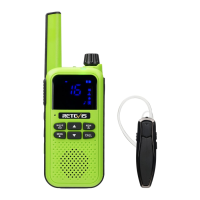
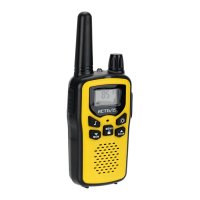
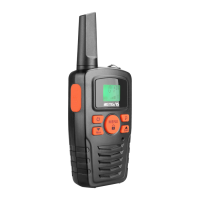
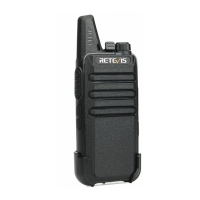
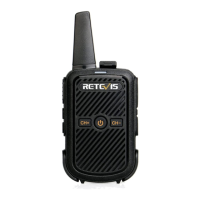
The Retevis RA19 is a Bluetooth walkie-talkie designed for reliable communication with a range of user-friendly features. This device supports 155 subcodes, allowing for minimized interference by preventing transmissions from unknown sources. Users can easily pair their walkie-talkies, and it supports Bluetooth headset intercom for hands-free communication. The RA19 includes a vibration reminder, room monitoring capabilities, and an LED flashlight for added utility. It offers 10 kinds of optional call prompt tones, providing customization for alert notifications. The walkie-talkie features a segmented LED display for clear information, and it supports USB charging for convenience. Channel monitoring and dual-channel monitoring functions are available, along with a keyboard lock to prevent accidental changes.
To operate the RA19, users first need to install the battery. The device can use a random lithium battery pack, a nickel-metal hydride rechargeable battery pack, or three AAA alkaline batteries. When the battery is low, the walkie-talkie will emit a beep, and the battery icon along with a red indicator light will flash. To install the battery, push the battery lock button backward and lift it up to remove the battery pack. Then, insert the lithium battery pack into the battery slot, press it down, and ensure it clicks into place. If using Ni-MH rechargeable batteries or AAA alkaline batteries, the battery cover should be used. The battery meter on the display shows the remaining power with 0-3 bars. When only one grid is shown, approximately 30% power remains, and a flashing battery icon indicates a low battery, requiring charging.
To turn the walkie-talkie on, rotate the knob clockwise. To turn it off, rotate the knob counterclockwise. Volume adjustment is also done by rotating the knob: clockwise to increase and counterclockwise to decrease. Users are advised not to hold the walkie-talkie close to their ears if the volume is set too high, as it may cause hearing damage.
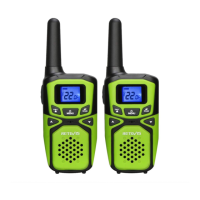
For communication, all walkie-talkies in a group must be set to the same channel and subcode. To send a message, hold the walkie-talkie 2-3 cm away from your mouth, press and hold the PTT button, and speak into the microphone. The machine indicator will light up red during transmission. To receive a call, release the PTT button, and the green light will illuminate.
Selecting a channel is straightforward. Press the MENU button until the "CH" icon is displayed and the channel number flashes. Use the UP or DOWN buttons to change the channel, with long presses allowing for quick scrolling. Press the PTT button to save and exit the menu, or press MENU to continue setting. Similarly, to select a subcode, press the MENU button until the subcode icon is displayed and the subcode number flashes. Use the UP or DOWN buttons to select the code, again with long presses for faster scrolling. Save and exit with the PTT button, or continue setting with MENU.
The squelch level can be adjusted by pressing the MENU button until the squelch icon is displayed and the level number flashes. Use the UP or DOWN buttons to select the desired level. Save and exit with the PTT button, or continue with MENU. The walkie-talkie also allows users to set a transmission call alert tone from 10 available options. Press MENU until the call alert tone icon is displayed and the code flashes. Use the UP or DOWN buttons to change and listen to the tones. Save with PTT or continue with MENU. To transmit the alert tone to other walkie-talkies, ensure they are on the same channel and subcode, then press the call alert tone button.
Voice control (VOX) sensitivity can be set by pressing MENU until the VOX icon is displayed and the sensitivity level (OFF, 01-09) flashes. Adjust the level with the UP or DOWN buttons, then save with PTT or continue with MENU. Dual channel monitoring allows the device to alternately scan the current channel and another. Press MENU until the "2CH" icon is displayed and the current setting flashes. Use UP or DOWN to change the channel for dual watch. Save with PTT or continue with MENU. Once set, the screen will alternately display the main and dual-channel monitor channels during standby.
Key tone switch settings can be accessed by pressing MENU until the key tone icon is displayed and the current setting flashes. Use UP or DOWN to toggle the tone on or off. Save with PTT or continue with MENU.
The side buttons offer additional functions. A short press of the side button switches the LED flashlight on or off. A long press switches the vibration function on or off. When vibration is active, the vibration icon is displayed, and the device vibrates for 3 seconds when a call is answered. If no operation occurs within 30 seconds after a previous call, it will trigger again when a new call comes in.
Another side button function is easy pairing. A short press enters the easy pairing state, indicated by a flashing icon. This function allows a group of walkie-talkie users to quickly program all their devices to the same channel and subcode settings. One walkie-talkie can be designated as the "leader" to transmit its settings to "member" walkie-talkies. Member walkie-talkies enter easy pairing mode by pressing the pairing button, showing a flashing icon, and waiting to receive settings. The leader walkie-talkie then presses the pairing button once, sees the icon flash, and presses it again to transmit settings. The red indicator light on the leader will turn on during transmission and off when complete.
A long press of this same side button enters the Bluetooth pairing state, indicated by a flashing Bluetooth icon. This function is for devices with Bluetooth capability. To pair, turn on the Bluetooth headset, which will prompt "turn on" and show alternating blue and red lights, entering pairing state. Once pairing is successful, the machine's blue light stops flashing, as does the headset's indicator light. Transmission can then be initiated by a short press of the button on the Bluetooth headset, and stopped by pressing it again to return to receiving mode. Note that after initial pairing, there's a 20-second wait before the first transmission.
The third side button provides an emergency alarm. A short press enters the emergency alarm state. Press PTT to exit. If it's a remote alarm, the red indicator light turns on, and the alarm sound is transmitted to the receiving group (which must be on the same channel and settings). If it's a local alarm, only the unit itself sounds the alarm. A long press of this button switches the transmission end prompt sound on or off. When on, an icon is displayed, and the walkie-talkie can transmit a unique prompt sound after transmission, signaling the end of a call (like "Roger" or "Over").
The RA19 also features a NOAA mode. A long press of the MODE button enters NOAA mode, and the NOAA icon will display. In NOAA mode, press the MENU button to enter NOAA channel selection, then use UP or DOWN to change the channel. Press the MENU button again to enter the NOAA emergency state switch setting. When this function is on, the "!" icon is displayed. If the 1050Hz audio signal is received, the machine will forcibly switch to NOAA mode and emit an alarm. Other buttons can be pressed to cancel the alarm and receive NOAA information normally. Additional features like companding and whisper mode are available through software.
For maintenance, store the battery in a place with a temperature between -20°C and 35°C and low humidity, away from moisture and corrosive materials. The micro USB charger allows for charging the lithium battery pack. Before charging, turn off the walkie-talkie. Insert the micro USB cable into the USB split charger, then insert the lithium battery or the walkie-talkie with the battery into the corresponding slot. The red light indicates charging, and the green light indicates a full charge. The micro USB cable can also be directly plugged into the walkie-talkie's USB charging port. When not in use, charge the battery every 3 months and remove it from the walkie-talkie for storage.
| Frequency Range | UHF 400-470MHz |
|---|---|
| Channel Capacity | 16 |
| Battery Capacity | 1500mAh |
| Water Resistance | IP54 |
| Operating Voltage | 3.7V DC |
| Antenna Impedance | 50Ω |
| Operating Temperature | -20°C to +60°C |
| Waterproof Rating | IP54 |
| Channel Spacing | 12.5kHz/25kHz |