EasyManua.ls Logo

Retrospec CUB - User Manual

Retrospec CUB
2 pages
Print Icon
To Next Page IconTo Next Page
Loading...
ASSEMBLY INSTRUCTIONS
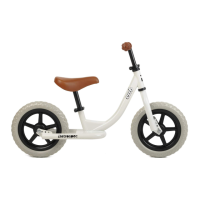
CUB BALANCE BIKE
TOOLS
1
STEP 1: UNPACKING YOUR BIKE
STEP 2: FRONT WHEEL
WARNING
• Children using this product should always be
supervised by an adult.
• Never allow this product to be ridden at night.
• For sidewalk use only! Do not ride on streets!
We supply: 1 - 10-function multi-tool.
You supply: Scissors.
Cut the shipping straps on the outside of the box.
Remove the box staples. These are sharp and can cut you as you access the bike. Lift bike out by frame and rear wheel.
Rotate the fork so that it is facing forward of the bike. Place the bike on the ground, so it’s standing upright on the fork dropouts and rear tire (Fig.1).
Cut all of the packing zip ties.
Separate the front wheel from the bike.
Examine your new bike for any visible damage that may have occurred during shipping.
1 -
2 -
3 -
4 -
5 -
6 -
1 -
2 -
3 -
Remove the plastic shipping protector(s) from the fork dropouts and plastic axle protector(s) (Fig.1).
Loosen the axle nuts on the front wheel and insert the front wheel into the fork dropouts. Insert the tab of the safety washers into the small
holes on the outside of the fork dropouts. (Fig.2).
Inspect the wheel to make sure it is centered in the fork (Fig.3). Tighten each axle nut a little at a time with a 15mm wrench, alternating
between sides, until each axle nut is properly tightened.
STEP 3: SADDLE/SEAT POST
1 -
2 -
The seat & seat post assembly will come installed from the factory. To adjust saddle height/position, use the following steps:
Pull the quick release lever attached to the top of the frame seat tube outwards. Insert the seat post/saddle assembly into the seat tube of the frame
to at least the minimum insertion line of the seat post (Fig.4). Adjust the seat to your desired height.
Once you have adjusted the seat post to your desired height, lock it in place by closing the quick release lever against the clamp (Fig.5).
The lever should begin to oer resistance at about the half way point in its travel. The lever should require some force to close. If it closes too easily
and does not hold the seat post in place, or if the eort to close the clamp is too great, adjust the clamping force by loosening or tightening the
adjusting nut on the side opposite the lever.
WARNING!
Never adjust the seat height so that the minimum insertion line at the lower end of the seat post is showing outside of the frame
(Fig.4).
2
4 5
3
Front
Question and Answer IconNeed help?

Do you have a question about the Retrospec CUB and is the answer not in the manual?

Summary

General Safety Warnings

Unpacking Your Bike

Unpacking Procedure

Instructions for safely removing and inspecting the bike from its packaging.

Front Wheel Installation

Installing the Front Wheel

Steps for correctly mounting and securing the front wheel onto the fork dropouts.

Seat Post Adjustment

Adjusting Saddle Height and Position

Guide for setting the correct saddle height and securing the seat post using the quick release.

Handlebar Assembly

Installing and Aligning Handlebars

Instructions for inserting, aligning, and securing the handlebar assembly in the fork steer tube.

Pre-Ride Check

Overview

The Retrospec Cub Balance Bike is a children's balance bike designed for sidewalk use, emphasizing safety and ease of assembly. It is intended for children and requires adult supervision during use. The bike should not be ridden at night or on streets.

Function Description:

The Cub Balance Bike is designed to help children learn balance and coordination before transitioning to a pedal bike. It features a simple design without pedals, allowing children to propel themselves with their feet and focus solely on balancing. The bike comes with a 10-function multi-tool for assembly and adjustments, and scissors are also required.

Assembly Instructions:

Step 1: Unpacking Your Bike

  1. Cut shipping straps: Begin by cutting the shipping straps on the outside of the box.
  2. Remove box staples: Carefully remove any box staples, as they can be sharp.
  3. Lift bike out: Lift the bike out of the box by its frame and rear wheel.
  4. Orient fork: Rotate the fork so it faces forward. Place the bike on the ground, ensuring it stands upright on the fork dropouts and rear tire (Fig.1).
  5. Cut zip ties: Cut all packing zip ties.
  6. Separate front wheel: Detach the front wheel from the bike.
  7. Inspect for damage: Examine the bike for any visible shipping damage.

Step 2: Front Wheel Assembly

  1. Remove protectors: Remove the plastic shipping protector(s) from the fork dropouts and any plastic axle protector(s) (Fig.1).
  2. Insert front wheel: Loosen the axle nuts on the front wheel. Insert the front wheel into the fork dropouts. Ensure the tab of the safety washers is inserted into the small holes on the outside of the fork dropouts (Fig.2).
  3. Center and tighten: Inspect the wheel to ensure it is centered in the fork (Fig.3). Tighten each axle nut gradually with a 15mm wrench, alternating between sides, until both axle nuts are properly secured.

Step 3: Saddle/Seat Post Assembly

  1. Pre-installed assembly: The seat and seat post assembly comes pre-installed from the factory.
  2. Adjust saddle height: To adjust the saddle height, pull the quick release lever attached to the top of the frame seat tube outwards. Insert the seat post/saddle assembly into the frame's seat tube, ensuring it is at least at the minimum insertion line of the seat post (Fig.4). Adjust the seat to the desired height.
  3. Lock in place: Once the seat post is at the desired height, close the quick release lever against the clamp to lock it in place (Fig.5). The lever should offer resistance about halfway through its travel and require some force to close. If it closes too easily or doesn't hold the seat post, or if it's too difficult to close, adjust the clamping force by loosening or tightening the adjusting nut on the side opposite the lever.
    • WARNING: Never adjust the seat height so that the minimum insertion line at the lower end of the seat post is visible outside of the frame (Fig.4).

Step 4: Handlebar Assembly

  1. Insert handlebar: Pull the quick release lever attached to the top of the fork steer tube outwards. Insert the handlebar assembly into the fork steer tube, ensuring it is at least at the minimum insertion line of the assembly (Fig.6). Adjust the handlebar to the desired height.
  2. Align handlebar: Ensure the front fork is facing forward (Fig.1 & 7). Align the handlebars with the centerline of the front wheel/tire and fork dropouts (Fig.7).
  3. Lock in place: Once the handlebar height and alignment are set, close the quick release lever against the clamp to lock it in place (Fig.8). You should feel reasonable resistance when closing the lever, and the handlebar assembly should not rotate easily. Test this by holding the front wheel between your legs and attempting to rotate the handlebars. The lever should offer resistance about halfway through its travel and require some force to close. If it closes too easily or doesn't hold the handlebar, or if it's too difficult to close, adjust the clamping force by loosening or tightening the adjusting nut on the side opposite the lever.
    • WARNING: Never adjust the handlebar/stem height so that the minimum insertion line at the lower end of the stem is visible outside of the fork steer tube/top of handlebar quick release clamp (Fig.7).

Before Your First Ride:

It is strongly recommended to take the bike to a professional bike shop. They can check your work and fine-tune the bike to ensure it is safe to ride.

Important Technical Specifications and Usage Features:

  • Tools included: 10-function multi-tool.
  • Required tools: Scissors.
  • Safety washers: Designed to secure the front wheel in the fork dropouts.
  • Quick release levers: Used for easy adjustment of both saddle and handlebar height.
  • Minimum insertion lines: Critical safety markers on both the seat post and handlebar stem to ensure proper and safe insertion depth into the frame and fork steer tube, respectively.
  • Adjustable clamping force: The quick release levers for both the seat post and handlebar can be adjusted by tightening or loosening a nut to achieve the correct clamping force, ensuring components are securely held without being overly difficult to close.
  • Fork orientation: The fork must be correctly oriented forward for proper steering and alignment.
  • Wheel centering: The front wheel must be properly centered in the fork for safe operation.

Maintenance Features:

  • Regular inspection: Users are advised to examine the bike for any visible damage after unpacking and presumably before each ride.
  • Professional check-up: A professional bike shop check-up is recommended before the first ride to ensure proper assembly and fine-tuning, which is a key maintenance and safety feature.
  • Adjustable components: The adjustable seat post and handlebar allow for customization as the child grows, extending the bike's usability. The quick release mechanisms facilitate these adjustments.
  • Tightening mechanisms: Axle nuts and quick release clamps are designed to be tightened securely to prevent components from shifting during use.

Retrospec CUB Specifications

General IconGeneral
BrandRetrospec
ModelCUB
CategoryBicycle
LanguageEnglish

Related product manuals