ASSEMBLY INSTRUCTIONS
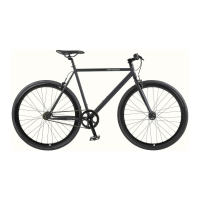
HARPER FIXIE
TOOLS
1
UNPACK YOUR BIKE
SADDLE
HANDLEBARS
WARNING
Using the bike with the minimum insertion line on the lower
portion of the seat post showing above the frame could result
in a failure of the seat post and/or the frame causing a loss of
control with potential injury to rider. Such failures are not
covered by warranty as it is improper use of the product.
WARNING
Using the bike with the minimum insertion line on the lower portion of the seat post showing above the
frame could result in a failure of the seat post and/or the frame causing a loss of control with potential
injury to rider. Such failures are not covered by warranty as it is improper use of the product.
WARNING
Installing the stem with the minimum insertion mark showing outside of the frame could create a
dangerous condition allowing the stem to break causing the rider to lose control resulting in serious
injuries to the rider (Figure 7).
What we give you: 3 Hex Wrenches (4mm, 5mm, & 6mm), a 10-function multi-tool.
What you need: Scissors, Phillips Screwdriver, 15mm wrench or crescent wrench.
Cut the shipping straps on the outside of the box.
Remove the box staples as these are sharp and can cut you as you access the bike. Lift bike out by frame and rear wheel.
Rotate the fork so that it is facing forward of the bike (Figure 1). Place the bike on the ground, so it’s standing upright on the fork dropouts and rear tire.
Cut all of the packing zip ties.
Separate the front wheel from the bike by carefully slipping it away from the crank arm, which is resting within the spokes.
Remove the accessory box and set it aside.
Ex-mine your new bike for any visible damage that may have occurred during shipping.
Special Note: For tightening all fasteners, please refer to Appendix D in the back of your owner’s manual for all fastener torque specifications.
1 -
2 -
3 -
4 -
5 -
6 -
7 -
8 -
1 -
2 -
3 -
4 -
5 -
1 -
2 -
3 -
4 -
.
Remove the plastic shipping plug from the top of the seat tube (Figure 2).
Use the included Hex wrench to loosen the seat clamp at the top of the seat tube.
RECOMMENDED; Apply a thin layer of grease to the inside of the frame seat tube.
Insert the seat with the seat post into the seat tube of the frame to at least the minimum insertion line on the shaft
of the seat post. WARNING! The minimum insertion line must NOT show above the seat tube (Figure 3).
Using the Hex wrench, tighten the seat clamp once it is at the correct height.
Note: You can make the final adjustment to the height of the seat as needed after the bike is assembled.
Loosen the stem bolt at the top of the stem one turn and remove the plastic packing cap from the bottom of the
stem (Figure 4). RECOMMENDED; apply a thin layer of grease to the end of the stem shaft by the wedge.
Untwist the handlebars and control cables and insert the quill end of the stem into the fork steer tube. You may
have to loosen the bolt and wedge a small amount to allow the quill to fit into the steer tube (Figure 5).
Make sure that the fork is facing forward and the handlebars are lined up with the fork dropouts.
Adjust the height of the stem to your desired level and tighten the stem bolt using a 6mm wrench. You can make
final adjustments to the height of the stem after the bike is assembled (Figure 6). NOTE: Be sure that the minimum
insertion mark on the shaft of the stem is inside the frame, it must not be visible outside of the frame (Figure 7).
FRONT
2
3
4 5
6
7
MIN INSERT
25.4
MAX
HT
22.2
MAX
HT
22.2
PLASTIC
SHIPPING
PLUG
PLASTIC
PACKING
CAP
APPLY GREASE
STEM QUILL
INTO FORK
STEER TUBE
STEM ADJUST
HANDLEBAR
ADJUST
MIN INSERT
25.4